
1. Introduction
This manual provides comprehensive instructions for the installation, operation, and maintenance of your LiftMaster 8500 Wall Mount Garage Door Opener. This model is designed for use with sectional garage doors up to 14 feet high and requires front mount torsion springs for compatibility. Please note that the 8500 model has been replaced by the 98022, and this manual applies to both.
The LiftMaster 8500/98022 offers a space-saving wall-mount design, ultra-quiet operation, and MyQ technology for smartphone control and monitoring. For optimal performance and safety, please read all instructions carefully before proceeding with installation or operation.
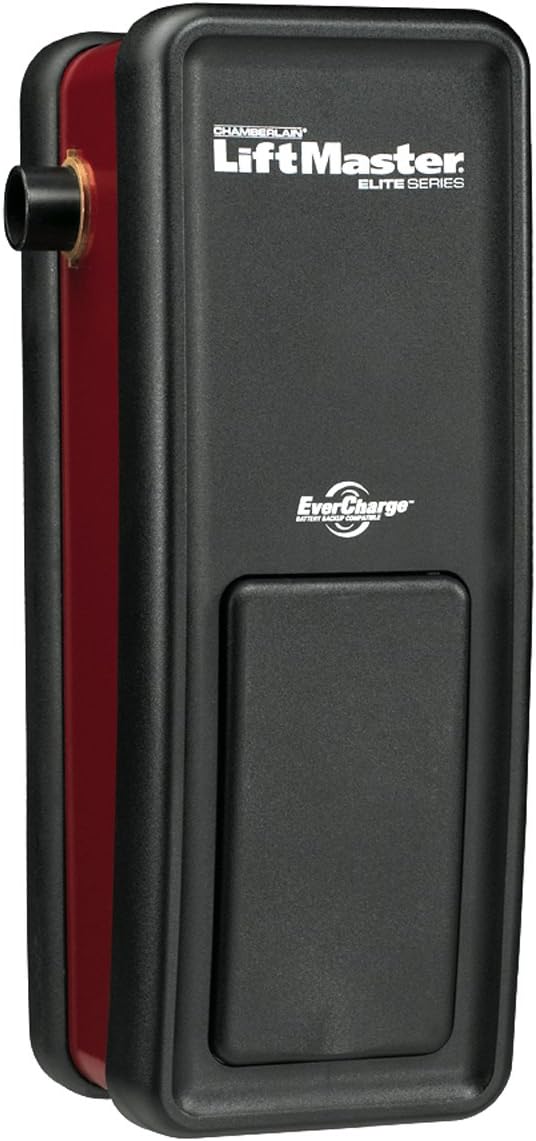
This image displays the main unit of the LiftMaster 8500 Wall Mount Garage Door Opener. It features a black casing with the 'Chamberlain LiftMaster Elite Series' logo and 'EverCharge Battery Backup Compatible' text. A red accent is visible on the side, and a shaft extends from the top left for connection to the torsion bar.
2. Safety Information
WARNING: To reduce the risk of severe injury or death, read and follow all instructions carefully.
- Ensure the garage door is balanced and in good working order before installation.
- Disconnect all electrical power to the garage door opener before performing any service or maintenance.
- Do not connect the opener to the power source until instructed.
- Install the wall control button within sight of the door, at a minimum height of 5 feet (1.5 meters) above the floor, and away from moving parts.
- Keep people and objects clear of the door opening at all times.
- Never permit children to operate or play with door controls.
- Test the safety reversal system monthly.
- This opener is designed for sectional doors only.
3. Package Contents
Your LiftMaster 8500/98022 package typically includes the following components:
- Wall Mount Garage Door Opener Unit
- Remote Light (200 watts or CFL equivalent)
- Automatic Garage Door Lock
- MyQ Control Panel
- Remote Control(s)
- Safety Reversing Sensors
- Power Cord (6 feet)
- Mounting Hardware
- Instruction Manual
Note: An optional 475LM battery backup is required for battery backup functionality and is sold separately. The 828LM MyQ Internet Gateway is required for MyQ smartphone app connectivity and is also sold separately.
4. Setup and Installation
Proper installation is crucial for the safe and efficient operation of your garage door opener. If you are unsure about any step, it is recommended to consult a qualified technician.
4.1 Pre-Installation Checks
- Verify your garage door is a sectional door and is no more than 14 feet high.
- Confirm your garage door has front mount torsion springs. This opener is not compatible with rear mount torsion springs or extension springs.
- Ensure there is adequate space on the wall next to the torsion bar for mounting the opener.
- Check for a power outlet within 6 feet of the installation area. If not available, a new outlet may need to be installed by a qualified electrician.
4.2 Mounting the Opener
- Attach the opener directly to the garage door's torsion bar. The wall-mount design eliminates the need for overhead rails.
- Secure the opener to the wall using the provided mounting hardware. Ensure it is firmly anchored to a structural stud or header.
- Connect the remote light to a suitable location in your garage.
4.3 Electrical Connection
- Plug the 6-foot power cord into a grounded electrical outlet.
- Connect the MyQ Control Panel wiring to the opener unit and mount the control panel on an interior garage wall, at least 5 feet above the floor.
- Install the safety reversing sensors according to the detailed instructions in the included manual, ensuring they are properly aligned.
4.4 MyQ Technology Setup (Optional)
To utilize MyQ smartphone control, you will need the LiftMaster 828LM MyQ Internet Gateway (sold separately).
- Connect the 828LM MyQ Internet Gateway to your home router.
- Download the MyQ mobile app from your device's app store.
- Follow the in-app instructions to create an account and link your garage door opener to the gateway. This will enable secure monitoring and control of your garage door and houselights from your smartphone, tablet, or computer.
5. Operating Instructions
5.1 Using the Remote Control
Press the designated button on your remote control to open or close the garage door. Ensure you are within range and have a clear line of sight to the door.
5.2 Using the MyQ Control Panel
Press the large button on the MyQ Control Panel to operate the garage door. The control panel also provides diagnostic information and allows for programming of remotes and other accessories.
5.3 MyQ Smartphone App
Once set up with the 828LM MyQ Internet Gateway, use the MyQ app to:
- Open and close your garage door from anywhere.
- Receive real-time alerts (email or push notifications) on your mobile device regarding the status of your garage door.
- Control connected MyQ-compatible houselights.
5.4 Battery Backup Operation (with optional 475LM battery)
In the event of a power outage, the optional 475LM battery backup will automatically engage, allowing you to operate your garage door for a limited number of cycles. The opener will indicate when it is running on battery power.
6. Maintenance
Regular maintenance ensures the longevity and safe operation of your garage door opener.
- Monthly: Test the safety reversal system. Place a 1.5-inch (3.8 cm) object on the floor in the path of the door. The door should reverse when it contacts the object. If it does not, refer to the troubleshooting section.
- Monthly: Check the safety reversing sensors. Ensure the indicator lights on both sensors are lit steadily. If not, check for obstructions or misalignment.
- Annually: Lubricate the garage door's moving parts (rollers, hinges, and bearings) with a garage door lubricant. Do not lubricate the torsion bar or the opener's internal components.
- Periodically: Inspect the garage door springs, cables, rollers, and other hardware for signs of wear or damage. Do not attempt to repair these components yourself; contact a qualified garage door service technician.
7. Troubleshooting
If your LiftMaster 8500/98022 opener is not functioning correctly, refer to the following common issues and solutions:
| Problem | Possible Cause | Solution |
|---|---|---|
| Opener does not operate from remote or wall control. | No power; remote battery dead; remote out of range; safety sensors obstructed. | Check power connection; replace remote battery; move closer to door; clear sensor path. |
| Door reverses immediately after starting to close. | Safety sensors obstructed or misaligned; force settings too high/low; door unbalanced. | Clear sensor path, realign sensors; adjust force settings (refer to full manual); check door balance. |
| Door operates but remote light does not turn on/off. | Light bulb burned out; light timer setting. | Replace bulb; adjust light timer setting on MyQ Control Panel. |
| MyQ app not connecting to opener. | Internet Gateway not connected; Wi-Fi issues; app not linked. | Check Gateway connection and internet; restart router; re-link app to Gateway. |
| Door closes partially then reverses (especially in cold weather). | Increased resistance due to cold, lack of lubrication, or unbalanced door. | Lubricate door bearings and rollers; check door balance; adjust force settings slightly (refer to full manual). |
For more detailed troubleshooting, please consult the complete installation manual or contact LiftMaster customer support.
8. Specifications
- Brand: LiftMaster
- Model Number: 8500 (Replaced by 98022)
- Manufacturer: Sentex/Chamberlain/Liftmaster
- Part Number: Liftmaster 8500 Genuine Factory Direct
- Item Weight: 32 pounds
- Product Dimensions: 24 x 10 x 12 inches
- Item Package Quantity: 1
- Color: Aluminum
- Exterior Finish: Aluminum or Stainless Steel or Zinc
- Installation Type: Screw In (Wall Mount)
- Compatibility: Sectional doors up to 14 feet high, with front mount torsion springs.
- Connectivity: MyQ technology compatible (requires 828LM MyQ Internet Gateway, sold separately).
- Power Cord: 6 feet
- Remote Light: 200 watts (or CFL equivalent) with adjustable light time delay.
- Battery Backup: Compatible (requires optional 475LM battery, sold separately).
- UPC: 612520736392
9. Warranty and Support
For information regarding the product warranty, please refer to the documentation included with your purchase or visit the official LiftMaster website. For technical support or service inquiries, please contact LiftMaster customer service directly.
LiftMaster Official Website: Visit the LiftMaster Store on Amazon