1. Introduction
This manual provides detailed instructions for the setup, operation, maintenance, and troubleshooting of your Skandika Nordland 4-Person Tunnel Tent. Please read these instructions carefully before using the tent to ensure proper assembly and safe use. The Skandika Nordland is designed as a spacious and weather-resistant family tent, offering comfort and protection in various outdoor conditions.
2. Safety Instructions
- Fire Safety: Keep all flame and heat sources away from the tent fabric. The tent is made of flammable material.
- Ventilation: Ensure adequate ventilation, especially when using cooking equipment or heaters inside the tent, to prevent carbon monoxide poisoning.
- Weather Conditions: Do not set up the tent under trees that may drop heavy branches. In strong winds, ensure all guy lines are securely anchored and poles are stable. In heavy snow, regularly clear snow from the tent roof to prevent collapse.
- Site Selection: Choose a level, dry site away from potential hazards like sharp objects, steep slopes, or flood-prone areas.
- Children: Keep children away from the tent during setup and takedown to prevent injury from poles or pegs.
- Electrical Cords: Use caution with electrical cords. Ensure they are properly insulated and routed to prevent tripping hazards or damage.
3. Package Contents
Before beginning assembly, verify that all components are present:
- Skandika Nordland 4-Person Tunnel Tent (outer tent and inner tent with sewn-in groundsheet)
- Fiberglass and Steel Pole Set
- Pegs (stakes)
- Guy Lines (reflective)
- 4 Awning Poles for doors
- Repair Kit
- Carry Bag
4. Setup Instructions
The estimated setup time for the Skandika Nordland tent is approximately 20 minutes with two people.
- Unpack and Lay Out: Remove the tent from its carry bag and lay the outer tent flat on your chosen campsite. Ensure the sewn-in groundsheet is spread out evenly.
- Assemble Poles: Connect the sections of the fiberglass and steel poles. Identify the different pole lengths and types for their respective sleeves.
- Insert Poles: Slide the assembled poles through the corresponding sleeves on the outer tent. The tent features a tunnel design, so poles will arch over the tent.
- Secure Poles: Once all poles are inserted, secure them at the base using the pins or rings provided at the tent corners.
- Raise the Tent: With the poles in place, carefully raise the tent structure.
- Peg Down the Base: Secure the four corners of the tent to the ground using pegs. Ensure the tent base is taut.
- Attach Guy Lines: Extend all reflective guy lines and peg them securely into the ground at an appropriate angle (approximately 45 degrees) to provide stability against wind. Adjust tension as needed.
- Install Inner Tent: The inner tent is pre-attached. If detached, clip or tie the inner tent to the designated loops inside the outer tent.
- Set Up Awning (Optional): Use the included awning poles to create sheltered entrances at the doors. Insert the poles into the grommets on the door flaps and secure with guy lines.

Image: The Skandika Nordland tent fully set up, demonstrating the use of the four included awning poles to create sheltered entryways. A close-up shows a weather-protected side entrance.

Image: Detailed view of tent components including durable fiberglass and steel poles, reflective guy lines for visibility and safety, and ventilation openings for air circulation.
5. Operating Instructions
5.1. Sleeping Cabin Features
The tent features a large sleeping cabin with a removable partition wall, allowing for flexible space configuration. This 'Sleeper Technology' design aims to provide a darker sleeping environment.
- Divisible Sleeping Cabin: Use the integrated partition wall to create two separate sleeping areas or remove it for one large space.
- Darkening: The sleeping cabin material is designed to reduce light penetration, promoting better sleep.
- Mosquito Nets: All entrances to the sleeping cabin are equipped with mosquito nets to keep insects out while allowing airflow.
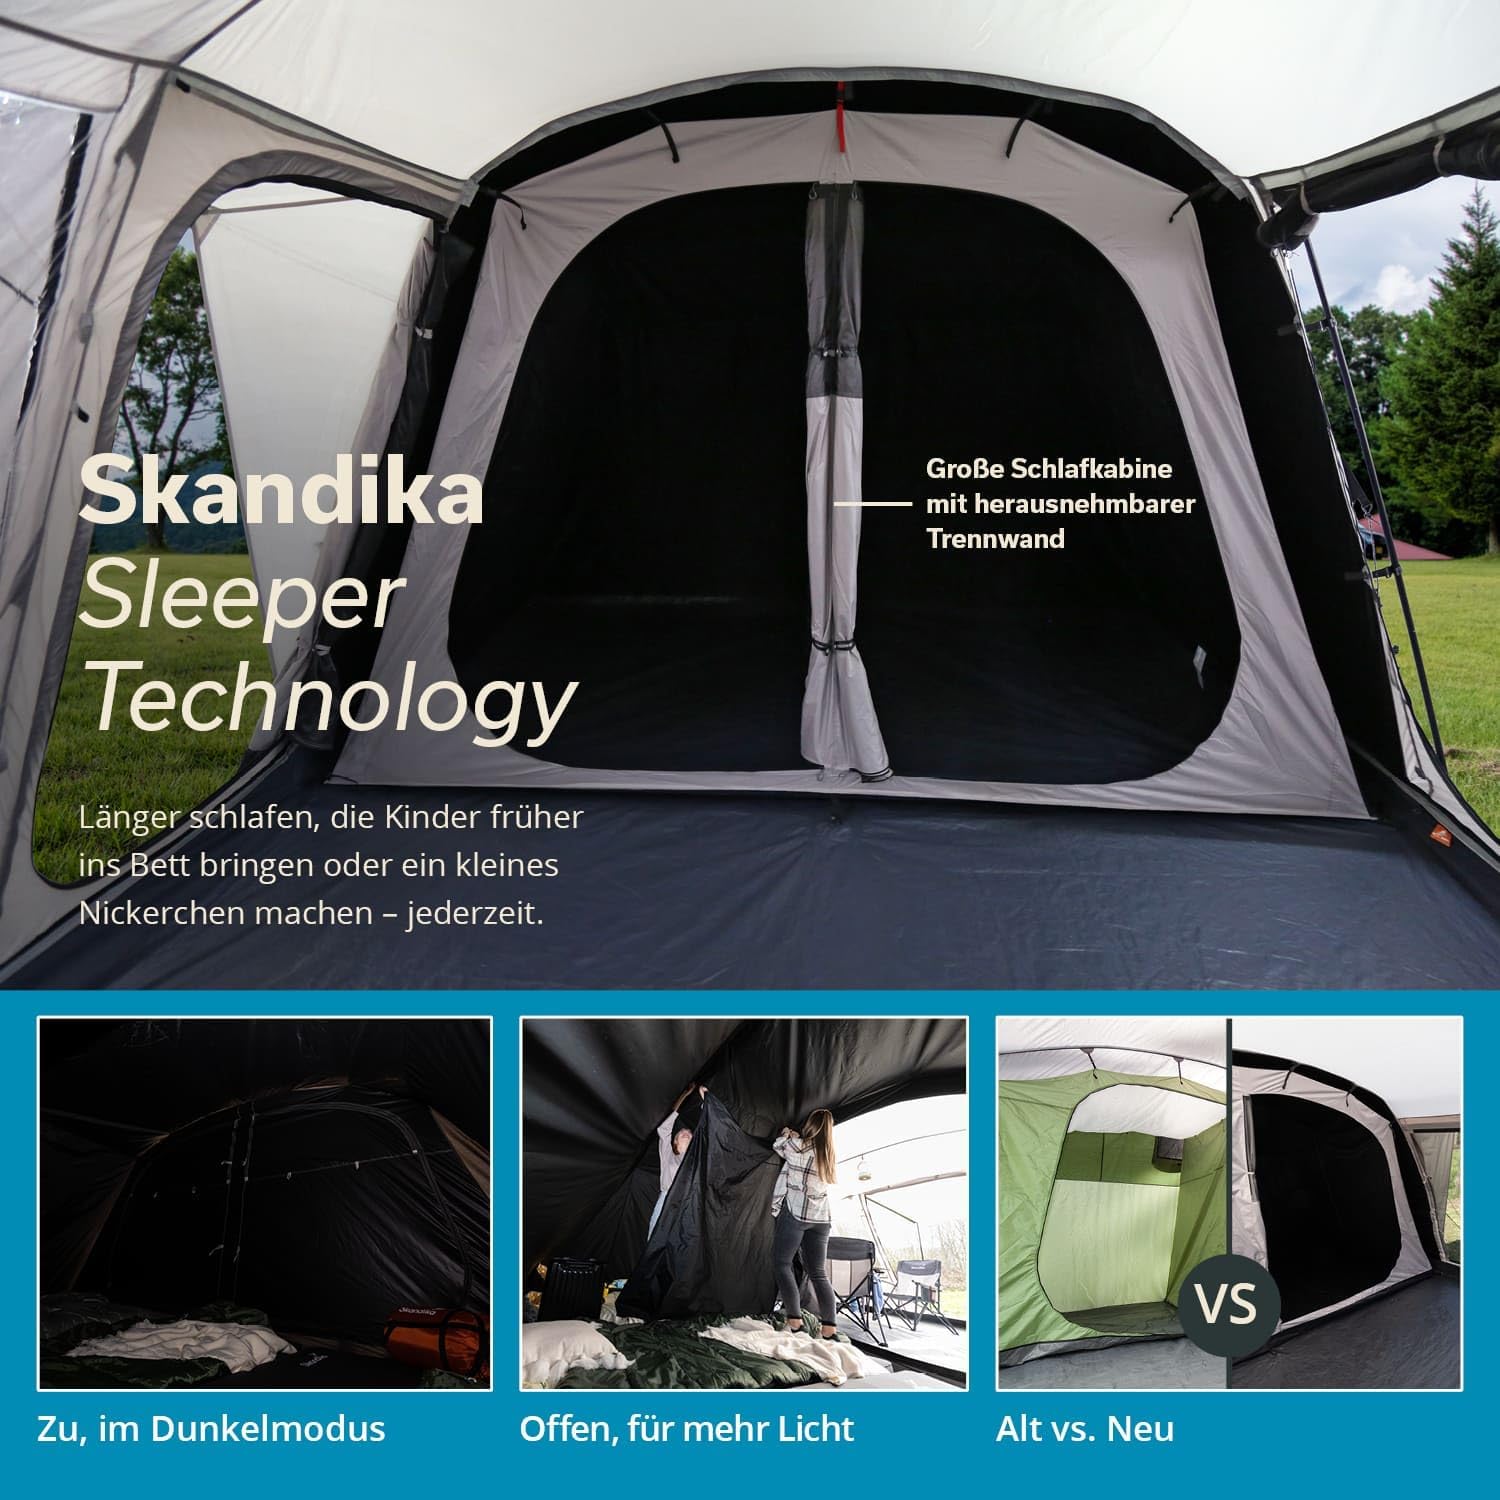
Image: The interior of the Skandika Nordland tent, highlighting the spacious sleeping cabin with its removable partition wall. Smaller images illustrate the cabin's dark mode when closed, its appearance when open for more light, and a visual comparison between an older tent design and the new Nordland Sleeper Technology.
5.2. Living Area and Ventilation
The tent offers a generous living area with panorama windows and multiple ventilation options.
- Panorama Windows: Large windows provide ample natural light and views. Each window includes a darkening cover for privacy and light control.
- Ventilation Openings: Strategically placed ventilation openings ensure continuous air circulation, reducing condensation.
- Mosquito Nets on Entrances: All three main entrances are fitted with mosquito nets, allowing you to keep doors open for airflow without inviting insects.

Image: The bright living area of the Skandika Nordland tent, showcasing its panorama windows and mosquito nets on all three entrances. Inset images detail the tent's ventilation openings, reflective guy lines, fiberglass/steel poles, and the darkening covers for windows and doors.
5.3. Convenience Features
- Cable Opening: A dedicated cable opening allows for safe and convenient routing of electrical cords into the tent.
- Hook for Camping Lamp: A hook is provided in the ceiling for hanging a camping lamp, offering overhead illumination.
- Click Fasteners: The sleeping cabin features click fasteners for easy and secure attachment.

Image: Detailed view of practical tent features, including a cable opening for electrical access, click fasteners on the sleeping cabin for secure closure, and a hook for hanging a camping lamp. The image also highlights the permanently sewn-in groundsheet.
6. Maintenance
- Cleaning: Clean the tent with a soft brush or sponge and lukewarm water. Do not use harsh detergents, bleach, or solvents, as these can damage the waterproof coating.
- Drying: Always ensure the tent is completely dry before packing it away to prevent mildew and odors. If you must pack it wet, unpack and dry it as soon as possible.
- Storage: Store the tent in a cool, dry place, away from direct sunlight and extreme temperatures.
- Pole Care: Inspect poles for damage before and after each use. Clean any dirt from pole sections and ensure elastic cords are in good condition.
- Repair Kit: Use the included repair kit for minor tears or punctures in the fabric. For larger damage, professional repair may be necessary.
7. Troubleshooting
| Problem | Possible Cause | Solution |
|---|---|---|
| Water leakage | Improper setup, damaged fabric, worn seams, extreme weather exceeding tent's rating. | Ensure tent is taut and guy lines are properly tensioned. Check for tears and use repair kit. Re-seal seams if necessary. |
| Broken poles | Excessive force during setup, strong winds, manufacturing defect. | Use the repair kit to splice broken pole sections. Contact customer service for replacement parts if needed. |
| Condensation inside tent | Lack of ventilation, high humidity, temperature difference between inside and outside. | Ensure all ventilation openings are open. If possible, open doors with mosquito nets for increased airflow. |
| Zippers sticking or difficult to close | Dirt, fabric caught in zipper, bent zipper teeth. | Clean zippers with a brush. Apply a zipper lubricant. Carefully free any caught fabric. |
8. Specifications
| Feature | Detail |
|---|---|
| Model Number | 4028 |
| Occupancy | 4 Person |
| Dimensions (Total) | 580 x 320 x 200 cm (Length x Width x Height) |
| Standing Height | 200 cm |
| Weight | 20.5 kg |
| Pack Size | 80 x 30 x 30 cm |
| Water Column (Outer Tent) | 5,000 mm |
| Material (Outer Tent) | 100% Polyester 185T, PU-coated |
| Material (Inner Tent) | 100% Polyester 185T, breathable |
| Material (Groundsheet) | 100% PE 125 g/m² (sewn-in) |
| Poles | Fiberglass and Steel |
| Features | Waterproof, taped seams, mosquito nets on all entrances and sleeping cabin, divisible sleeping cabin, cable opening, hook for camping lamp, panorama windows with darkening. |

Image: An illustrative diagram detailing the key specifications of the Skandika Nordland tent, including its overall dimensions (580 cm length, 320 cm width, 200 cm standing height), estimated setup time of 20 minutes, 4-person occupancy, pack size, total weight, and water column ratings for the outer tent and groundsheet.
9. Warranty and Support
Skandika products are designed for durability and performance. For any questions regarding your tent, spare parts, or warranty claims, please contact Skandika customer service. Support is available in multiple languages.
For further assistance, please visit the official Skandika website or contact your retailer.


