
Introduction
This manual provides essential information for the installation, maintenance, and troubleshooting of the Stens Spindle Assembly, model 285-989. This assembly is designed as a replacement for specific Hustler mower models. Please read these instructions carefully before proceeding with installation or maintenance.
Product Specifications
The Stens Spindle Assembly 285-989 is engineered to meet or exceed OEM specifications for Hustler part number 783506.
- Description: Spindle Assembly
- Height: 5 1/2 inches (approximately 5.45 inches)
- Outer Diameter (OD): 5 1/4 inches
- Replaces OEM Part Number: Hustler 783506
Compatibility: This spindle assembly is compatible with Hustler FasTrak, Mini Z, and Super Mini Z models equipped with 44-inch and 52-inch decks.

Figure 1: Approximate dimensions of the Stens Spindle Assembly 285-989. The diagram illustrates the overall height of the unit.
Product Features
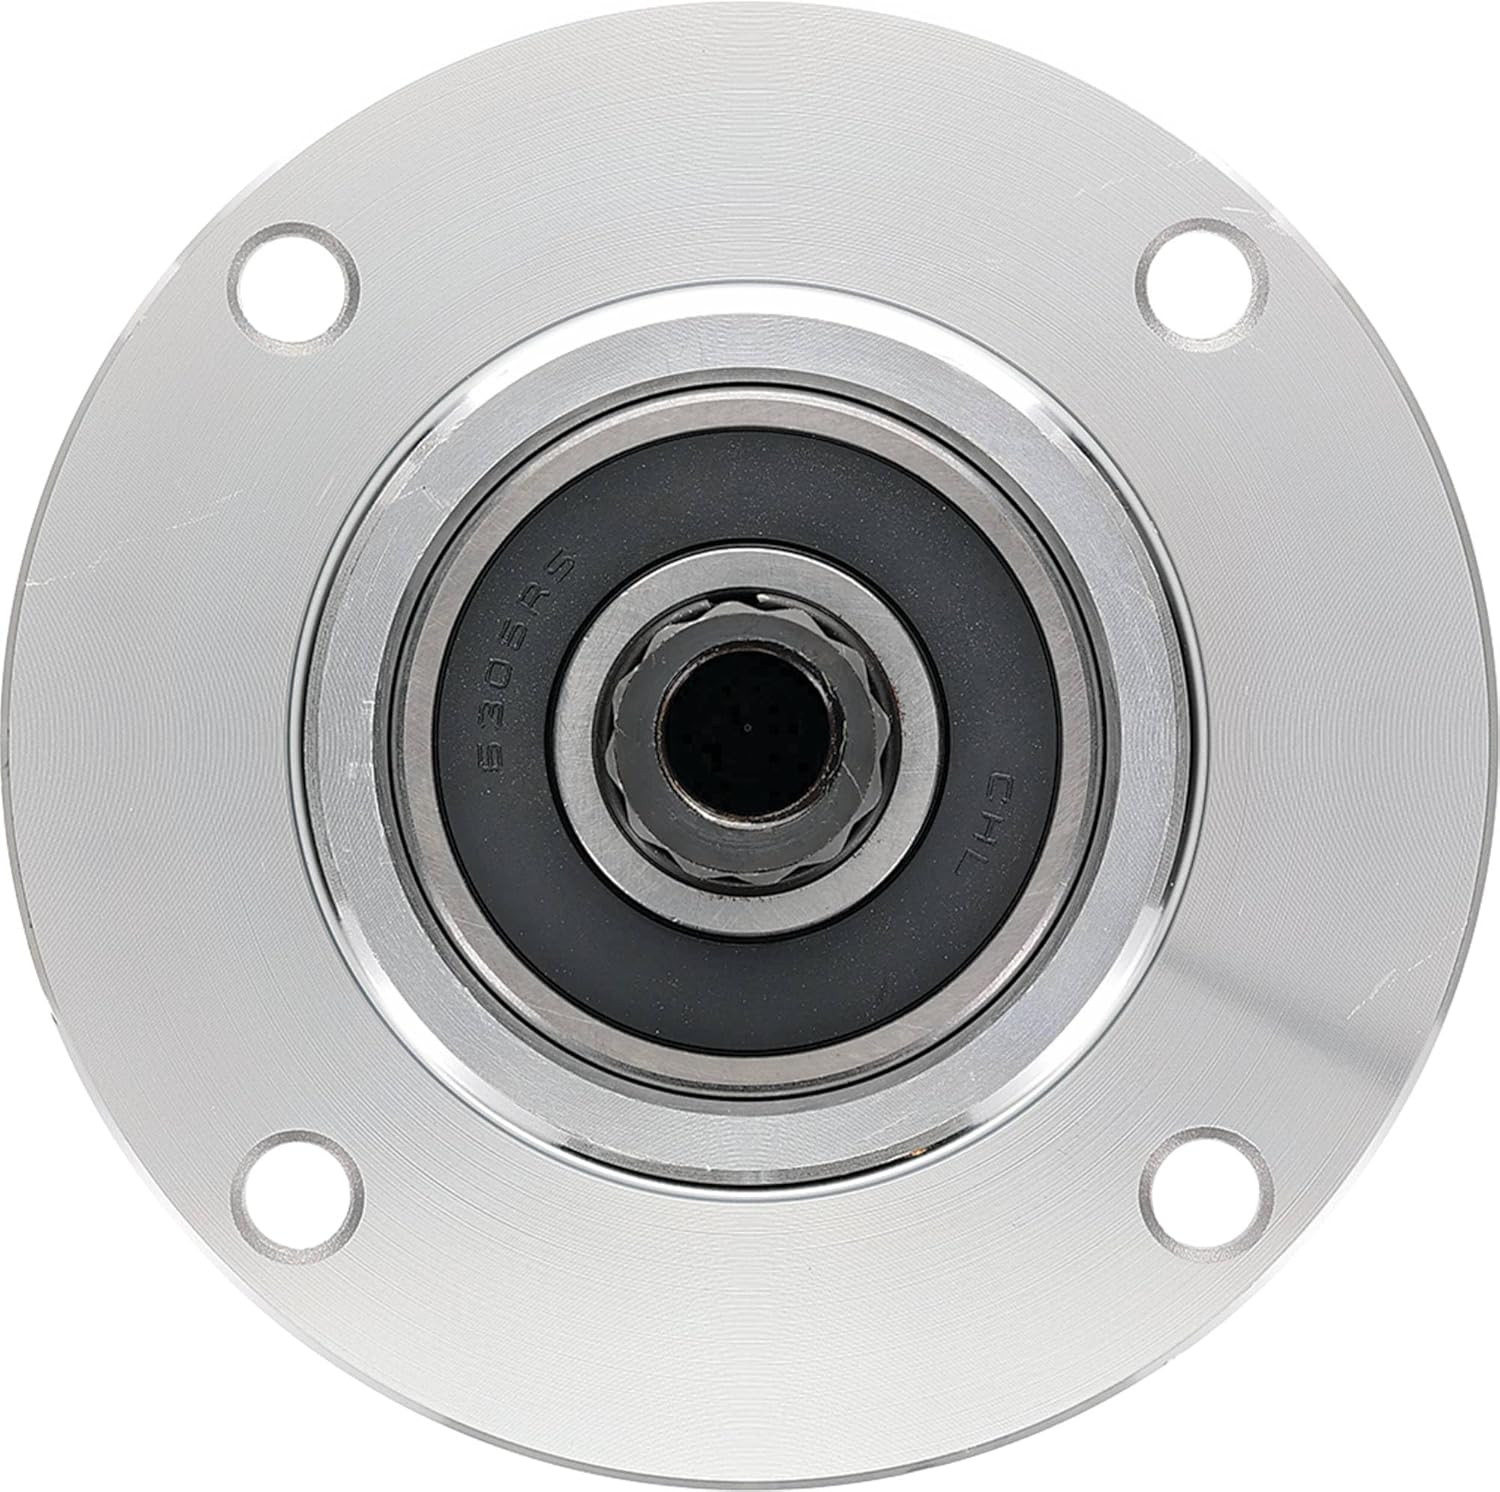
Figure 2: Detailed view of the Stens Spindle Assembly components and their characteristics.
- Lubrication: All spindles are pre-greased with high-performance grease to reduce friction and heat during operation.
- Spindle Bearings: Equipped with heavy-duty bearings to minimize friction and vibration, ensuring smooth performance.
- Spindle Shaft: Precision-machined shafts designed for optimal clearances, promoting free and true rotation.
- Spindle Housing: Typically constructed from cast-iron or cast aluminum, matching OEM quality for durability.
Pre-Installation Check: When to Replace a Spindle
Before installing a new spindle, it is important to confirm that the existing spindle requires replacement. Follow these steps to assess the condition of your current spindle:
- Remove the Belt: First, carefully remove the belt from the pulley of the spindle you are inspecting.
- Spin the Spindle: With the spindle and pulley free from obstruction, give it a spin. Observe how the spindle rotates. If it spins freely without unusual noises, the internal section is likely in working order.
- Check Housing Movement: Next, check the housing of the spindle. When turned, it should rotate smoothly and straight.
You will know the bearings are damaged if you hear a noise coming from inside the spindle. If the spindle spins from side to side, it indicates it is bent. In both of these cases, the spindle needs to be replaced.

Figure 3: Visual guide for diagnosing a faulty spindle assembly.
Installation Instructions
Safety First: Always ensure the mower engine is off, the spark plug wire is disconnected, and the parking brake is engaged before performing any maintenance or installation. Wear appropriate safety gear, including gloves and eye protection.
- Prepare the Mower Deck: Lift and secure the mower deck to access the underside. Remove any debris or grass clippings from around the spindle area.
- Remove Old Spindle:
- Carefully remove the mower blade attached to the bottom of the spindle. Note the orientation of any washers or spacers.
- Loosen and remove the bolts securing the old spindle assembly to the mower deck.
- Remove the old spindle assembly and discard it properly.
- Clean Mounting Surface: Thoroughly clean the mounting surface on the mower deck where the new spindle will be installed. Remove any rust, old gasket material, or debris to ensure a flat and secure fit.
- Install New Spindle Assembly:
- Position the new Stens Spindle Assembly 285-989 onto the cleaned mounting surface. Ensure the bolt holes align correctly.
- Insert the mounting bolts and hand-tighten them.
- Using a torque wrench, tighten the bolts to the manufacturer's specified torque settings (refer to your mower's service manual for exact values). Tighten in a star pattern to ensure even pressure.
- Reattach Mower Blade: Reinstall the mower blade onto the new spindle shaft, ensuring it is correctly oriented and secured with the appropriate washers and nuts. Tighten the blade nut to the manufacturer's specified torque.
- Reinstall Belt: Reattach the drive belt to the spindle pulley, ensuring it is properly seated and tensioned according to your mower's specifications.
- Final Check: Before starting the mower, manually rotate the blades to ensure they spin freely and do not contact any part of the deck. Verify all fasteners are tight.

Figure 4: Top view of the spindle assembly, illustrating the bolt pattern for mounting.

Figure 5: Side view of the spindle assembly, highlighting its robust construction.
Maintenance
Regular maintenance ensures the longevity and optimal performance of your spindle assembly.
- Inspection: Periodically inspect the spindle assembly for any signs of wear, damage, or excessive play. Check for unusual noises during operation.
- Cleaning: Keep the area around the spindle free of grass clippings, dirt, and debris. This prevents buildup that can lead to overheating or premature wear.
- Lubrication: While Stens spindles are pre-greased, consult your mower's service manual for recommended lubrication intervals and procedures for your specific deck type.
- Fastener Check: Regularly check that all mounting bolts and blade nuts are securely tightened to the manufacturer's specifications.
Troubleshooting Common Issues
If you experience issues with your mower deck after spindle replacement, consider the following:
- Excessive Vibration or Noise:
- Ensure the mower blade is balanced and correctly installed.
- Verify all spindle mounting bolts are tightened to specification.
- Check for any foreign objects lodged in the deck or around the spindle.
- Re-evaluate the spindle for internal bearing damage as described in the "When to Replace a Spindle" section.
- Uneven Cut:
- Confirm the mower deck is level.
- Inspect blades for sharpness and damage.
- Ensure the spindle shaft is not bent (check for side-to-side movement).
- Belt Slippage or Wear:
- Check belt tension and condition.
- Ensure the spindle pulley is clean and free of obstructions.
- Verify the spindle rotates freely without binding.
Support and Further Information
For additional support, specific torque specifications for your mower model, or to inquire about other Stens products, please refer to your mower's original service manual or visit the official Stens website. Always use genuine replacement parts to ensure compatibility and performance.
Note: International products may have separate terms and may differ from local products, including fit, age ratings, and language of product, labeling, or instructions. Verify part fits before purchasing.


