1. Introduction
This manual provides essential information for the installation, operation, and maintenance of your Western Digital 1TB 3.5" SATA HDD (Model WD10EZEX). This internal hard drive is designed for desktop PC and Mac systems, offering reliable storage and performance for various applications.

Figure 1: Top view of the Western Digital 1TB 3.5" SATA Hard Drive.
2. Safety Information
Observe the following safety guidelines to prevent damage to the drive or personal injury:
- Always handle the hard drive by its edges to avoid touching the circuit board or connectors.
- Ensure proper grounding to prevent electrostatic discharge (ESD) when handling the drive. Use an anti-static wrist strap.
- Disconnect power from your computer before installing or removing the hard drive.
- Avoid exposing the drive to extreme temperatures, humidity, or direct sunlight.
- Do not drop or subject the drive to physical shock.
3. Package Contents
Your package should contain the following item:
- Western Digital 1TB 3.5" SATA HDD (Model WD10EZEX)
Note: SATA data cables, power cables, and mounting screws are typically sold separately and are not included with this OEM drive.
4. Setup
4.1. Pre-installation Checklist
- A desktop computer with an available 3.5-inch drive bay.
- A SATA data cable.
- An available SATA power connector from your power supply.
- Mounting screws (typically M3 or 6-32 UNC).
- A Phillips head screwdriver.
- Anti-static wrist strap (recommended).
4.2. Physical Installation
- Power Off: Shut down your computer and disconnect the power cord from the wall outlet.
- Open Case: Remove the side panel(s) of your computer case to access the internal components.
- Locate Drive Bay: Identify an available 3.5-inch drive bay. Some cases may require a drive caddy.
- Mount Drive: Slide the hard drive into the drive bay or caddy. Secure it with mounting screws on both sides.
- Connect Cables:
- Connect one end of the SATA data cable to the smaller port on the hard drive and the other end to an available SATA port on your motherboard.
- Connect a SATA power cable from your power supply to the larger port on the hard drive.
- Close Case: Replace the computer case side panel(s) and reconnect the power cord.

Figure 2: Bottom view of the hard drive, showing the SATA data and power connectors.
4.3. Initial Software Setup (Windows/macOS)
After physical installation, the drive needs to be initialized and formatted by your operating system:
- Power On: Start your computer.
- Access Disk Management (Windows): Right-click on the Start button, select "Disk Management".
- Initialize Disk: Locate your new WD10EZEX drive (it may appear as "Unallocated Space"). Right-click on it and select "Initialize Disk". Choose MBR (Master Boot Record) for drives up to 2TB or GPT (GUID Partition Table) for drives larger than 2TB (though this 1TB drive can use either, GPT is more modern).
- Create New Simple Volume: Right-click on the unallocated space, select "New Simple Volume". Follow the wizard to assign a drive letter and format the drive (NTFS for Windows).
- For macOS: Open "Disk Utility", select the new drive, and use the "Erase" function to format it (e.g., APFS or Mac OS Extended).
For migrating an existing operating system to this new drive, Western Digital offers Acronis True Image Edition software for free download. This software enables you to copy all your data, including the operating system, to the new drive without reinstalling.
5. Operating the Hard Drive
Once installed and formatted, your WD10EZEX drive will function as a standard storage device. You can use it for:
- Storing documents, photos, videos, and other personal files.
- Installing applications and games.
- Creating backups of your primary drive.
The 7200 RPM rotational speed and SATA 6Gb/s interface ensure efficient data transfer and responsive performance for everyday computing tasks.
6. Maintenance
To ensure the longevity and optimal performance of your hard drive, consider the following maintenance tips:
- Regular Backups: Periodically back up important data to another storage device or cloud service.
- Disk Defragmentation (HDD only): For Windows users, run Disk Defragmenter occasionally to optimize file arrangement. SSDs do not require defragmentation.
- Monitor Health: Use disk utility software (e.g., CrystalDiskInfo, WD Drive Utilities) to monitor the drive's S.M.A.R.T. (Self-Monitoring, Analysis and Reporting Technology) status for early detection of potential issues.
- Keep Cool: Ensure adequate airflow within your computer case to prevent overheating.
- Avoid Physical Shock: Hard drives are mechanical devices; avoid moving the computer while it is operating or subjecting it to sudden impacts.
7. Troubleshooting
7.1. Drive Not Detected
- Check all SATA data and power cable connections to ensure they are secure.
- Verify that the drive is properly seated in its bay.
- Check your computer's BIOS/UEFI settings to ensure the SATA port is enabled and the drive is recognized.
- Ensure the drive has been initialized and formatted in Disk Management (Windows) or Disk Utility (macOS).
7.2. Slow Performance
- Ensure your SATA data cable is connected to a SATA 6Gb/s port on your motherboard for optimal speed.
- Check for background processes consuming disk resources.
- Run disk defragmentation (Windows) if the drive is heavily fragmented.
- Verify the drive's health using S.M.A.R.T. monitoring tools.
7.3. Unusual Noises
- Clicking, grinding, or repetitive noises can indicate a failing drive. Back up your data immediately and consider replacing the drive.
- A slight hum or whirring sound is normal for mechanical hard drives.
8. Specifications
| Feature | Description |
|---|---|
| Model Number | WD10EZEX |
| Capacity | 1 TB |
| Interface | SATA 6 Gb/s |
| Form Factor | 3.5 Inches |
| Rotational Speed | 7200 RPM |
| Cache | 64 MB |
| Dimensions (LxWxH) | 5.69 x 3.92 x 0.89 inches |
| Item Weight | 15.9 ounces |
| Hardware Platform | PC |
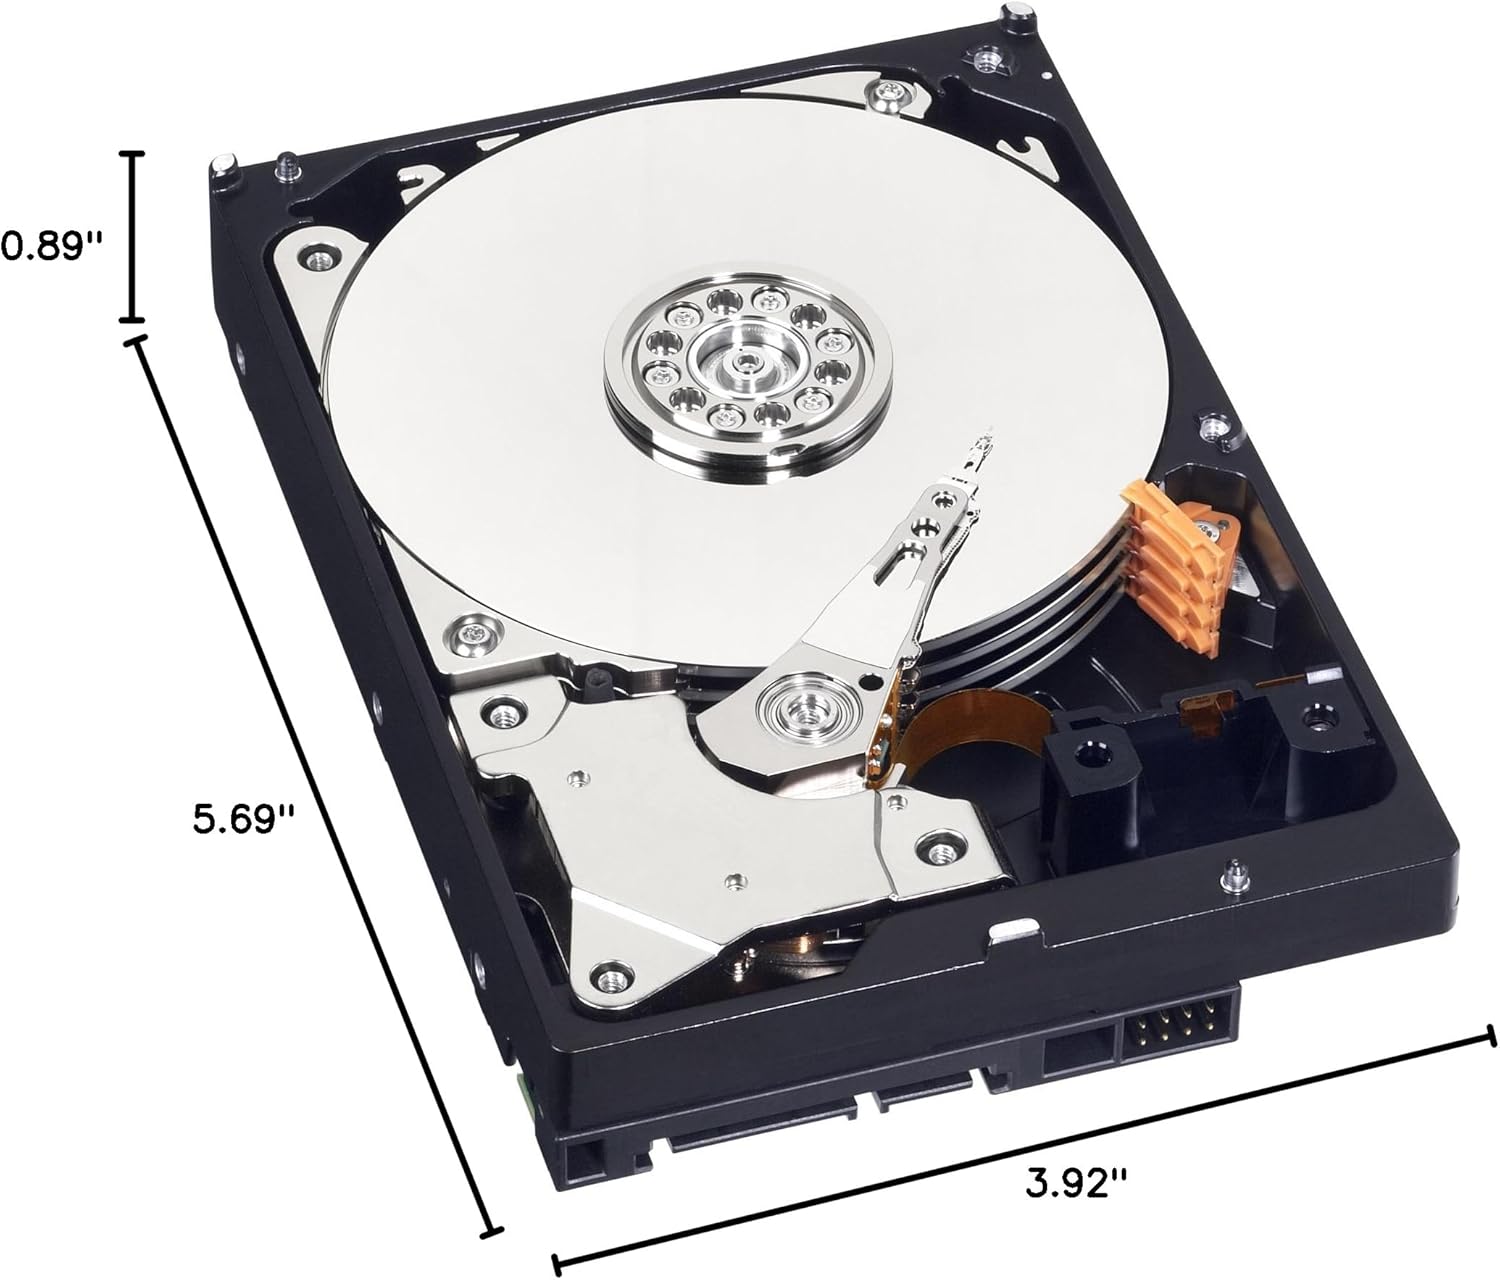
Figure 3: Dimensions of the Western Digital 1TB 3.5" SATA Hard Drive.
9. Warranty and Support
For warranty information and technical support, please refer to the official Western Digital website or contact their customer service. Keep your proof of purchase for warranty claims.