1. Introduction
This manual provides instructions for the safe and effective use of your Premier 1 Solar IntelliShock® 30 Fence Energizer. This portable, all-in-one solar energizer is designed to power electric fences and netting, offering a reliable solution for livestock containment and predator deterrence. Please read this manual thoroughly before installation and operation.

Image 1.1: The Premier 1 Solar IntelliShock® 30 Fence Energizer, a compact solar-powered unit for electric fencing.
2. Important Safety Information
WARNING: Proposition 65 Warning: This product can expose you to chemicals which are known to the State of California to cause cancer and birth defects or other reproductive harm. For more information go to www.P65Warnings.ca.gov.
- Always disconnect the energizer from the fence and ground before performing any maintenance or adjustments.
- Do not install the energizer near flammable materials or in areas with explosive gases.
- Ensure proper grounding to prevent electrical hazards and ensure effective operation.
- Keep children and unauthorized personnel away from the electric fence.
- Do not touch the electric fence with bare hands or wet clothing.
- Regularly inspect the energizer and fence for damage. Repair or replace damaged components immediately.
- Use only the specified battery and charger provided or recommended by Premier 1 Supplies.
3. Package Contents
Verify that all components are present in your package:
- 0.30 Joule Fence Energizer Unit
- 12V/15AH Sealed Lead Acid Battery (pre-installed)
- Wiring Harness
- 5 Watt Solar Panel with preset tilt angles
- 110V Battery Recharger
- U-Spike Ground Stake (combination ground rod and support stand)
- Overcharge Regulator (integrated)
- UV-treated Polycarbonate Case with yellow handle
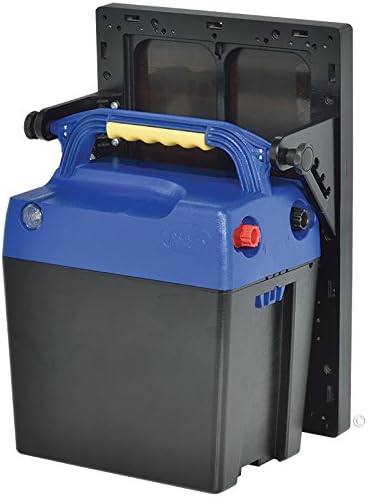
Image 3.1: Rear view of the energizer unit, highlighting the integrated carrying handle for portability.
4. Setup Instructions
4.1 Initial Charging
Before first use, fully charge the internal 12V battery using the included 110V battery recharger. Connect the recharger to the energizer's charging port and plug it into a standard wall outlet. Allow 24-48 hours for a full charge. The solar panel will maintain the charge during operation, but initial charging ensures optimal performance.
4.2 Mounting the Energizer
The IntelliShock 30 is designed for portability and can be mounted using the included U-Spike ground stake or placed on a flat surface.
- Using the U-Spike Ground Stake:

Image 4.1: The IntelliShock 30 energizer shown with the U-Spike ground stake attached, ready for insertion into the ground.
Attach the energizer to the U-Spike ground stake. Insert the stake firmly into the ground in a location that receives maximum sunlight throughout the day. Ensure the energizer is stable and upright.
- Alternative Placement:
If not using the stake, place the energizer on a stable, elevated surface to protect it from ground moisture and vegetation. Ensure the solar panel is unobstructed.
4.3 Adjusting the Solar Panel
The solar panel's angle can be adjusted to optimize sunlight exposure, especially important for seasonal changes.

Image 4.2: Detail of the solar panel adjustment knob and angle markings (e.g., 90°, 60°, 45°, 36°) on the energizer.
- Loosen the adjustment knob on the side of the solar panel.
- Tilt the panel to the desired angle. For optimal year-round performance, aim the panel towards the south (in the Northern Hemisphere) at an angle roughly equal to your latitude. Adjust seasonally for best results (steeper in winter, flatter in summer).
- Tighten the adjustment knob to secure the panel in place.
4.4 Connecting to the Fence and Ground
Ensure the energizer is OFF before making connections.
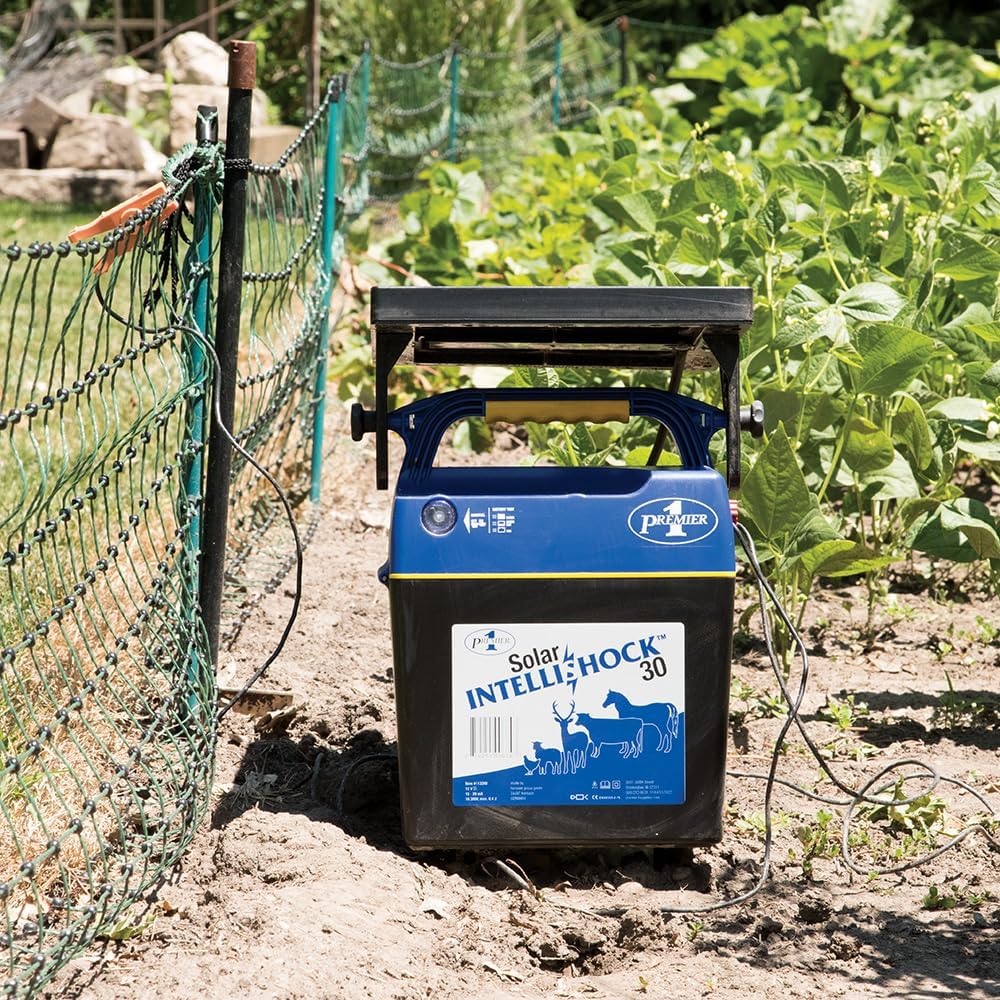
Image 4.3: The IntelliShock 30 energizer positioned next to an electric fence, with wires connected to the fence and ground terminals.
- Fence Connection: Connect the red terminal (positive) on the energizer to your electric fence line using the provided wiring harness. Ensure a secure connection.
- Ground Connection: Connect the black terminal (negative) on the energizer to a dedicated ground rod. The U-Spike ground stake can serve as your ground rod if properly inserted into moist soil. For larger or drier installations, an additional ground rod may be beneficial.
5. Operating Instructions
5.1 Powering On/Off
Once all connections are secure, switch the energizer ON. A light indicator (if present) will confirm operation. To turn off, simply switch the energizer OFF.
5.2 IntelliShock® Technology
The IntelliShock® 30 features intelligent technology that reduces energy demand when the fence's voltage is high. This occurs when fewer weeds or other obstructions are touching the fence, indicating less resistance. This feature optimizes battery life and ensures consistent fence performance by only delivering the necessary power.
5.3 Monitoring Fence Performance
Regularly check your fence line for proper voltage using a fence tester (sold separately). A consistent, strong pulse indicates correct operation. Low voltage may suggest issues with grounding, fence shorts, or insufficient sunlight for the solar panel.

Image 5.1: The IntelliShock 30 energizer effectively powering an electric netting fence, protecting poultry.

Image 5.2: The IntelliShock 30 energizer providing power to an electric fence, demonstrating its use for larger livestock like horses.
6. Maintenance
- Solar Panel Cleaning: Periodically clean the solar panel surface with a soft, damp cloth to remove dust, dirt, or debris that may reduce charging efficiency.
- Battery Care: The internal sealed lead-acid battery is designed for long life. If the energizer is stored for extended periods without sunlight, it is recommended to fully charge the battery every 3-6 months using the 110V recharger to prevent deep discharge.
- Connections: Regularly check all fence and ground connections for corrosion or looseness. Clean and tighten as necessary to ensure optimal conductivity.
- Vegetation Control: Keep vegetation clear from the fence line to prevent shorts and maintain maximum fence voltage.
- Case Inspection: Inspect the UV-treated polycarbonate case for any cracks or damage that could compromise its weather resistance.
7. Troubleshooting
| Problem | Possible Cause | Solution |
|---|---|---|
| No pulse or weak pulse from energizer |
|
|
| Energizer light not flashing |
|
|
| Solar panel appears faded or less efficient |
|
|
8. Specifications
| Feature | Detail |
|---|---|
| Model | 113200 |
| Brand | Premier 1 Supplies |
| Output Energy | 0.30 Joules |
| Power Source | Solar with 12V/15AH Sealed Lead Acid Battery |
| Solar Panel Power | 5 Watts |
| Maximum Voltage | 110 Volts (Input for recharger) |
| Material | UV-treated Polycarbonate |
| Item Weight | 14.7 pounds |
| UPC | 859251006343 |
9. Warranty and Customer Support
For warranty information, technical assistance, or to purchase replacement parts, please contact Premier 1 Supplies directly. Refer to the contact information provided with your purchase or visit their official website.
Premier 1 Supplies Contact:
- Website: www.premier1supplies.com
- Phone: (Refer to product packaging or website for current phone numbers)
When contacting support, please have your model number (113200) and purchase date available.


