1. Introduction
The STANLEY SXVC20PE is a versatile wet/dry vacuum cleaner designed for effective cleaning of dust, liquids, and solid debris. Its robust construction makes it suitable for various environments, including homes, garages, workshops, construction sites, and industrial areas. This manual provides essential information for the safe and efficient operation and maintenance of your vacuum cleaner.
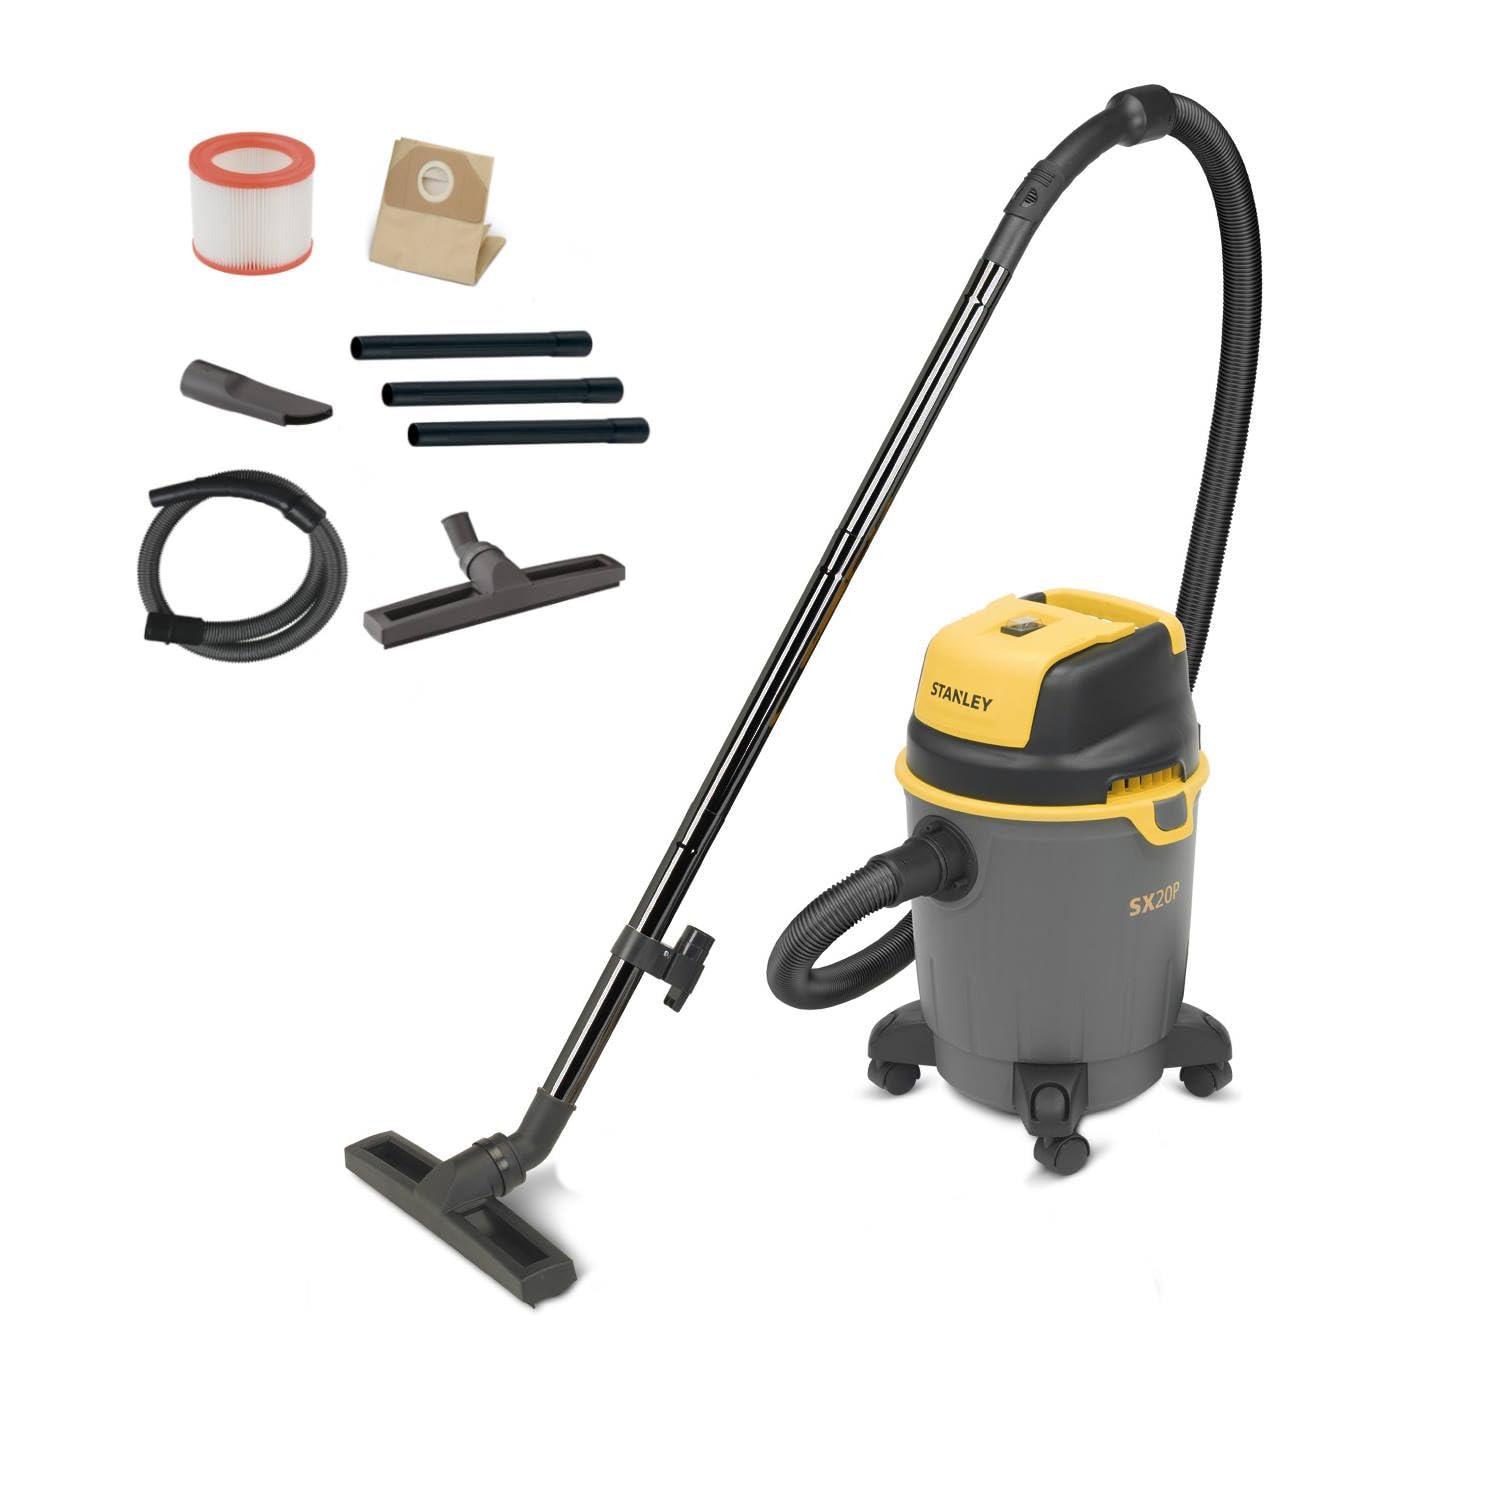
Figure 1: STANLEY SXVC20PE 20L Wet/Dry Vacuum Cleaner - Front View
Important Safety Information
Always read and understand all safety warnings and instructions before using this appliance. Failure to follow the warnings and instructions may result in electric shock, fire, and/or serious injury. Keep this manual for future reference.
- Do not leave the appliance unattended when plugged in. Unplug from outlet when not in use and before servicing.
- Do not use with damaged cord or plug. If appliance is not working as it should, has been dropped, damaged, left outdoors, or dropped into water, return it to a service center.
- Do not pull or carry by cord, use cord as a handle, close a door on cord, or pull cord around sharp edges or corners. Do not run appliance over cord. Keep cord away from heated surfaces.
- Do not unplug by pulling on cord. To unplug, grasp the plug, not the cord.
- Do not handle plug or appliance with wet hands.
- Do not put any object into openings. Do not use with any opening blocked; keep free of dust, lint, hair, and anything that may reduce air flow.
- Keep hair, loose clothing, fingers, and all parts of body away from openings and moving parts.
- Do not pick up anything that is burning or smoking, such as cigarettes, matches, or hot ashes.
- Use extra care when cleaning on stairs.
- Do not use to pick up flammable or combustible liquids, such as gasoline, or use in areas where they may be present.
- Do not use the appliance in an enclosed space where vapors are given off by oil-based paint, paint thinner, some mothproofing substances, flammable dust, or other explosive or toxic vapors.
- Do not use to pick up asbestos or asbestos-containing materials.
2. Package Contents
Verify that all items listed below are included in your package. If any parts are missing or damaged, contact customer support.
- 1 x STANLEY SXVC20PE Wet/Dry Vacuum Cleaner Unit
- 1 x Flexible and twist-resistant suction hose (2 meters length, 35mm diameter)
- 2 x Metal extension tubes (33 cm length each)
- 1 x Liquid brush / Wet nozzle
- 1 x Floor brush / Dry nozzle
- 1 x Carpet and sofa brush
- 1 x Crevice nozzle
- 1 x Washable high-efficiency cartridge filter
- 1 x Paper filter bag
- 4 x Swivel casters
- User Manual
3. Setup and Assembly
3.1 Attaching the Casters
- Carefully invert the tank of the vacuum cleaner.
- Insert each of the four swivel casters into the designated slots on the base of the tank until they click securely into place.
- Return the vacuum cleaner to its upright position.
3.2 Filter Installation
The vacuum cleaner uses a dual-filtration system. Ensure the correct filter is installed for your cleaning task.
For Dry Vacuuming:
- Remove the motor head by unlatching the side clips.
- Ensure the washable high-efficiency cartridge filter is securely installed over the filter cage.
- Place the paper filter bag inside the tank, ensuring the opening aligns with the suction inlet. This collects solid debris and prevents fine dust from spreading.
- Replace the motor head and secure the side clips.
For Wet Vacuuming:
- Remove the motor head by unlatching the side clips.
- Remove the paper filter bag if installed.
- Ensure the washable high-efficiency cartridge filter is securely installed. This filter protects the motor from liquids.
- Replace the motor head and secure the side clips.
- Important: Do not use the paper filter bag for wet vacuuming.
3.3 Connecting the Hose and Accessories
- Insert the flexible suction hose into the main suction inlet on the front of the tank until it locks into place.
- Attach the desired extension tubes and nozzle (e.g., floor brush, liquid brush, crevice nozzle) to the end of the hose.
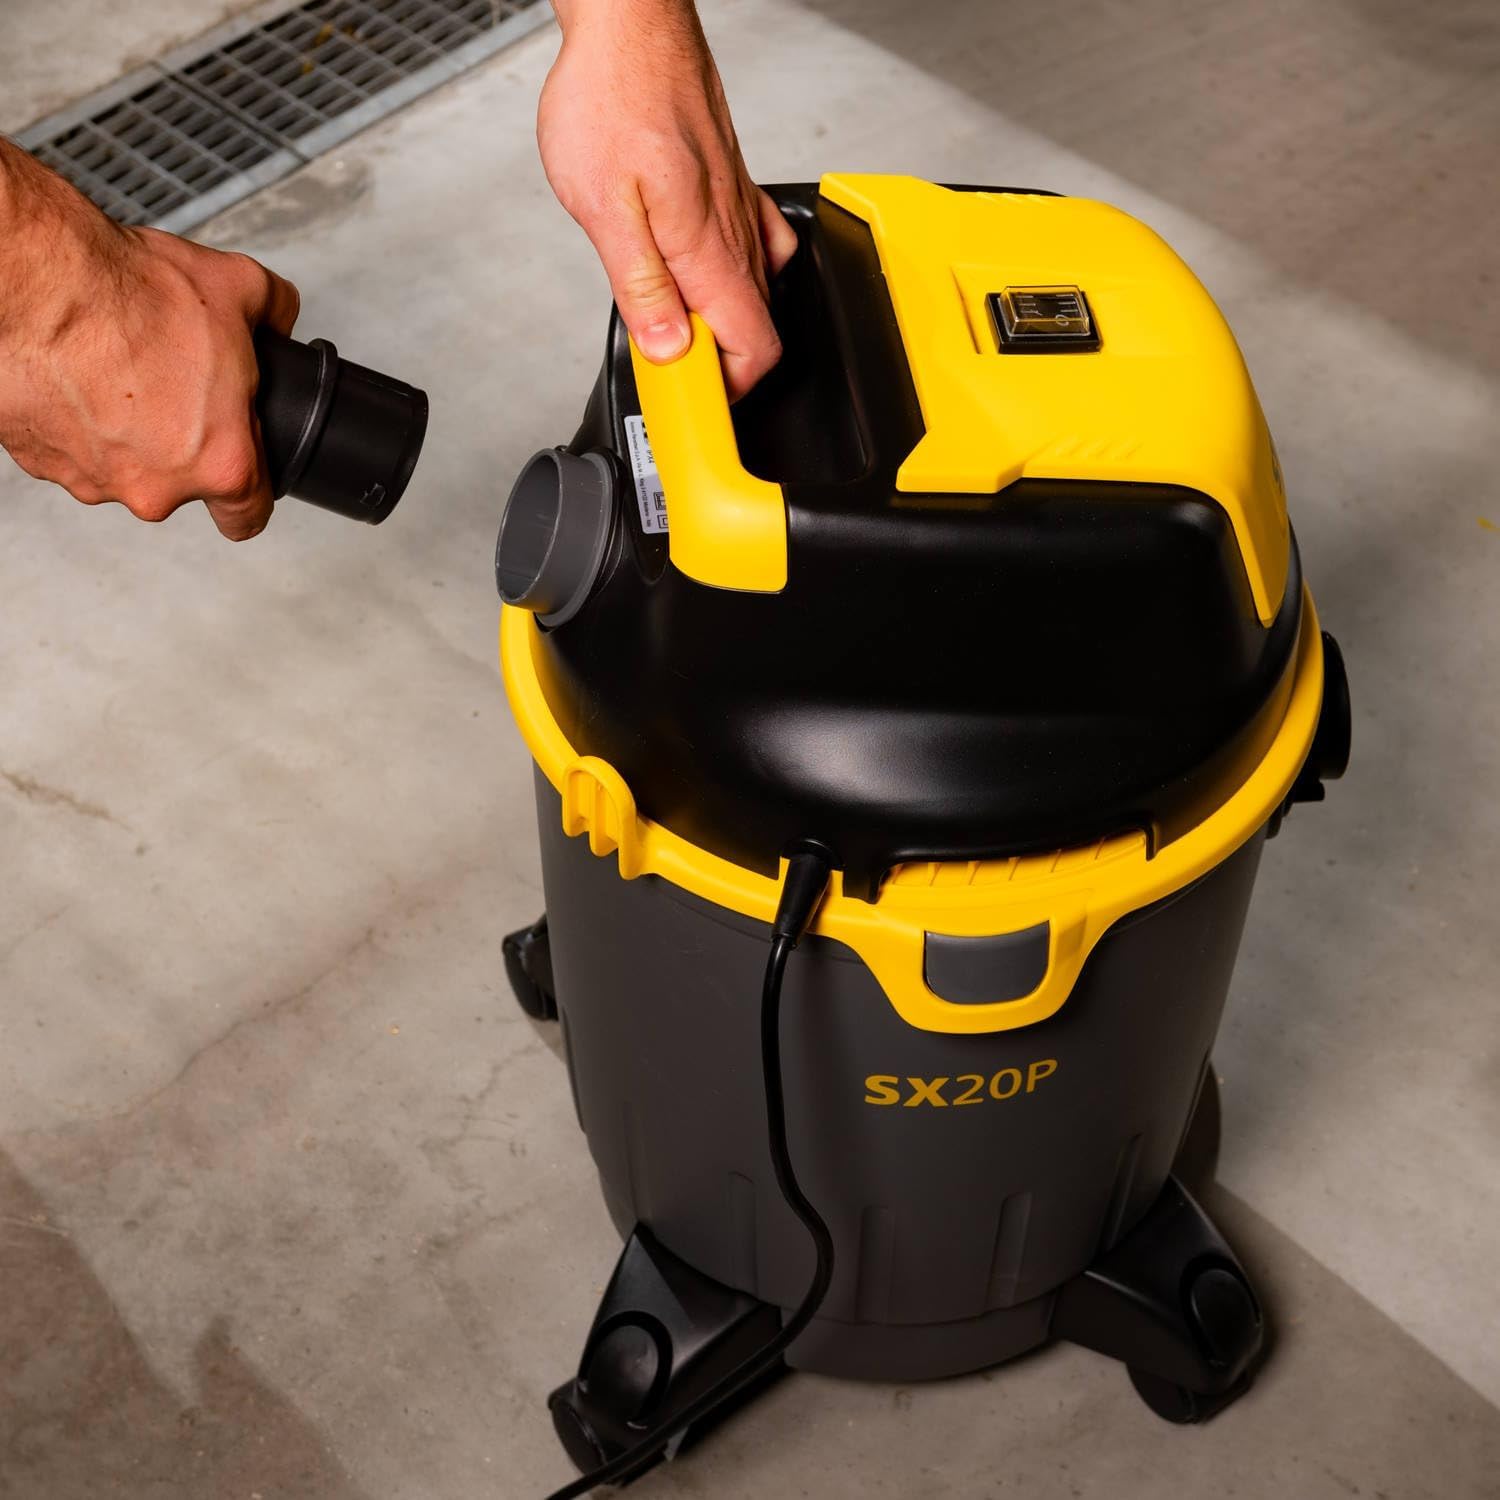
Figure 2: Connecting the hose to the suction inlet.
4. Operating Instructions
4.1 Powering On/Off
- Plug the power cord into a suitable electrical outlet (230V).
- Locate the power switch on the motor head.
- To turn on the vacuum cleaner, move the switch to the "I" (ON) position.
- To turn off the vacuum cleaner, move the switch to the "O" (OFF) position.
4.2 Dry Vacuuming
For dry vacuuming, ensure the cartridge filter and paper filter bag are correctly installed (refer to Section 3.2). Use the floor brush or crevice nozzle as appropriate for the surface.

Figure 3: Dry vacuuming solid debris.
4.3 Wet Vacuuming
For wet vacuuming, ensure the paper filter bag is removed and the cartridge filter is installed (refer to Section 3.2). Use the liquid brush for best results.
- The internal float system will automatically interrupt suction when the tank is full, indicating it needs to be emptied.
- After wet vacuuming, always clean the tank and filters thoroughly to prevent mold and odors.
4.4 Blowing Function
The SXVC20PE also features a blowing function, useful for clearing debris from hard-to-reach areas or surfaces where suction is not ideal (e.g., gravel).
- Disconnect the suction hose from the front inlet.
- Locate the blowing port on the motor head (usually opposite the suction inlet).
- Insert the flexible suction hose into the blowing port until it locks into place.
- Turn on the vacuum cleaner to activate the blowing function.
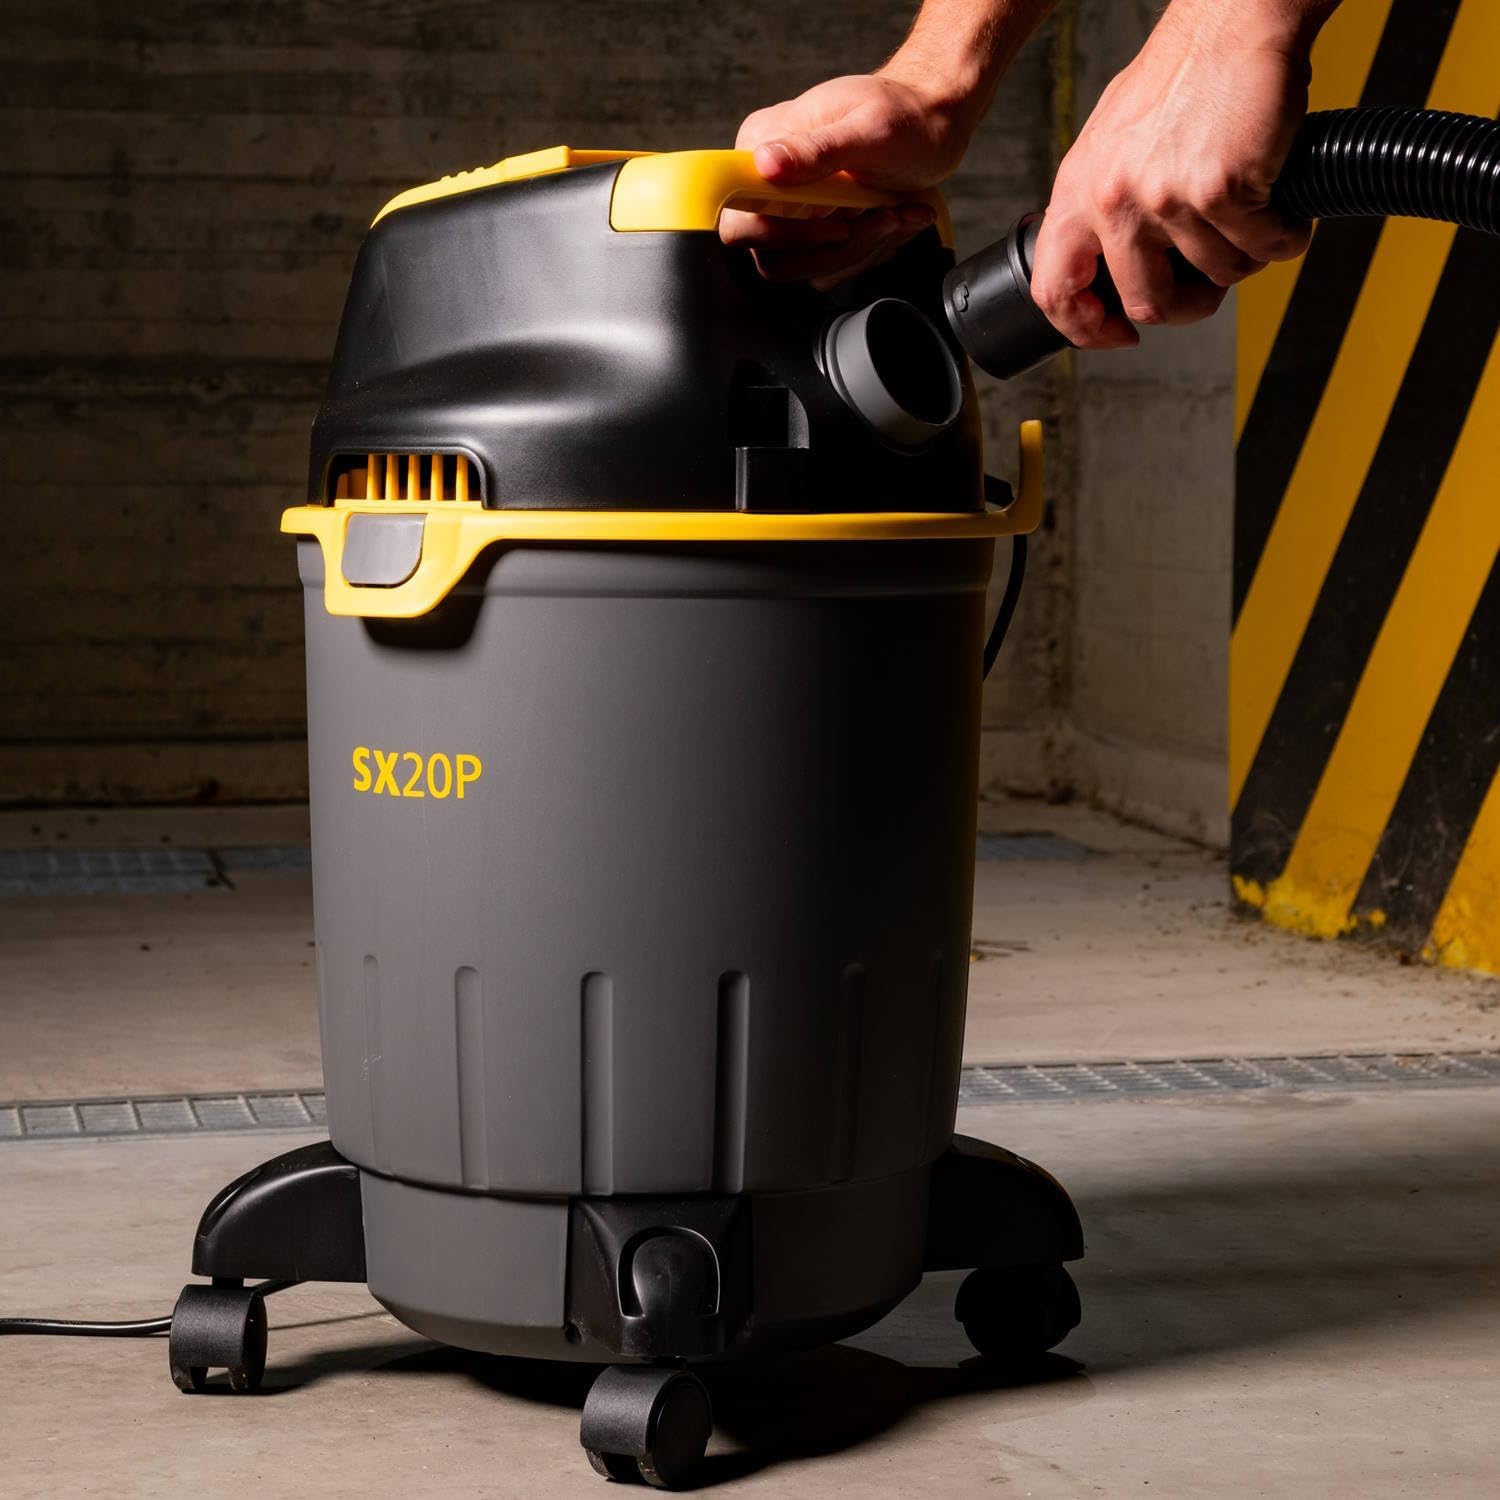
Figure 4: Connecting the hose to the blowing port.
4.5 Power Tool Socket (If Applicable)
Some models of the SXVC20PE may include an integrated power tool socket. This feature allows for synchronized operation with power tools, automatically activating the vacuum when the tool is switched on.
- Plug your power tool (e.g., circular saw) into the integrated socket on the vacuum cleaner.
- Set the vacuum cleaner's power switch to the "Auto" or "Tool Sync" position (if available).
- When you switch on the connected power tool, the vacuum cleaner will automatically start. It will typically continue to run for a few seconds after the tool is switched off to clear any remaining debris.
- To use the vacuum cleaner independently, set the switch to the "I" (ON) position.
5. Maintenance
Regular maintenance ensures optimal performance and extends the life of your vacuum cleaner. Always unplug the unit before performing any maintenance.
5.1 Emptying the Tank
- Unplug the vacuum cleaner from the power outlet.
- Unlatch the side clips and carefully remove the motor head.
- For dry debris, carefully lift out the paper filter bag and dispose of its contents.
- For liquids, carefully pour out the contents of the tank into a suitable drain.
- Clean the inside of the tank with water and a mild detergent if necessary, then dry thoroughly.
- Replace the motor head and secure the clips.
5.2 Cleaning/Replacing Filters
Cartridge Filter:
- Remove the cartridge filter from the filter cage.
- Tap the filter gently to dislodge loose dust.
- For thorough cleaning, rinse the filter under running water. Allow it to air dry completely before reinstallation. Do not use heat to dry.
- Replace the filter if it is damaged or excessively worn.
Paper Filter Bag:
- The paper filter bag is disposable and should be replaced when full or when suction performance decreases.
- Do not wash or reuse paper filter bags.
5.3 Storage
After use, store all accessories and the power cord in the designated storage compartments on the vacuum cleaner. Store the unit in a dry place, away from direct sunlight and extreme temperatures.
6. Troubleshooting
| Problem | Possible Cause | Solution |
|---|---|---|
| Vacuum cleaner does not start. | No power supply. Power switch is off. | Check power cord and outlet. Ensure power switch is in the "I" (ON) position. |
| Loss of suction. | Tank is full. Hose or nozzle is blocked. Filter is clogged. Motor head not properly sealed. | Empty the tank. Check and clear any blockages in the hose or accessories. Clean or replace the filter. Ensure side clips are securely latched. |
| Water/liquid escaping during wet vacuuming. | Tank is overfilled (float activated). Filter not correctly installed for wet use. | Empty the tank. Ensure paper filter bag is removed and cartridge filter is correctly installed. |
| Unusual noise during operation. | Blockage in hose or nozzle. Loose component. | Check for and remove any blockages. Inspect the unit for any loose parts and secure them. |
7. Specifications
| Feature | Detail |
|---|---|
| Model Number | SXVC20PE |
| Power Consumption | 1200 W |
| Voltage | 230 V |
| Tank Capacity | 20 Liters |
| Suction Power (Depression) | 170 mbar |
| Air Flow (Suction Air) | 28 l/s |
| Hose Length | 2 meters |
| Hose Diameter | 35 mm |
| Power Cord Length | 5 meters |
| Noise Level | 80 Decibels |
| Dimensions (L x W x H) | 38.1 x 41.7 x 53.9 cm |
| Weight | 4.8 kg |
| Filter Type | Cartridge filter (washable) + Paper filter bag |
| Special Features | Blowing function, Lightweight, Float system for wet vacuuming |
8. Warranty and Support
This STANLEY product is manufactured to high-quality standards and is guaranteed against manufacturing defects for a period specified by your retailer or local regulations from the date of purchase. Please retain your proof of purchase.
For warranty claims, technical support, or to purchase replacement parts, please contact your local STANLEY dealer or visit the official STANLEY website for contact information in your region. Do not attempt to repair the appliance yourself, as this may void the warranty.