Hancock 7230W-3-0219
Instruction Manual for Hancock 7230W-3-0219 Steel Socket Weld Globe Valve
Brand: Hancock | Model: 7230W-3-0219 | Part Number: D556993
Introduction
This instruction manual provides essential information for the safe and effective installation, operation, and maintenance of the Hancock 7230W-3-0219 1/2 Inch 2680 Steel Socket Weld Globe Valve. Please read this manual thoroughly before attempting any procedures to ensure proper handling and to prevent damage or injury. This valve is designed for industrial applications requiring precise flow control and shut-off capabilities.
Safety Information
Adherence to safety protocols is paramount when working with industrial valves. Failure to follow these guidelines may result in serious injury, property damage, or equipment malfunction.
- Qualified Personnel Only: Installation, maintenance, and repair should only be performed by trained and qualified personnel familiar with industrial piping systems and safety procedures.
- Personal Protective Equipment (PPE): Always wear appropriate PPE, including safety glasses, gloves, and protective clothing, when handling or working near the valve.
- Depressurize System: Before any installation, maintenance, or repair, ensure the system is completely depressurized and drained. Isolate the valve from all pressure sources.
- Temperature Considerations: Be aware of the operating temperature of the fluid. Hot fluids can cause severe burns. Allow components to cool before handling.
- Proper Lifting: The valve has a significant weight (approximately 11.75 pounds). Use proper lifting techniques or equipment to prevent injury.
- Welding Safety: As this is a socket weld valve, follow all applicable welding safety standards and procedures during installation. Ensure proper ventilation and fire prevention measures are in place.
- Material Compatibility: Verify that the valve's steel construction is compatible with the fluid and operating conditions of your system.
Product Overview
The Hancock 7230W-3-0219 is a robust 1/2 inch steel globe valve designed for socket weld connections. Globe valves are primarily used for throttling flow in a pipeline, but can also be used for shut-off. The design allows for precise regulation of flow by moving a disc closer to or further from a seat.
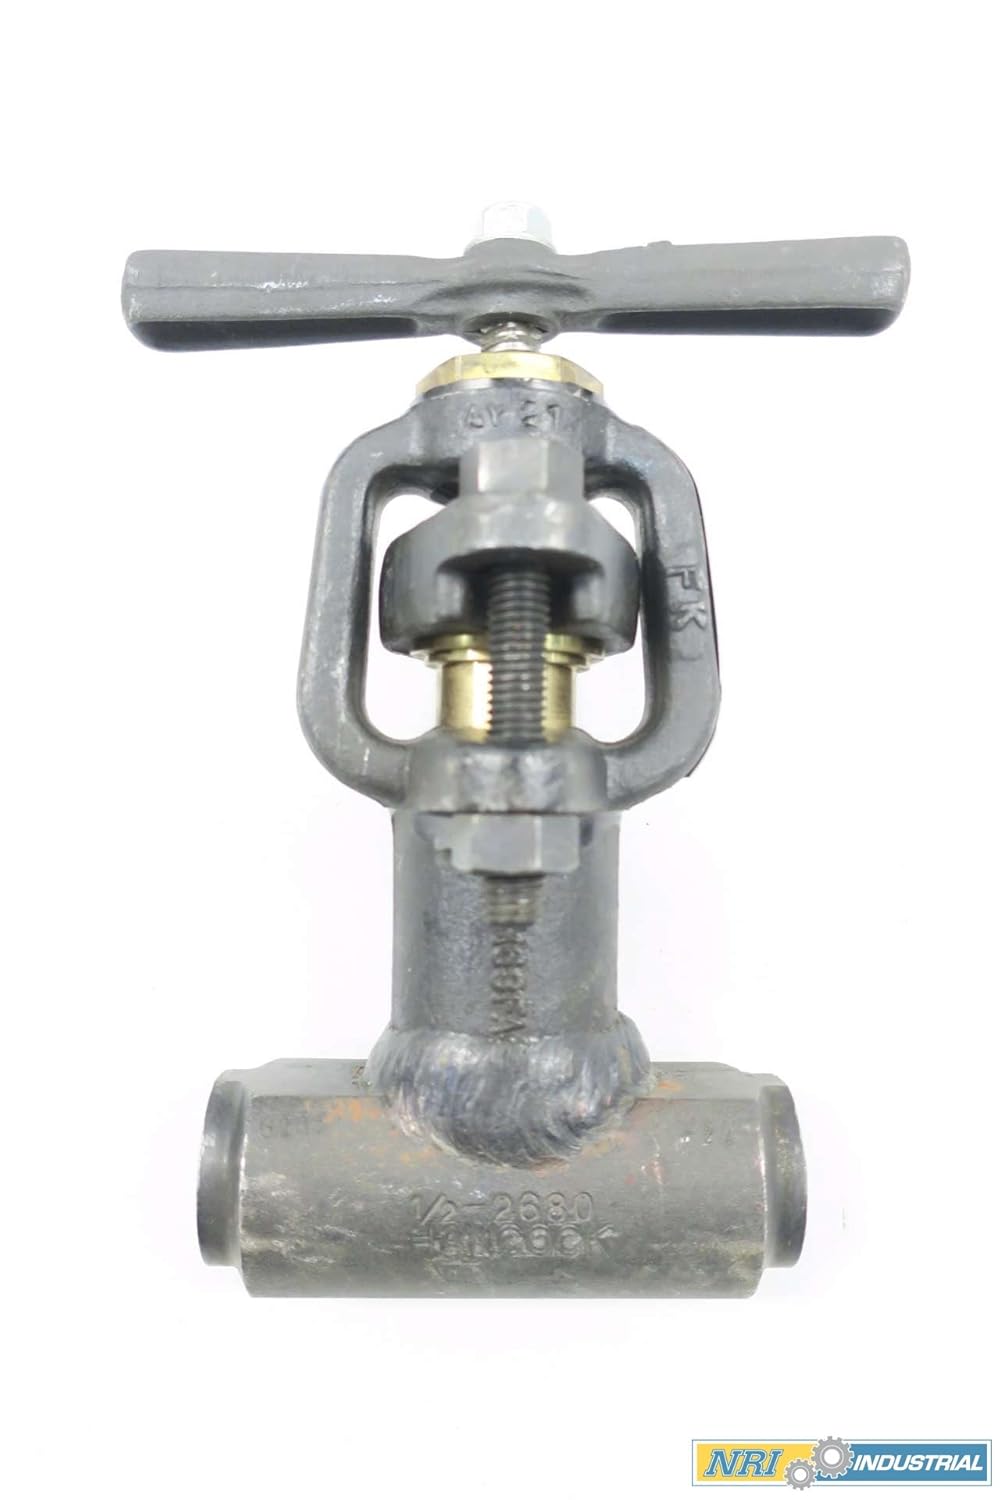
Figure 1: Front view of the Hancock 7230W-3-0219 globe valve, showing the main body, handwheel, stem, and socket weld ends. This view highlights the compact and sturdy construction of the valve.

Figure 2: Top-down perspective of the valve, illustrating the handwheel and the robust stem assembly. The handwheel is designed for manual operation to control the valve's open or closed position.
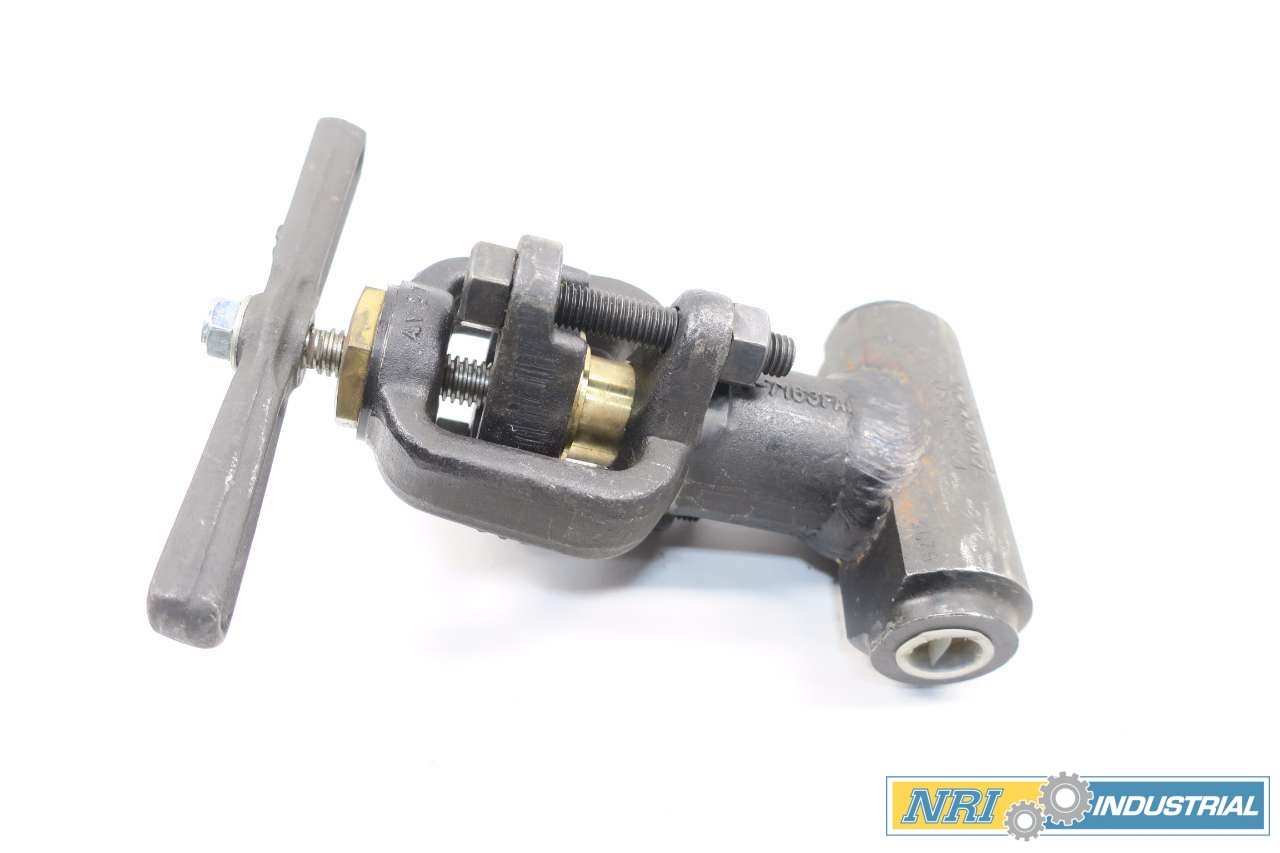
Figure 3: Side profile of the valve, clearly showing the socket weld ends for secure pipe connection. The valve body is constructed from durable steel, suitable for high-pressure applications.

Figure 4: An alternative side view, providing a different angle of the valve's construction, including the bonnet and packing gland area. This view emphasizes the valve's compact design.
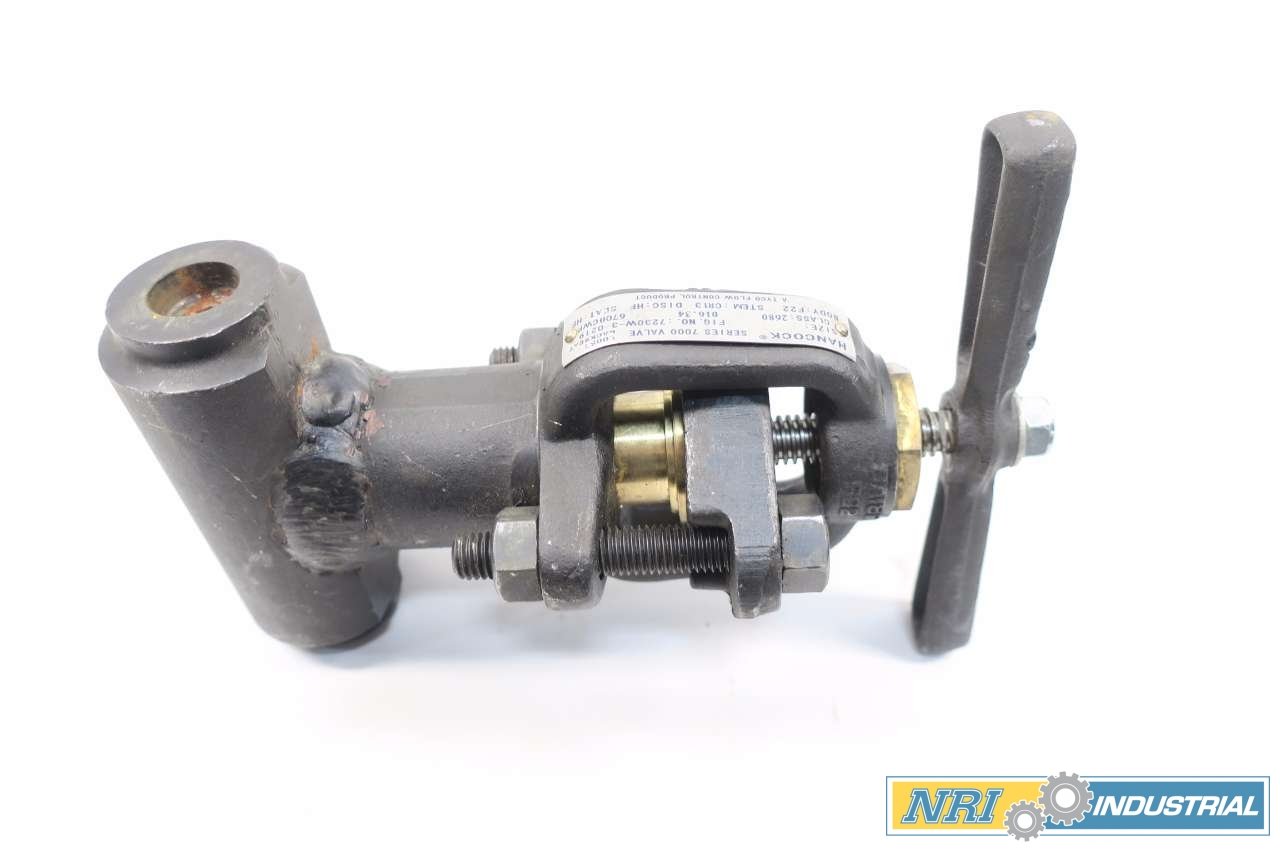
Figure 5: An angled perspective of the valve, showcasing its complete assembly from the handwheel to the socket weld ends. This view helps in understanding the valve's orientation and footprint.

Figure 6: Detailed view of the valve's identification tag, which includes critical information such as the model number (7230W-3-0219), size (1/2"), class (2680), and material specifications (Body: F22, Stem: CR13, Disc: HF, Seat: 6700W). This tag is essential for product identification and compliance.

Figure 7: Product barcode label, displaying the full product description: "HANCOCK 7230W-3-0219 1/2 IN 2680 STEEL SOCKET WELD GLOBE VALVE" and the D556993 identifier. This label is typically found on packaging for inventory and tracking purposes.
Setup and Installation
Proper installation is crucial for the long-term performance and safety of the valve. It is recommended that installation be performed by certified welders and pipefitters.
Pre-Installation Checks:
- Inspect the valve for any signs of damage during shipping or handling. Do not install a damaged valve.
- Verify that the valve's specifications (size, pressure rating, material) match the system requirements.
- Ensure the piping system is clean and free of debris that could damage the valve's internal components.
- Confirm that the flow direction in the pipeline matches the arrow (if present) on the valve body. Globe valves are typically installed so that the flow enters below the disc for better throttling control and to prevent pressure buildup above the disc when closed.
Socket Weld Installation Steps:
- Prepare Pipe Ends: Clean the outer surface of the pipe ends and the inner surface of the valve's socket ends thoroughly to remove any grease, oil, or rust.
- Fit-Up: Insert the pipe into the valve's socket. Ensure a small gap (typically 1/16 to 1/8 inch or 1.5 to 3 mm) is left between the end of the pipe and the bottom of the socket. This gap allows for thermal expansion and prevents stress on the weld.
- Alignment: Align the valve correctly within the pipeline, ensuring it is plumb and level. Support the valve and piping adequately to prevent strain on the weld joints.
- Welding: Perform the socket weld according to applicable welding codes and standards (e.g., ASME B31.1, B31.3). Use appropriate welding procedures, filler materials, and pre/post-weld heat treatment as required by the material and service conditions.
- Inspection: After welding, visually inspect the welds for defects. Non-destructive testing (NDT) such as radiography or ultrasonic testing may be required depending on the application and code requirements.
- Pressure Testing: Once the installation is complete and welds have cooled, perform a hydrostatic or pneumatic pressure test of the system as per design specifications to check for leaks.
Operating Instructions
The Hancock globe valve is operated manually using the handwheel. Its design allows for precise control over fluid flow.
- Opening the Valve: Turn the handwheel counter-clockwise to raise the stem and lift the disc from the seat, allowing fluid to flow. Continue turning until the desired flow rate is achieved or the valve is fully open.
- Closing the Valve: Turn the handwheel clockwise to lower the stem and seat the disc, restricting or stopping fluid flow. Do not overtighten the handwheel when closing, as this can damage the disc or seat. Close firmly to achieve a tight shut-off.
- Throttling: Globe valves are excellent for throttling applications. Adjust the handwheel gradually to achieve the desired flow rate. Avoid operating the valve in a partially open position for extended periods if severe vibration or cavitation occurs, as this can lead to accelerated wear.
Maintenance
Regular maintenance ensures the longevity and reliable operation of your Hancock globe valve.
Routine Checks:
- Leak Detection: Periodically inspect the valve body, bonnet, and stem packing for any signs of leakage. Small leaks from the stem packing may be resolved by tightening the packing gland nuts slightly.
- Operation Check: Cycle the valve periodically (if not in continuous use) to ensure smooth operation and prevent seizing of internal components.
- Visual Inspection: Check for external corrosion, damage to the handwheel, or any loose fasteners.
Packing Gland Adjustment/Replacement:
If stem leakage persists after tightening the packing gland nuts, the packing may need to be replaced. This procedure should only be performed with the system depressurized and drained.
- Depressurize and drain the line.
- Loosen the packing gland nuts and remove the old packing material.
- Clean the packing box and stem thoroughly.
- Install new packing rings, ensuring they are properly seated and staggered.
- Tighten the packing gland nuts evenly until a snug fit is achieved, then back off slightly to allow for stem movement.
- Re-pressurize the system and check for leaks. Adjust packing nuts further if necessary, but avoid overtightening.
Disassembly and Repair:
For internal repairs such as disc or seat replacement, the valve must be removed from the line. This is a complex procedure that requires specialized tools and expertise. It is recommended to consult with a qualified valve technician or the manufacturer for such repairs.
Troubleshooting
This section addresses common issues encountered with globe valves.
| Problem | Possible Cause | Solution |
|---|---|---|
| Leakage from stem packing | Loose packing gland nuts, worn packing, damaged stem. | Tighten packing gland nuts evenly. If leakage persists, replace packing. Inspect stem for damage. |
| Leakage from valve seat (valve not fully closing) | Debris on seat, worn disc or seat, stem bent or damaged. | Flush the line to remove debris. If problem persists, valve may require disassembly for disc/seat repair or replacement by a qualified technician. |
| Difficulty operating handwheel (stiff or seized) | Stem corrosion, dry packing, bent stem, internal damage. | Lubricate stem (if applicable). Loosen packing gland nuts slightly (if too tight). If severe, valve may need disassembly and repair. |
| Excessive noise or vibration during operation | Cavitation, excessive flow velocity, improper installation. | Adjust flow rate. Review system design for proper sizing. Ensure valve is installed correctly. |
Specifications
Key technical specifications for the Hancock 7230W-3-0219 1/2 Inch 2680 Steel Socket Weld Globe Valve:
| Specification | Value |
|---|---|
| Model Number | 7230W-3-0219 |
| Part Number | D556993 |
| Size | 1/2 Inch |
| Material | Steel (Body: F22, Stem: CR13, Disc: HF, Seat: 6700W) |
| Connection Type | Socket Weld |
| Class Rating | 2680 |
| Product Dimensions (L x W x H) | 11.5 x 7 x 6 inches |
| Item Weight | 11.75 pounds |
| Manufacturer | HANCOCK |
| Date First Available | March 30, 2017 |
Warranty and Support
For specific warranty information regarding your Hancock 7230W-3-0219 valve, please refer to the documentation provided at the time of purchase or contact Hancock directly. Warranty terms typically cover manufacturing defects under normal operating conditions.
For technical support, spare parts, or service inquiries, please contact the manufacturer or your authorized distributor. When contacting support, please have your valve's model number (7230W-3-0219) and part number (D556993) readily available.
Ask a question about this manual
Ask about setup, troubleshooting, compatibility, parts, safety, or missing instructions. Manuals+ will review the question and use this page’s manual context to help answer it.