Introduction
This manual provides detailed instructions for the installation, operation, and maintenance of your Nilight ZH001 20-inch 126W Spot Flood Combo LED Off-Road Light Bar and accompanying 18W LED Pods. Please read this manual thoroughly before installation and use to ensure proper function and safety.
Package Contents
- 1 x 126W Combo LED Light Bar (20-inch)
- 2 x 18W Flood LED Light Pods (4-inch)
- 1 x 16AWG Wiring Harness Kit (2-Lead)
- Mounting Brackets and Hardware

Image: Complete package contents including the 20-inch light bar, two 4-inch LED pods, and the wiring harness kit.
Product Features
- High Brightness: Utilizes advanced LED chips and clear PC lenses for a powerful and bright light beam, enhancing visibility in dark conditions.
- Perfect Combo Beam: The 126W light bar offers an excellent visual effect with a spot beam for long-distance illumination and a flood beam for a broad view area.
- Adjustable Mounting Bracket: The light bar's mounting bracket allows for adjustment up to approximately 45 degrees, facilitating easier direction changes of the light beam.
- Superior Quality Wires: The included wiring harness features good electrical conductivity, high temperature and melting resistance, and outstanding bending performance.
- Durable Construction: Made with aluminum housing and polycarbonate (PC) lens, designed for durability and waterproof performance.
Specifications
| Attribute | Value |
|---|---|
| Model | ZH001 |
| Light Source Type | LED |
| Material | Aluminum (Housing), Polycarbonate (PC) (Shade) |
| Finish Type | Aluminium |
| Voltage | 12 Volts |
| Brightness | 1260 Lumen (for 126W light bar) |
| Light Source Wattage | 126 Watts (light bar), 18 Watts (pods) |
| Color Temperature | 6500 Kelvin |
| Mounting Type | Bracket Mount |
| Special Features | Waterproof, Adjustable beam patterns (Spot Flood Combo) |
| Item Weight | 6 Pounds |
| Product Dimensions | 20"L x 4"W x 8"H (Light Bar) |
Dimensions

Image: Detailed dimensions for the 20-inch LED light bar, showing length, height, and bracket measurements.

Image: Detailed dimensions for the 4-inch LED light pods, showing width, height, and bracket measurements.
Setup and Installation
Proper installation is crucial for the performance and longevity of your Nilight LED lights. It is recommended to have basic automotive electrical knowledge or seek professional assistance if unsure.
Wiring Diagram Overview

Image: General wiring diagram for connecting the light bar and pods to the included harness, relay, fuse, and switch.
Detailed Wiring Steps
- Mounting the Lights: Securely attach the 20-inch light bar and two 4-inch LED pods to your desired location using the provided mounting brackets and hardware. Ensure the mounting surface is stable and can support the weight of the lights. The adjustable brackets allow for precise aiming.
- Connecting the Lights to the Harness: Connect the light bar and LED pods to the corresponding connectors on the 16AWG wiring harness. Ensure all connections are secure.
- Connecting the Wiring Harness to Power:
- Connect the positive (+) wire from the harness to the positive terminal of your vehicle's battery. The harness includes an in-line blade fuse for circuit protection.
- Connect the negative (-) wire from the harness to the negative terminal of your vehicle's battery or a suitable chassis ground point.
- The harness includes a relay (JD1912 12V 40A) to manage the power flow to the lights, protecting your vehicle's electrical system.
- Installing the Switch: Install the included switch in a convenient location within your vehicle's cabin. The switch connects to the wiring harness to control the lights. Ensure the switch is properly wired according to the diagram.
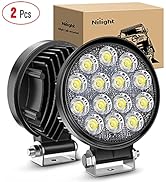
Image: The in-line blade fuse provides essential circuit protection for the light system.
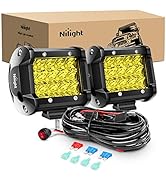
Image: The automotive relay, model JD1912 12V 40A, is integrated into the wiring harness to ensure stable power delivery.
Installation Video Guide
Video: A detailed guide on how to install a Nilight light bar on a Jeep, demonstrating wiring and mounting procedures. This video is provided by Nilight.
Operating Instructions
Once installed, operating your Nilight LED lights is straightforward:
- Power On/Off: Use the installed toggle switch to turn the LED light bar and pods on or off.
- Beam Pattern: The 20-inch light bar features a spot-flood combo beam pattern, providing both focused long-distance light and wide area illumination. The 4-inch pods are flood beam for broad coverage.
- Adjusting Beam Direction: Loosen the bolts on the adjustable mounting brackets to change the angle of the light bar and pods. Tighten the bolts securely once the desired angle is achieved.
Demonstration Videos
Video: Demonstration of Nilight 18W light bars illuminating a forest path at night, showcasing their effectiveness for off-road driving. This video is provided by Nilight.
Video: Testing the light output of a Nilight LED 18W bar, highlighting its brightness and beam pattern. This video is provided by Nilight.
Maintenance
- Cleaning: Regularly clean the lenses of the light bar and pods with a soft cloth and mild soap solution to maintain optimal light output. Avoid abrasive cleaners.
- Connection Check: Periodically inspect all electrical connections for tightness and corrosion. Ensure the wiring harness is free from damage.
- Waterproof Integrity: The lights are designed to be waterproof. However, avoid directing high-pressure water jets directly at the seals for extended periods.
- Heat Dissipation: The aluminum housing is designed for efficient heat dissipation. Ensure the fins are not obstructed to prevent overheating.

Image: Illustration of the heat dissipation design with cooling fins on the light bar housing.

Image: Close-up view of the waterproof seal, highlighting the product's resistance to water ingress.
Troubleshooting
| Problem | Possible Cause | Solution |
|---|---|---|
| Lights do not turn on. | Loose wiring connection, blown fuse, faulty switch, insufficient power. | Check all connections (positive, negative, switch). Inspect the in-line fuse and replace if blown. Test the switch for functionality. Ensure battery voltage is adequate. |
| Lights are dim or flickering. | Poor electrical connection, low voltage, damaged wiring. | Verify all connections are tight and free of corrosion. Check battery voltage. Inspect wiring for any cuts or damage. |
| Moisture inside the lens. | Compromised seal, extreme temperature changes. | Ensure all screws on the light housing are tightened. If moisture persists, contact support. Small amounts of condensation due to temperature changes may dissipate naturally. |
Warranty and Support
Your Nilight ZH001 LED Light Bar kit comes with a 2-year warranty. For any warranty claims, technical support, or questions regarding your product, please contact Nilight customer service through their official channels. Keep your purchase receipt as proof of purchase.
For more information and support, visit the official Nilight Store: Nilight Store on Amazon


