
Introduction
This manual provides detailed instructions for the setup, operation, and maintenance of your Pro-Ject Essential III George Harrison Special Edition Turntable. Please read all instructions carefully before use to ensure proper function and longevity of your device. Keep this manual for future reference.

Figure 1: Pro-Ject Essential III George Harrison Turntable.
Key Features:
- Limited edition design featuring George Harrison artwork.
- Pre-mounted Ortofon OM10 cartridge for high-quality sound.
- Precision 8.6-inch aluminum tonearm.
- Includes Acryl-It E acrylic platter for enhanced audio performance.
- High precision DC speed control.
- Attached 1.23m semi-balanced audio cable with RCA connectors.
Included Components
Verify that all the following components are present in the packaging:
- Pro-Ject Essential III George Harrison Turntable
- Ortofon OM10 Phono Cartridge (pre-mounted)
- 15 V DC Universal Power Supply
- Hinged Acrylic Dust Cover
- Connect It E Audio Cable (semi-balanced RCA)
- 7-inch 45 RPM Adaptor
- Felt Mat
- Counterweight
- Anti-skating Weight
- Drive Belt
- Allen Key
- Instruction Manual
Setup Instructions
Follow these steps to correctly set up your turntable. It is recommended to perform the setup on a stable, level surface in a clean environment.
1. Unpacking
- Carefully open the packaging. Retain all packaging materials for potential future transport or service.
- Remove the accessories bag and felt mat from the top of the box.
- Remove the dust cover carton.
- Lift the wrapped turntable out of the box.

Figure 2: Turntable components after initial unpacking.
2. Tonearm and Cartridge Setup
- Carefully pull out the platter protection.
- Remove the stylus guard from the cartridge.
- Remove the tonearm twist tie.
- Place the counterweight onto the rear of the tonearm.
- Balance the tonearm so it stays level by turning the counterweight.
- Turn the front scale of the counterweight to "0" without moving the weight itself.
- Turn the whole counterweight counter-clockwise until the scale reads 15 (for 1.5g tracking force, recommended for Ortofon OM10).
- Put the loop of the anti-skating weight in the second groove on the tonearm post.
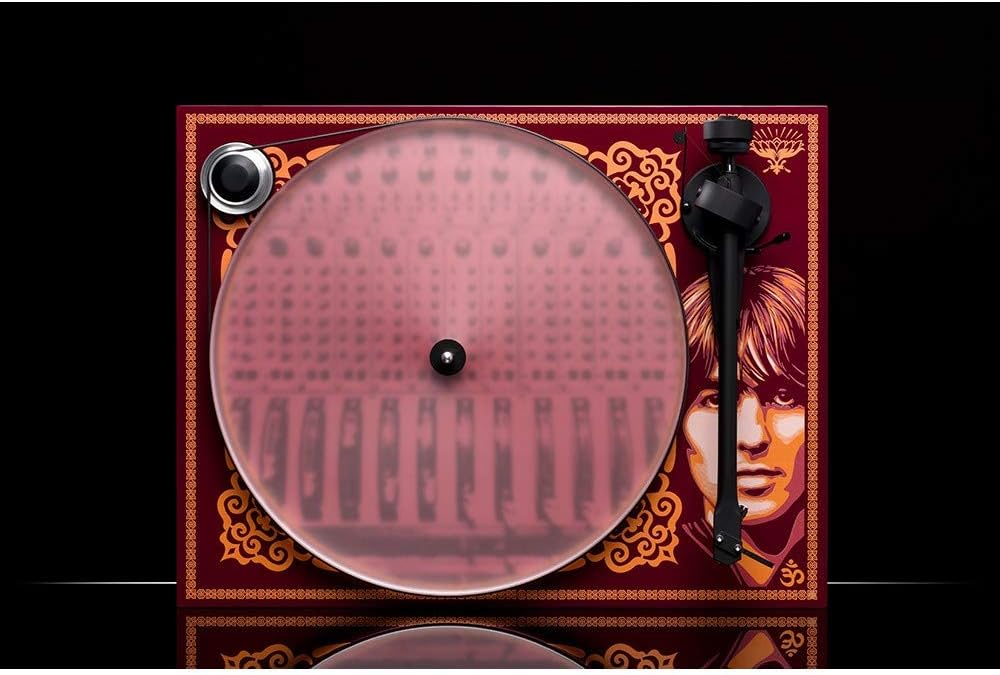
Figure 3: Tonearm with counterweight and anti-skating mechanism.
3. Platter and Belt Installation
- Place the drive belt around the motor pulley and the sub-platter.
- Unpack the felt mat and place it on the acrylic platter.
4. Connections
- Unpack the power supply, attach the appropriate plug, and connect it to the turntable.
- Connect the included RCA audio cable from the turntable to your phono preamplifier or amplifier's phono input. Ensure the ground wire is also connected.
5. Dust Cover Installation
- Unpack the dust cover and carefully place it onto the turntable hinges.

Figure 4: Turntable with dust cover installed.
Setup Video Guide:
Video 1: Pro-Ject Essential III George Harrison Unboxing & Setup. This video provides a visual guide to the unpacking and initial setup of your turntable.
Operating Instructions
Power On/Off
To power on the turntable, press the power button located on the plinth. Press it again to power off.
Speed Selection
The turntable supports 33 1/3 RPM and 45 RPM playback. To change speed, manually move the drive belt to the appropriate groove on the motor pulley. For 7-inch singles, use the included 45 RPM adaptor.
Playing a Record
- Place a record on the platter.
- Ensure the correct speed is selected.
- Carefully lift the tonearm using the tonearm lift lever.
- Position the tonearm over the desired starting groove of the record.
- Gently lower the tonearm using the lift lever. The stylus will descend onto the record and playback will begin.
Stopping Playback
- At the end of a record, or to stop playback, lift the tonearm using the tonearm lift lever.
- Return the tonearm to its rest and secure it with the tonearm clip.
- Power off the turntable if not in use.
Maintenance
Cleaning the Stylus
Regularly clean the stylus using a soft brush designed for stylus cleaning. Brush gently from back to front. Avoid touching the stylus with your fingers.
Cleaning the Platter and Plinth
Use a soft, lint-free cloth to wipe the acrylic platter and turntable plinth. For stubborn marks, a slightly damp cloth can be used, followed by a dry cloth. Avoid harsh chemicals or abrasive cleaners.
Dust Cover Care
Clean the dust cover with a soft, damp cloth. Do not use window cleaning fluids containing ammonia, as they can damage the acrylic. The dust cover protects your turntable from dust when not in use.
Troubleshooting
If you encounter issues, consult the following common problems and solutions:
- No power: Ensure the power supply is correctly connected to the turntable and a working power outlet.
- No sound or weak sound: Check all audio cable connections. Ensure your amplifier is set to the correct input (Phono) and that the volume is up. Verify the stylus guard is removed.
- Distorted sound: Check tracking force and anti-skating settings. Ensure the stylus is clean and not damaged.
- Incorrect speed: Verify the drive belt is correctly positioned on the motor pulley for the desired speed (33 1/3 or 45 RPM).
- Humming noise: Ensure the ground wire is properly connected between the turntable and your amplifier. Check for proximity to other electronic devices that may cause interference.
If problems persist, contact Pro-Ject customer support or your retailer for assistance.
Specifications
| Brand | Pro-Ject |
| Model Name | Essential III George Harrison |
| Maximum Rotational Speed | 45 RPM (supports 33 1/3 RPM) |
| Tonearm | 8.6-inch Aluminium |
| Cartridge | Ortofon OM10 (pre-mounted) |
| Platter | Acryl-It E Acrylic Platter |
| Motor Type | DC Motor |
| Power Source | Corded Electric (15V DC Universal Power Supply) |
| Connectivity Technology | RCA |
| Signal-to-Noise Ratio | 75 dB |
| Item Weight | 5 Kilograms |
| Material | Engineered Wood |
Warranty Information
Your Pro-Ject Essential III George Harrison Turntable is covered by a 2-year manufacturer's warranty. Please retain your proof of purchase for warranty claims. The warranty covers defects in materials and workmanship under normal use. It does not cover damage caused by misuse, accidents, unauthorized modifications, or normal wear and tear.
Support and Contact
For technical support, service, or further inquiries, please contact your authorized Pro-Ject retailer or visit the official Pro-Ject Audio Systems website. When contacting support, please have your product model and serial number available.
For more information, you can visit the Pro-Ject Store on Amazon.


