
DALLUX RCS7000
DALLUX RCS7000 Truck Backup Camera Kit User Manual
Model: RCS7000 | Brand: DALLUX
Introduction
This manual provides detailed instructions for the installation, operation, and maintenance of your DALLUX RCS7000 Truck Backup Camera Kit. This system is designed to enhance rear visibility for various heavy-duty vehicles, including trucks, buses, vans, trailers, RVs, campers, and motor homes, operating on 12V-24V power systems.
Package Contents
Verify that all items listed below are included in your package:
- 7-inch HD LCD Color Monitor
- 1080P HD Backup Camera (IP69K Waterproof)
- 4 PIN Extension Cable (66ft)
- Remote Control
- Power Cord
- Power Cord Fuse
- Mounting Brackets (3 types: U-shaped, Suction Cup, Dashboard Adhesive)
- Accessories (screws, nuts, wrench)

Figure 1: Overview of all components included in the DALLUX RCS7000 Truck Backup Camera Kit, showing the monitor, camera, extension cable, remote control, power cords, and various mounting hardware.
Setup and Installation
Proper installation is crucial for optimal performance. Follow these steps carefully:
1. Camera Installation
- Mount the Camera: The camera is designed for rear mounting. Secure it using the provided bracket and screws. Ensure the camera has a clear, unobstructed view of the rear of your vehicle. The camera features 18 infra-red lights for night vision up to 50ft and a 130° wide-angle lens.
- Route the Cable: Connect the 4-PIN extension cable to the camera. Carefully route the cable from the camera's location to the vehicle's cabin, ensuring it is secured and protected from moving parts, heat, and sharp edges.
- Connect to Power (Optional for Reversing Trigger): If you intend for the system to activate only when reversing, connect the green wire from the power cord to your vehicle's reversing light circuit. If you prefer the system to run continuously (e.g., as a rearview mirror), connect the camera to AV1 and disregard the green wire.
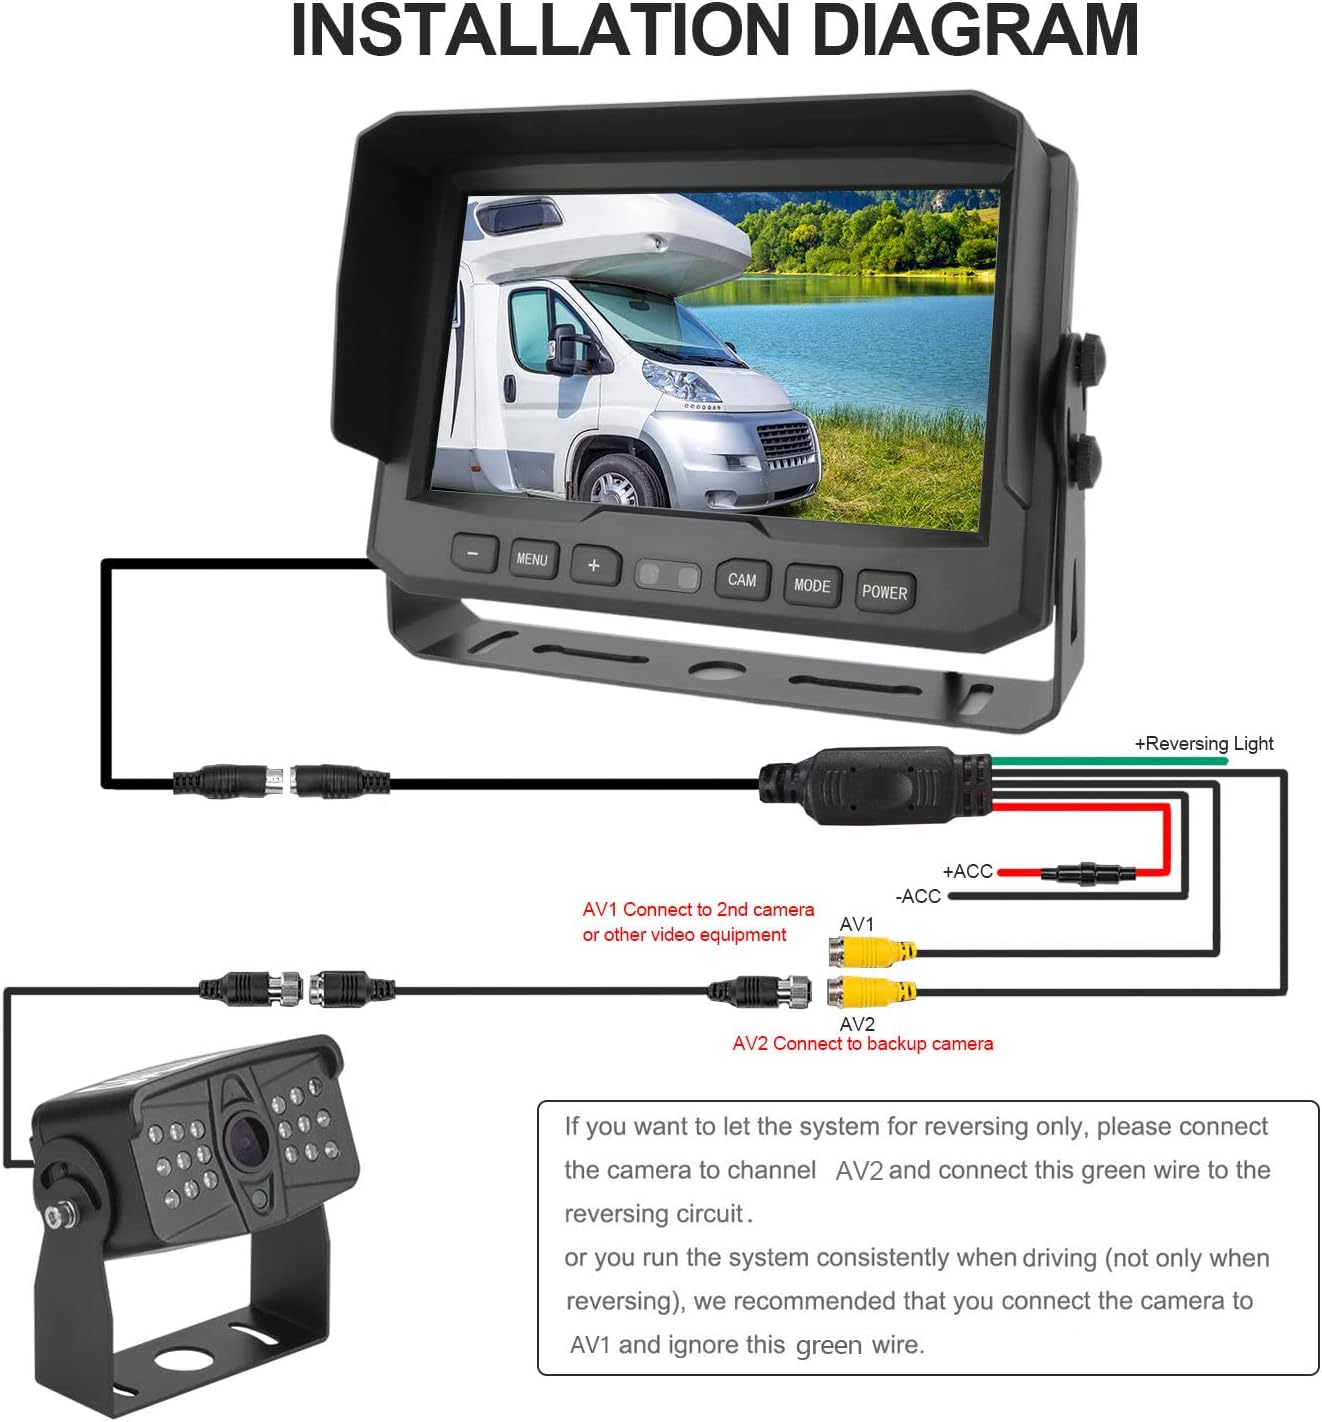
Figure 2: Wiring diagram illustrating the connection points for the DALLUX RCS7000 monitor and camera, including optional connections for reversing lights and continuous power.
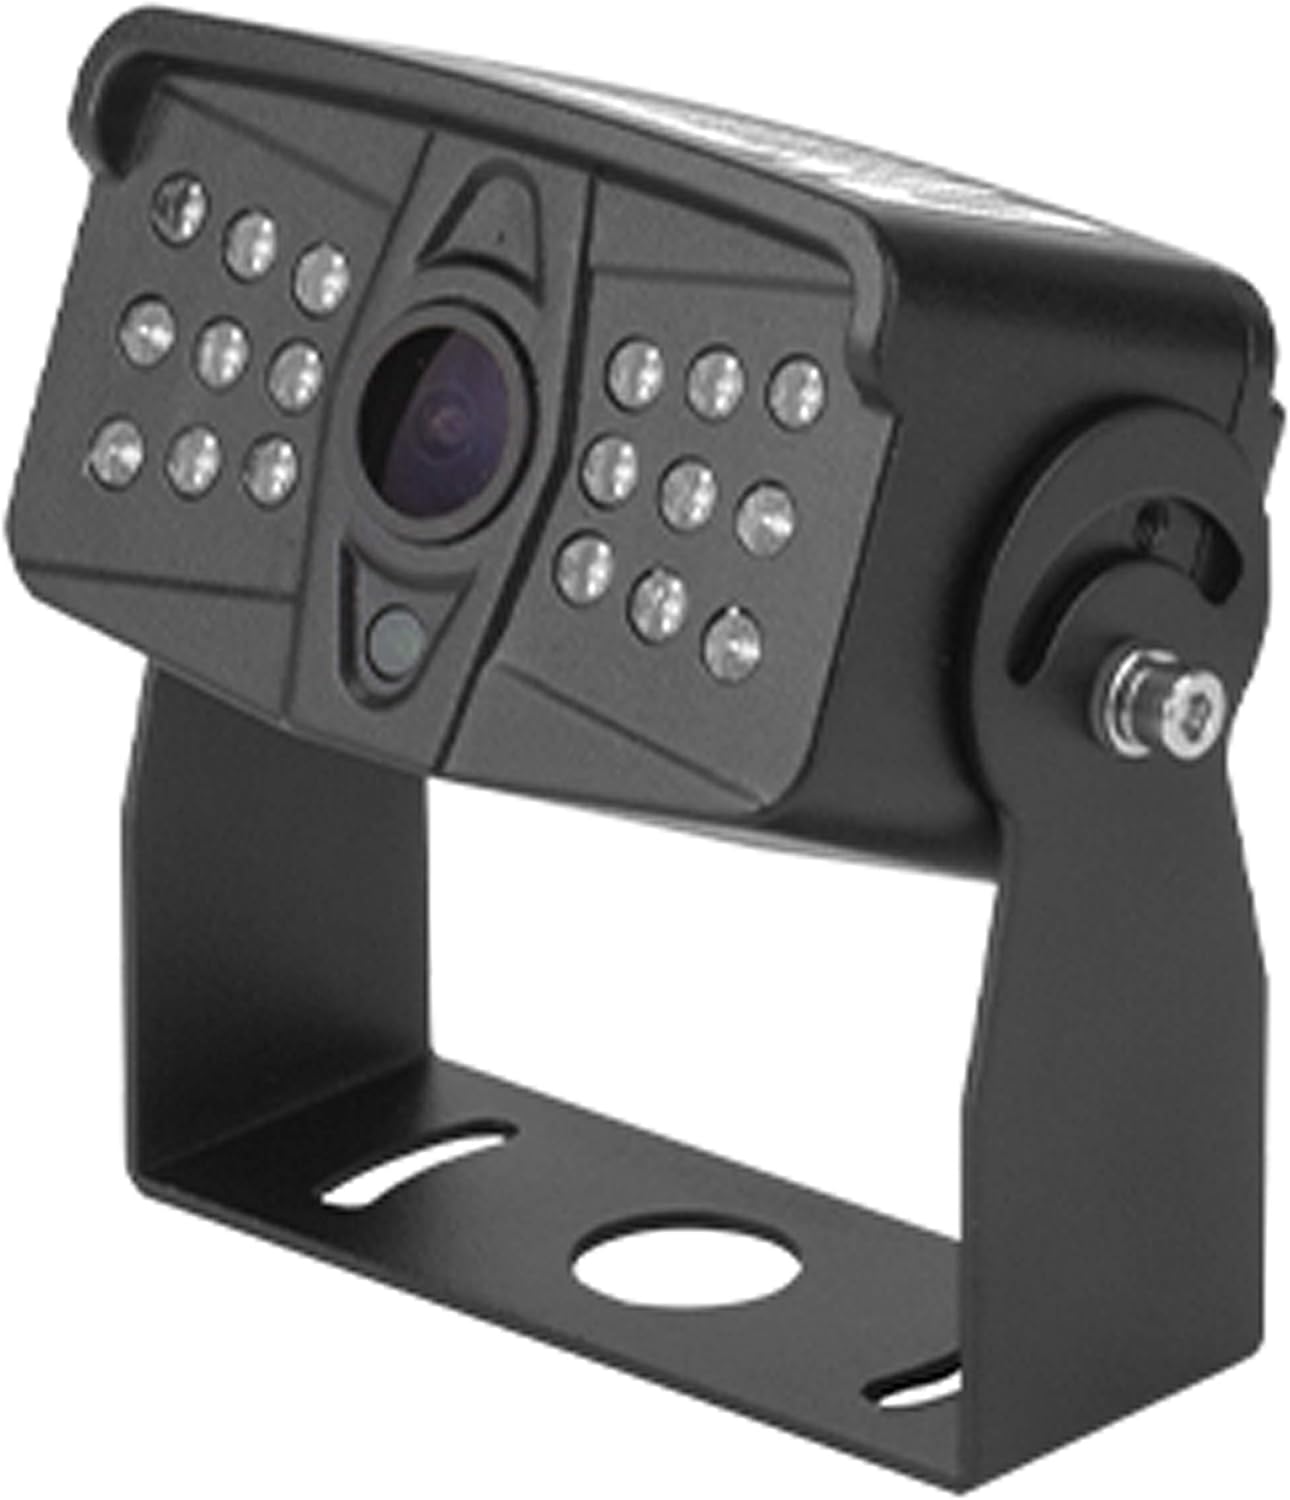
Figure 3: Close-up view of the DALLUX RCS7000 backup camera, highlighting its robust design and integrated LED lights for night vision.
2. Monitor Installation
- Choose Mounting Location: Select a suitable location on your dashboard or windshield that provides clear visibility without obstructing your driving view.
- Attach Mounting Bracket:
- Suction Cup Mount: For windshield mounting, attach the suction cup mount to a clean, smooth surface.
- Dashboard Adhesive Mount: For dashboard mounting, use the adhesive pad to secure the bracket.
- U-shaped Bracket: This bracket can be screwed directly to a flat surface.
- Secure the Monitor: Attach the 7-inch monitor to the chosen mounting bracket. Adjust the angle for optimal viewing.
- Connect Power: Connect the monitor's power cord to a 12V-24V power source in your vehicle, such as a cigarette lighter adapter or by hardwiring to the vehicle's electrical system.
- Connect Camera Cable: Plug the 4-PIN extension cable from the camera into the corresponding input on the monitor (e.g., AV2 for backup camera, AV1 for continuous view).

Figure 4: Illustration of the three different mounting options for the DALLUX RCS7000 monitor: U-shaped bracket, suction cup mount, and dashboard adhesive mount.

Figure 5: Detailed view of the 7-inch HD LCD color monitor, showing its dimensions and control buttons.
Operating Instructions
1. Powering On/Off
- If connected to the ignition, the monitor will power on/off with the vehicle.
- If using the cigarette lighter adapter, press the power button on the adapter or the monitor to turn it on/off.
2. Monitor Controls
The monitor features several buttons for control:
- MENU: Access the on-screen display (OSD) menu for settings.
- +/-: Navigate menu options or adjust values.
- CAM: Switch between camera inputs (AV1/AV2) if multiple cameras are connected.
- MODE: Change display modes or aspect ratios.
- POWER: Turn the monitor on or off.
3. Remote Control
The included remote control provides convenient access to all monitor functions from a distance.
4. Image Adjustment (Mirror/Normal)
The monitor allows you to flip the rear view image horizontally or vertically to suit your preference or mounting orientation. This can be adjusted via the menu or dedicated buttons (Up/Down/Left/Right).

Figure 6: Examples of mirror and normal image display options on the DALLUX RCS7000 monitor, demonstrating the flexibility in viewing modes.
5. Night Vision
The camera is equipped with 18 infra-red lights, enabling clear visibility up to 50ft in complete darkness. The auto-dimming feature adjusts monitor brightness based on ambient light conditions for optimal viewing day or night.
Maintenance
- Cleaning: Regularly clean the camera lens and monitor screen with a soft, damp cloth. Avoid abrasive cleaners.
- Cable Inspection: Periodically check all cables and connections for wear, damage, or loose fittings.
- Waterproof Rating: The camera has an IP69K waterproof rating, ensuring functionality in various weather conditions. However, avoid direct high-pressure water jets on the lens.
Troubleshooting
| Problem | Possible Cause | Solution |
|---|---|---|
| No image on monitor | No power to monitor/camera; loose cable connection; incorrect input selected. | Check power connections; ensure cables are securely plugged in; select correct AV input (AV1/AV2). |
| Image is distorted or flickering | Poor cable connection; electrical interference; damaged cable. | Secure all connections; ensure cables are not near high-voltage wires; replace damaged cables. |
| Night vision not working | Infrared LEDs are faulty; insufficient power. | Verify power supply; contact support if LEDs are not illuminating. |
| Monitor does not turn on automatically when reversing | Green trigger wire not connected to reversing light. | Ensure the green wire is correctly connected to the vehicle's reversing light circuit. |
Specifications
| Feature | Detail |
|---|---|
| Model Number | RCS7000 |
| Monitor Screen Size | 7 Inches |
| Monitor Display Technology | LCD |
| Monitor Pixel Resolution | 1024 x 600 |
| Camera Resolution | HD 1080P (1920x1080 pixels) |
| Camera Sensor Type | 1/3" Color CCD |
| Camera Viewing Angle | 130° Wide Angle |
| Night Vision Range | Up to 50ft (with 18 IR lights) |
| Waterproof Rating | IP69K |
| Operating Voltage | 12V-24V |
| Connector Type | 4PIN Aviation Connector |
| Item Weight | 5.04 pounds |
| Package Dimensions | 11.5 x 7.95 x 4.49 inches |
Warranty and Support
For warranty information or technical support, please refer to the contact details provided in your product packaging or visit the official DALLUX website. Ensure you retain your proof of purchase for any warranty claims.
Ask a question about this manual
Ask about setup, troubleshooting, compatibility, parts, safety, or missing instructions. Manuals+ will review the question and use this page’s manual context to help answer it.