
1. Introduction
This manual provides essential information for the safe and efficient operation, installation, and maintenance of your Pitco SG18-S 75 lb. Stainless Steel Floor Fryer. Please read this manual thoroughly before installing or operating the equipment. Keep this manual for future reference.
2. Safety Information
WARNING: Improper installation, adjustment, alteration, service, or maintenance can cause property damage, injury, or death. Read the installation, operating, and maintenance instructions thoroughly before installing or servicing this equipment.
This appliance is intended for commercial use only. It must be installed by qualified personnel in accordance with all applicable local and national codes.
- Always ensure adequate ventilation in the area where the fryer is installed.
- Do not store or use gasoline or other flammable vapors and liquids in the vicinity of this or any other appliance.
- Keep the area around the fryer clear and free from combustible materials.
- Allow hot oil to cool before attempting to clean or filter.
- Wear appropriate personal protective equipment (PPE) when operating or servicing the fryer.
3. Setup and Installation
The Pitco SG18-S fryer requires professional installation due to its gas and electrical connections. Ensure the installation site meets all clearance and ventilation requirements.
3.1 Unpacking
Carefully remove the fryer from its packaging. Inspect for any shipping damage. Report any damage immediately to the carrier and your supplier.
3.2 Placement and Clearances
Position the fryer on a level, non-combustible surface. Maintain minimum clearances from combustible materials as specified by local codes and the appliance data plate. Ensure proper ventilation is available.

Image: Front-angled view of the Pitco SG18-S commercial deep fryer, showing its overall design and two empty fry baskets. This view is typical for initial placement assessment.

Image: Rear view of the Pitco SG18-S commercial deep fryer. This perspective highlights the location of the gas connection point, crucial for proper installation and utility hook-up.
3.3 Gas Connection
A qualified gas technician must connect the fryer to the gas supply. Ensure the gas type (Natural Gas) matches the fryer's specifications. Install a manual shut-off valve in the gas line ahead of the fryer for safety and service.

Image: Close-up view of the gas supply line and its associated valve, demonstrating the connection point to the fryer's internal gas components. This connection must be performed by a certified professional.
3.4 Leveling
Adjust the fryer's legs to ensure it is perfectly level. This is critical for even cooking and proper oil drainage.
3.5 Initial Cleaning
Before first use, clean the frypot and all accessories with a mild detergent and warm water. Rinse thoroughly and dry completely.
4. Operating Instructions
4.1 Filling the Frypot
Ensure the drain valve is closed. Fill the frypot with cooking oil to the 'OIL LEVEL' mark indicated on the inside of the tank. Do not overfill or underfill.
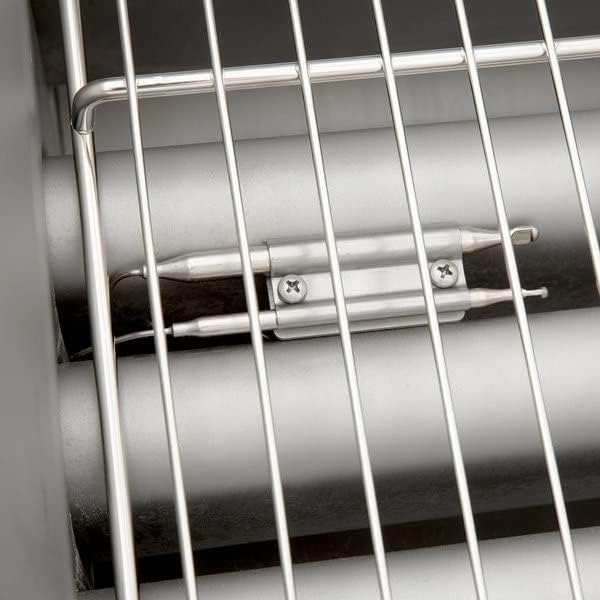
Image: Close-up view of the clearly marked oil level indicators (MIN, O'L LEVEL, MAX) inside the fryer tank. Proper oil level is essential for safe and efficient operation.
4.2 Ignition Procedure (Millivolt Control)
- Ensure the gas supply valve to the fryer is open.
- Turn the thermostat knob to the 'OFF' position.
- Push in the thermostat knob and turn it to the 'PILOT' position. Continue to hold it in.
- While holding the knob in, light the pilot burner with a match or lighter. Hold the knob in for approximately 60 seconds after the pilot lights to allow the thermocouple to heat up.
- Release the knob. If the pilot goes out, repeat steps 3-4.
- Once the pilot is lit, turn the thermostat knob to the desired cooking temperature (200°F-400°F). The main burners will ignite.
4.3 Frying
Allow the oil to reach the set temperature before adding food. Do not overload the baskets, as this can lower oil temperature and result in greasy food. Use the provided fry baskets for cooking.

Image: The Pitco SG18-S fryer in active use, with a basket full of golden-brown fried food being carefully lifted from the hot oil. This illustrates the primary function of the appliance.
4.4 Shutdown Procedure
To turn off the fryer, turn the thermostat knob to the 'OFF' position. For complete shutdown, close the manual gas shut-off valve.
5. Maintenance
Regular maintenance is crucial for the longevity and efficient operation of your fryer.
5.1 Daily Cleaning
- Crumb Removal: At the end of each day, remove crumbs and food particles from the frypot using a skimmer.
- Wipe Down: Wipe down the exterior of the fryer with a damp cloth and mild detergent. Dry thoroughly.
5.2 Oil Filtration/Replacement
Filter the cooking oil daily or as needed to extend its life and maintain food quality. Replace oil completely when it degrades significantly.
5.3 Boil-Out Procedure (Weekly/Bi-Weekly)
When oil is removed, perform a boil-out to thoroughly clean the frypot. Fill the frypot with water and a recommended fryer cleaning solution. Bring to a boil and simmer for 20-30 minutes. Drain, rinse thoroughly, and dry.

Image: Close-up view of the heating elements and temperature probe located within the fryer tank. Regular cleaning of these components is vital for efficient heat transfer and accurate temperature control.
5.4 Regular Inspections
Periodically inspect gas connections, hoses, and controls for any signs of wear or damage. Any issues should be addressed by a qualified service technician.
6. Troubleshooting
Before calling for service, review the following common issues and their potential solutions:
| Problem | Possible Cause | Solution |
|---|---|---|
| Fryer not heating | Pilot light out; Gas supply off; Thermostat set too low; High-limit switch tripped. | Relight pilot; Check gas supply valve; Adjust thermostat; Reset high-limit switch (consult manual for location). |
| Uneven cooking | Oil level too low; Overloading baskets; Thermostat malfunction. | Add oil to proper level; Reduce batch size; Contact service technician. |
| Excessive smoke/odor | Oil degradation; Food particles in oil. | Filter or replace oil; Perform boil-out cleaning. |
If the problem persists after attempting these solutions, contact a qualified service technician.
7. Specifications
Key specifications for the Pitco SG18-S 75 lb. Stainless Steel Floor Fryer:
| Specification | Value |
|---|---|
| Model Name | Solstice Gas Fryer |
| Brand | Pitco |
| Material | Stainless Steel |
| Product Dimensions (D x W x H) | 40"D x 30"W x 30"H |
| Item Weight | 75 Pounds |
| Wattage | 1800 watts |
| Oil Capacity | 75 Liters |
| Manufacturer | Pitco |
| UPC | 732058333723 |
| BTU | 140,000 BTU |
8. Warranty and Support
Pitco products are manufactured to the highest standards and come with a limited warranty against defects in materials and workmanship. For specific warranty terms and conditions, please refer to the warranty card included with your product or visit the official Pitco website.
For technical support, parts, or service inquiries, please contact your authorized Pitco dealer or a certified service agent. Ensure you have your model number (SG18-S) and serial number ready when contacting support.