1. Introduction
The Saramonic SR-PMIC1 is a compact, super-cardioid unidirectional condenser microphone designed to significantly improve the audio quality of your video recordings when used with DSLR cameras and camcorders. This microphone features a robust construction, battery-free operation, an integrated shockmount, and a switchable low-cut filter, making it a versatile tool for various recording environments. This manual provides detailed instructions for the proper setup, operation, and maintenance of your SR-PMIC1 microphone.
2. Package Contents
Please check that all the following items are included in your package:
- Saramonic SR-PMIC1 Super-Cardioid Unidirectional Condenser Microphone
- Foam Windscreen
- Integrated Shockmount (pre-attached)
- 3.5mm TRS Output Cable (attached or included)

Image: The Saramonic SR-PMIC1 microphone, showcasing its compact design, integrated shockmount, and the attached 3.5mm TRS output cable. The foam windscreen is also visible.
3. Key Features
- Super-Cardioid Unidirectional Microphone: Captures sound primarily from the front, reducing unwanted noise from the sides and rear.
- Battery-Free Operation: Powered directly by your camera's microphone input, eliminating the need for external batteries.
- Switchable Low-Cut Filter (100 Hz): Reduces low-frequency noise such as wind, air conditioning, or traffic rumble.
- Integrated Rubber Shockmount: Minimizes handling noise and vibrations transmitted from the camera.
- Foam Windscreen Included: Helps to reduce wind noise during outdoor recordings.
- Compact and Lightweight Design: Easy to mount and transport without adding significant bulk to your camera setup.
4. Setup Guide
Follow these steps to properly set up your Saramonic SR-PMIC1 microphone with your camera or camcorder.
- Attach the Foam Windscreen: Gently slide the foam windscreen over the microphone capsule until it is securely in place. This helps to reduce wind noise and plosives.
- Mount the Microphone:
- Locate the cold shoe mount on your DSLR camera or camcorder.
- Slide the microphone's integrated shoe mount into your camera's cold shoe.
- Tighten the locking wheel on the microphone's mount to secure it firmly in place.
- Connect to Camera:
- Plug the 3.5mm TRS output cable from the SR-PMIC1 into the microphone input jack on your camera or camcorder. Ensure the connection is snug.
- The SR-PMIC1 operates without batteries, drawing power directly from your camera's microphone input.
- Camera Audio Settings: Access your camera's audio settings menu.
- Set the audio input to "External Microphone."
- Adjust the recording level to an appropriate setting. It is recommended to perform a test recording to ensure optimal levels without clipping or excessive noise.
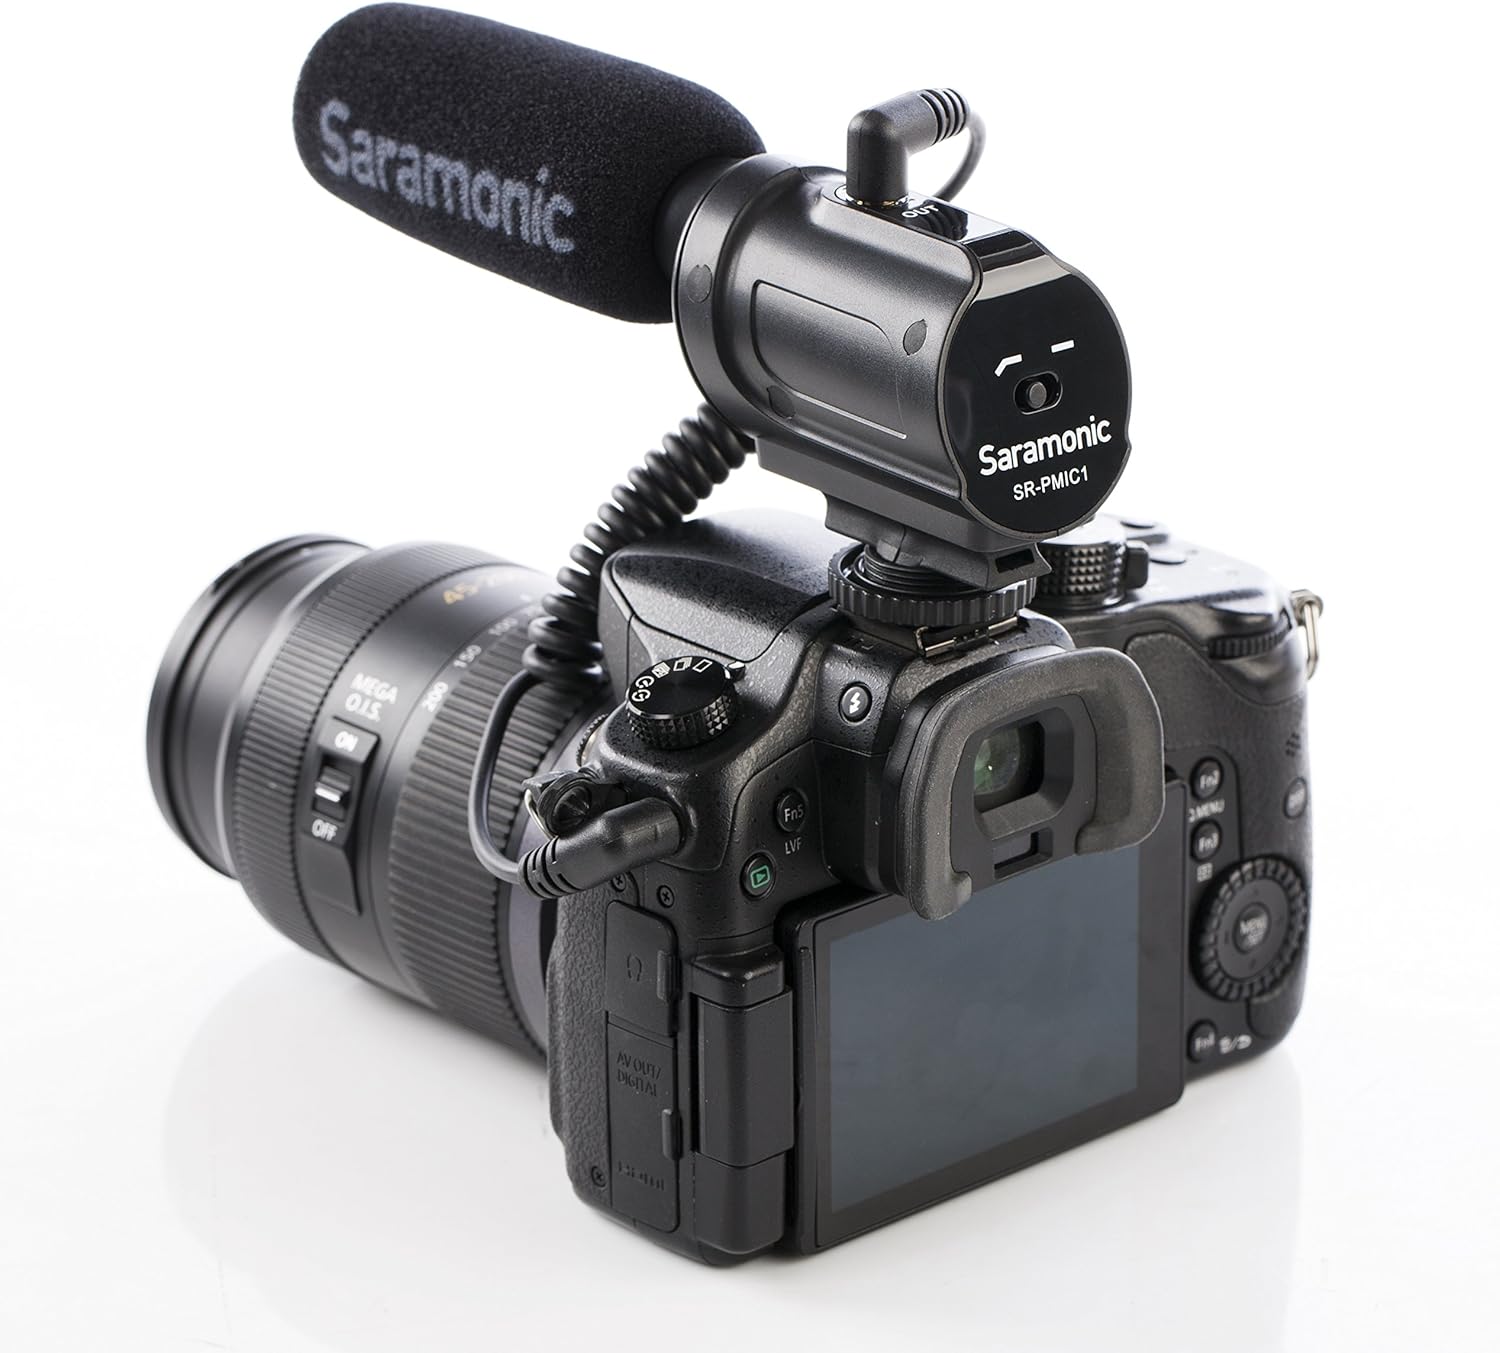
Image: The Saramonic SR-PMIC1 microphone securely mounted on a DSLR camera's hot shoe, demonstrating a typical setup configuration.

Image: Another view of the Saramonic SR-PMIC1 microphone attached to a camera, highlighting the cable connection and overall compact profile.
5. Operating Instructions
Once the SR-PMIC1 is set up, operating it is straightforward.
- Power On/Off: The SR-PMIC1 does not have a separate power switch. It is powered on automatically when connected to a camera with a powered microphone input. Disconnect it to power off.
- Low-Cut Filter:
- The microphone features a switchable low-cut filter at 100 Hz. This switch is located on the side of the microphone body.
- Position I (Flat): For general recording where the full frequency range is desired.
- Position II (Low-Cut): Engage this setting to reduce low-frequency rumble from sources like wind, air conditioners, or traffic. This can improve clarity for speech and other mid-to-high frequency sounds.
- Monitoring Audio: If your camera has a headphone output, use it to monitor your audio during recording. This allows you to catch any issues with levels or unwanted noise in real-time.
- Microphone Placement: Position the microphone to point directly at your sound source for optimal capture, leveraging its super-cardioid polar pattern.
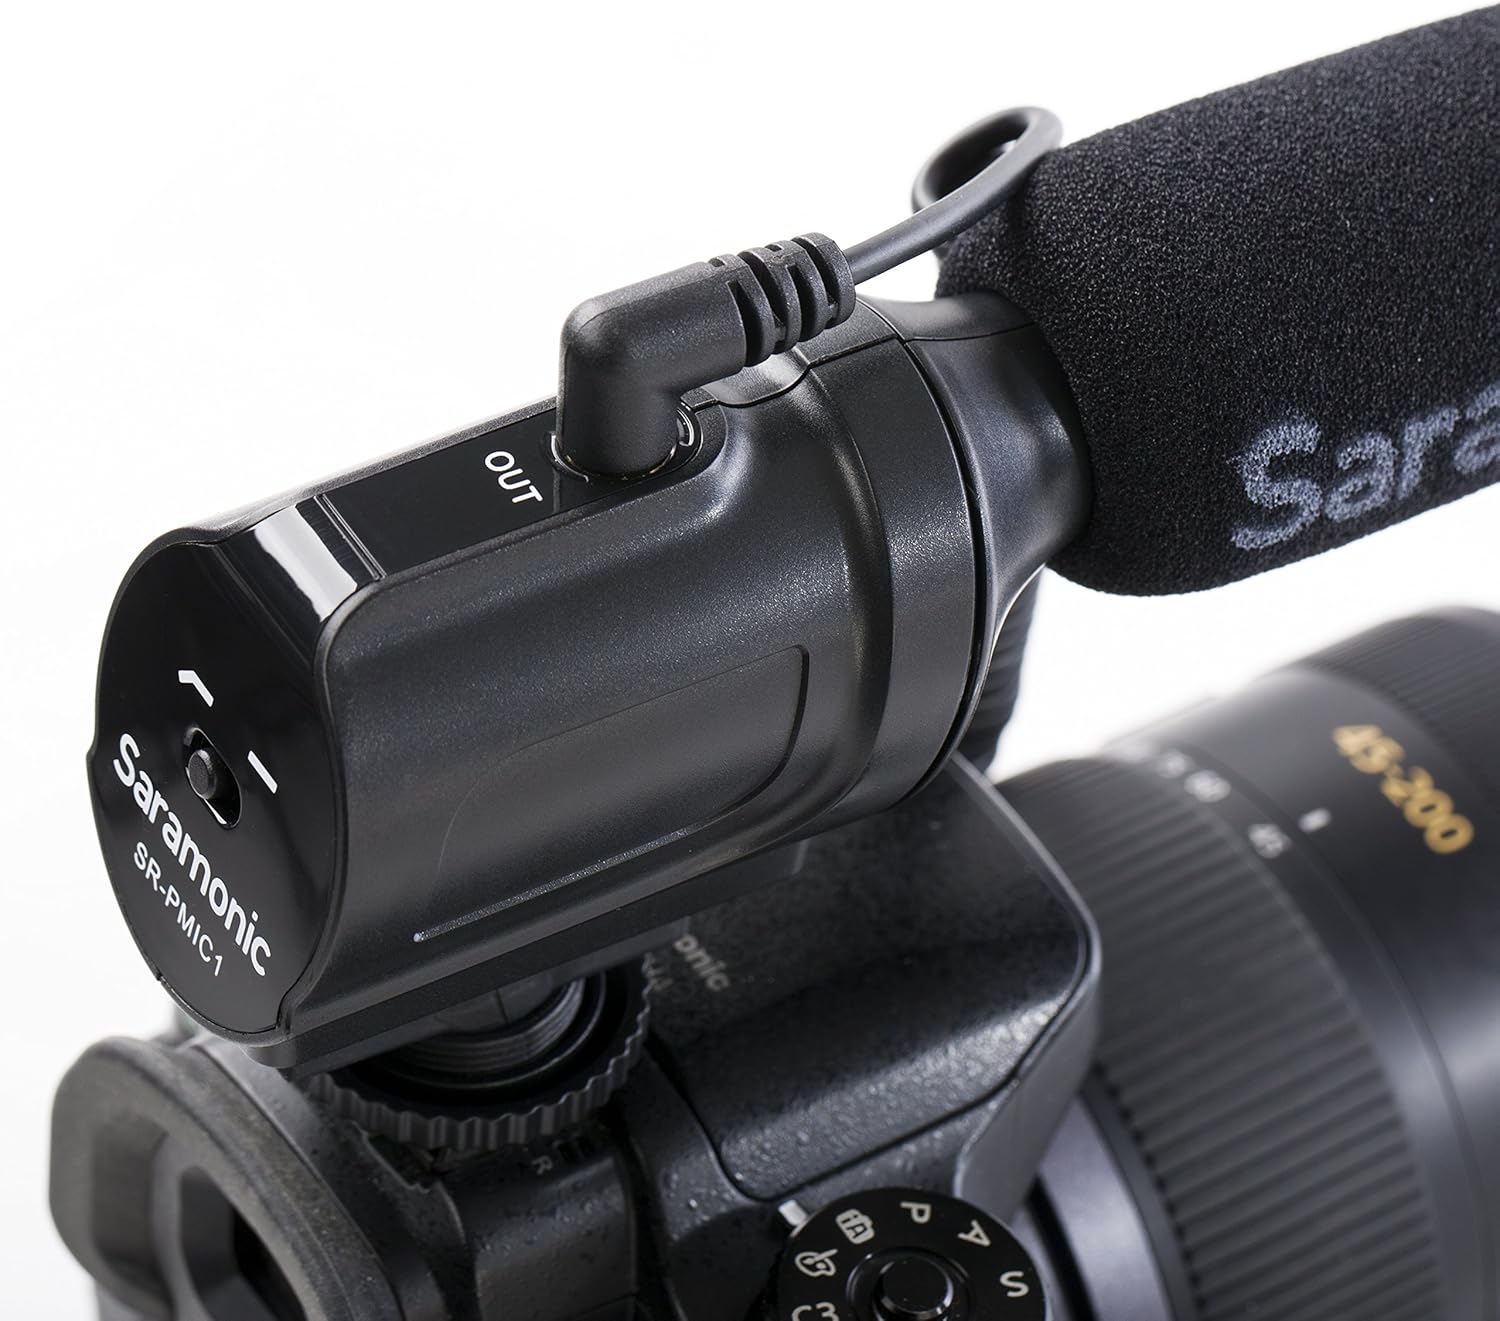
Image: A detailed view of the Saramonic SR-PMIC1, highlighting the low-cut filter switch and the 3.5mm output port for easy access and control.
6. Maintenance
Proper maintenance ensures the longevity and optimal performance of your SR-PMIC1 microphone.
- Cleaning: Use a soft, dry cloth to clean the microphone body. Do not use liquid cleaners or solvents, as these can damage the microphone's components.
- Foam Windscreen: The foam windscreen can be gently hand-washed with mild soap and water if it becomes dirty. Ensure it is completely dry before reattaching it to the microphone.
- Storage: When not in use, store the microphone in a dry, dust-free environment, preferably in its original packaging or a protective pouch.
- Handling: Avoid dropping the microphone or subjecting it to strong impacts, as this can damage the internal components and affect performance.
- Moisture: Keep the microphone away from water and high humidity. If it gets wet, disconnect it immediately and allow it to dry completely before use.
7. Troubleshooting
If you encounter issues with your SR-PMIC1 microphone, refer to the following common problems and solutions.
| Problem | Possible Cause | Solution |
|---|---|---|
| No audio recording or very low audio level. |
|
|
| Audio sounds muffled or distorted. |
|
|
| Excessive background noise (wind, hum). |
|
|
8. Specifications
| Feature | Detail |
|---|---|
| Microphone Type | Mono Condenser |
| Polar Pattern | Super-Cardioid |
| Frequency Range | 80 Hz - 12 kHz |
| Sensitivity | -32dB +/- 1dB |
| Signal to Noise Ratio | 70dB SPL |
| Output Connector | 3.5mm TRS Jack |
| Dimensions (L x W x H) | 6.3 x 2.3 x 1.6 inches (16.2 x 5.9 x 4.1 cm) |
| Weight | 1.9 oz (55g) / 2.08 ounces (59g) |
| Power Source | Camera Plug-in Power (Battery-Free) |
| Material | Rubber (Shockmount) |
| Compatible Devices | DSLR Cameras, Camcorders |
9. Warranty and Support
The Saramonic SR-PMIC1 microphone comes with a manufacturer's warranty. For detailed warranty information, terms, and conditions, please refer to the official Saramonic website or the warranty card included with your product.
For technical support, service, or additional product information, please visit the official Saramonic store or contact their customer service directly.
Saramonic Official Store: Visit the Saramonic Store on Amazon


