
1. Introduction
The MOOER Micro Preamp 001, also known as the Gas Station, is a digital recreation of the preamp section of a popular tube amplifier. It utilizes advanced technology to accurately capture the sound, dynamics, and response of the original amplifier. This micro preamp features dual channels, an integrated speaker cabinet simulation, and two footswitch operating modes to accommodate various user preferences.

Figure 1: Angled view of the MOOER Gas Station Micro Preamp M001, showcasing its compact design and primary controls.
2. Setup
Follow these steps to set up your MOOER Gas Station Micro Preamp M001:
- Power Connection: Connect a standard 9V DC power supply (center negative) to the 'DC 9V' input jack located on the top of the unit. Ensure the power supply meets the specified voltage and polarity requirements.
- Audio Input: Connect your guitar or other instrument to the input jack on the right side of the pedal using a standard 1/4-inch instrument cable.
- Audio Output: Connect the output jack on the left side of the pedal to your amplifier's input, a power amplifier, or an audio interface using a standard 1/4-inch instrument cable.
- Initial Check: Before powering on, ensure all connections are secure and correctly oriented.

Figure 2: Side view of the MOOER Gas Station Micro Preamp M001, highlighting the input and output jacks for audio connections.
3. Operating Instructions
The MOOER Gas Station Micro Preamp M001 offers intuitive controls for shaping your tone:
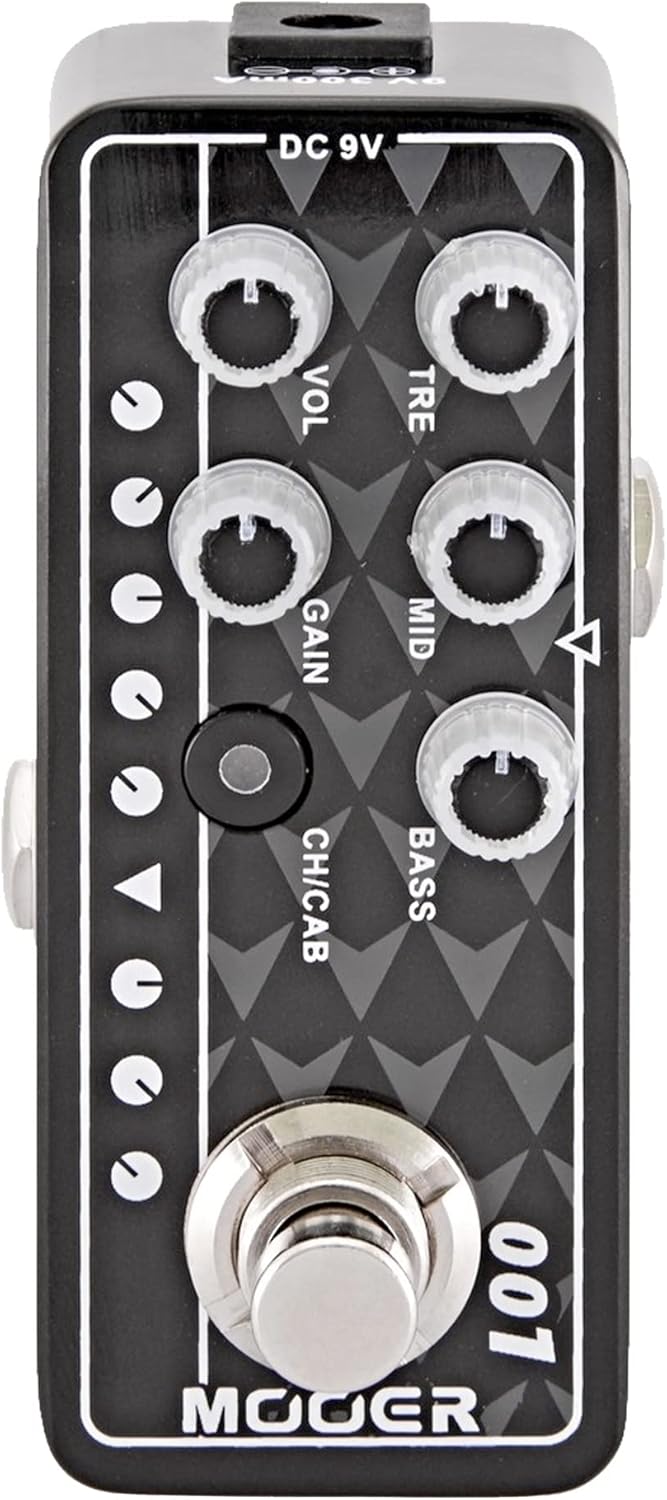
Figure 3: Top-down view of the MOOER Gas Station Micro Preamp M001, illustrating the layout of all control knobs and buttons.
3.1. Controls
- VOL (Volume): Adjusts the overall output level of the selected channel.
- TRE (Treble): Controls the high-frequency response of the selected channel. Turn clockwise for brighter tones, counter-clockwise for darker tones.
- GAIN: Adjusts the amount of overdrive or distortion for the selected channel. Higher settings produce more saturated tones.
- MID (Middle): Controls the mid-range frequency response of the selected channel.
- BASS: Controls the low-frequency response of the selected channel. Turn clockwise for more bass, counter-clockwise for less.
- CH/CAB Button:
- Short Press: Toggles between Channel A and Channel B. Each channel retains its independent EQ, gain, and volume settings.
- Long Press: Toggles the integrated speaker cabinet simulation on or off. This is useful when connecting directly to a mixer or audio interface.
- Footswitch: The footswitch operates in two modes: On/Off or Channel A/B. The specific method for switching between these modes is typically detailed in the product's accompanying documentation.
3.2. Dual Channel Operation
The M001 features two independent channels (A and B), each with its own settings for Volume, Treble, Gain, Mid, and Bass. This allows for quick switching between different tonal characteristics, such as a clean channel and a high-gain channel.
3.3. Speaker Cabinet Simulation
The integrated speaker cabinet simulation can be activated or deactivated by long-pressing the CH/CAB button. When active, it provides a more natural, mic'd cabinet sound, which is ideal for direct recording or connecting to a PA system without a physical guitar cabinet.
4. Maintenance
Proper maintenance ensures the longevity and optimal performance of your Micro Preamp M001:
- Cleaning: Wipe the unit with a soft, dry cloth. Avoid using abrasive cleaners, solvents, or harsh chemicals, as these can damage the finish and internal components.
- Storage: Store the pedal in a dry environment, away from extreme temperatures, humidity, and direct sunlight. When not in use for extended periods, disconnect the power supply.
- Power Supply: Always use a compatible 9V DC (center negative) power supply. Using an incorrect power supply can cause damage to the unit and void the warranty.
- Connections: Periodically check all cable connections for wear and tear. Replace damaged cables to prevent signal loss or intermittent issues.
5. Troubleshooting
If you encounter issues with your MOOER Gas Station Micro Preamp M001, refer to the following troubleshooting tips:
- No Sound Output:
- Verify that the power supply is correctly connected and functioning.
- Check all instrument cables for secure connections and ensure they are not faulty.
- Ensure the volume knob on the pedal and your amplifier/audio interface is turned up.
- Confirm that the correct channel (A or B) is selected and its volume is not set to zero.
- Poor Sound Quality / Excessive Noise:
- Check for faulty cables or connections.
- Ensure the power supply is stable and providing clean power.
- Adjust the GAIN, TREBLE, MID, and BASS controls. Excessive gain can introduce unwanted noise.
- If using the speaker cabinet simulation, try toggling it off to see if the issue persists.
- Unit Not Powering On:
- Confirm that the 9V DC power supply is connected correctly and is operational.
- Test the power supply with another compatible device if possible.
6. Specifications
| Feature | Specification |
|---|---|
| Item Weight | 6.4 ounces |
| Product Dimensions | 4.1 x 1.9 x 2.3 inches |
| Item Model Number | M001 |
| Compatible Devices | Guitar |
| Connector Type | USB |
| Signal Format | Digital |
| Material Type | Metal |
| Output Wattage | 2 Watts |
| Power Source | DC Power Supply |
| Voltage | 9 Volts |
| Brand | MOOER |
7. Warranty and Support
For detailed warranty information, please refer to the documentation included with your MOOER Gas Station Micro Preamp M001 at the time of purchase. For technical support, product registration, or further inquiries, please visit the official MOOER website or their Amazon store page: