
AEOTEC ZW111-A
Aeotec Nano Dimmer User Manual
Model: ZW111-A
1. Product Overview
The Aeotec Nano Dimmer (ZW111-A) is an in-wall Z-Wave Plus lighting controller designed to convert existing wall switches into smart switches, enabling remote control and dimming capabilities for various lighting types. Its compact size allows for invisible installation behind your existing wall switch.

Image: The Aeotec Nano Dimmer module shown alongside its product packaging.
This device supports both 2-wire and 3-wire electrical systems, with or without a neutral wire, and is compatible with leading and trailing edge dimming. It can be integrated into 3-way installations and offers broad compatibility with incandescent, halogen, dimmable LED, and dimmable CFL bulbs.
2. Important Safety Information
Please read this manual carefully before installation and operation. Failure to follow the instructions could be dangerous or cause a violation of the law. The manufacturer, importer, distributor, and seller shall not be liable for any loss or damage resulting from non-compliance with the instructions in this manual or from improper installation.
- Installation must be performed by a qualified electrician or trained professional.
- Ensure power is disconnected at the circuit breaker before installation or maintenance.
- Do not exceed the maximum load capacity of 1.2 Amps (140 Watts) for the dimmer. Overloading can cause damage or fire.
- This device is designed for indoor use only.
- Keep away from moisture, direct sunlight, and extreme temperatures.
- Only use with dimmable light sources. Non-dimmable bulbs may flicker or be damaged.
3. Package Contents
- 1x Aeotec Nano Dimmer (ZW111-A)
- 1x User Manual
4. Setup and Installation
4.1. Before You Begin
- Turn off power to the light switch circuit at the main circuit breaker.
- Verify that the power is off by attempting to turn on the light switch.
- Ensure you have the necessary tools: screwdriver, wire strippers, electrical tape.
- Confirm your electrical box has sufficient space for the Nano Dimmer in addition to existing wiring.
4.2. Wiring Diagrams
The Nano Dimmer can be wired in various configurations depending on your existing electrical system (with or without a neutral wire, 2-way or 3-way switch). Always ensure connections are secure and insulated.
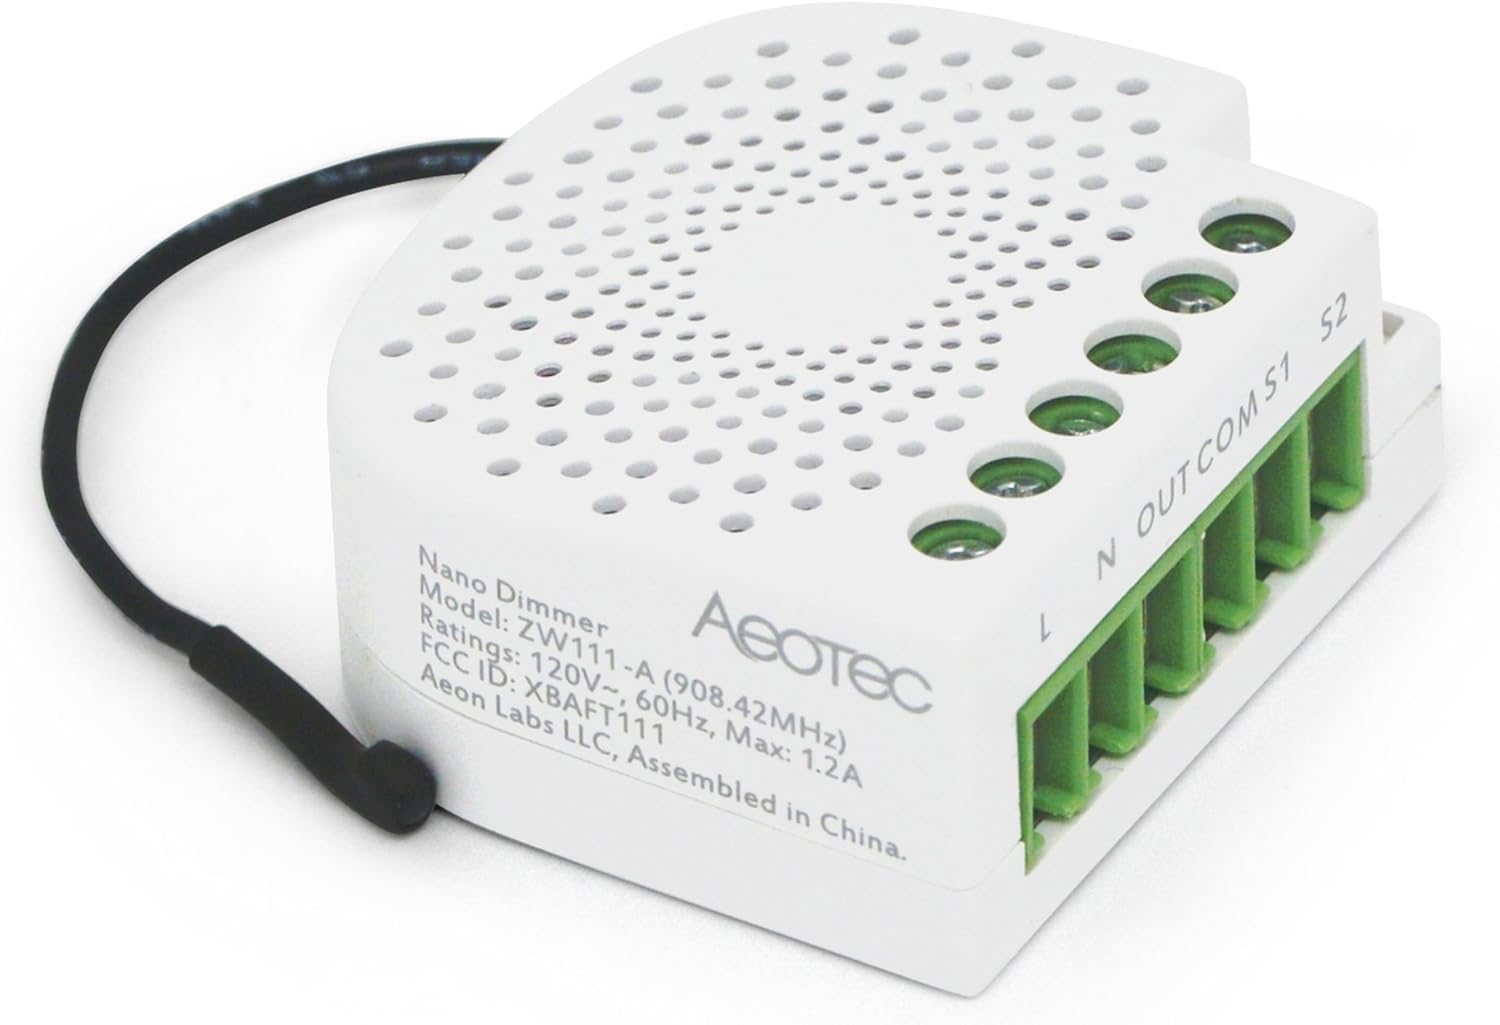
Image: Top view of the Nano Dimmer showing the terminal labels (L, N, OUT, COM, S1, S2).
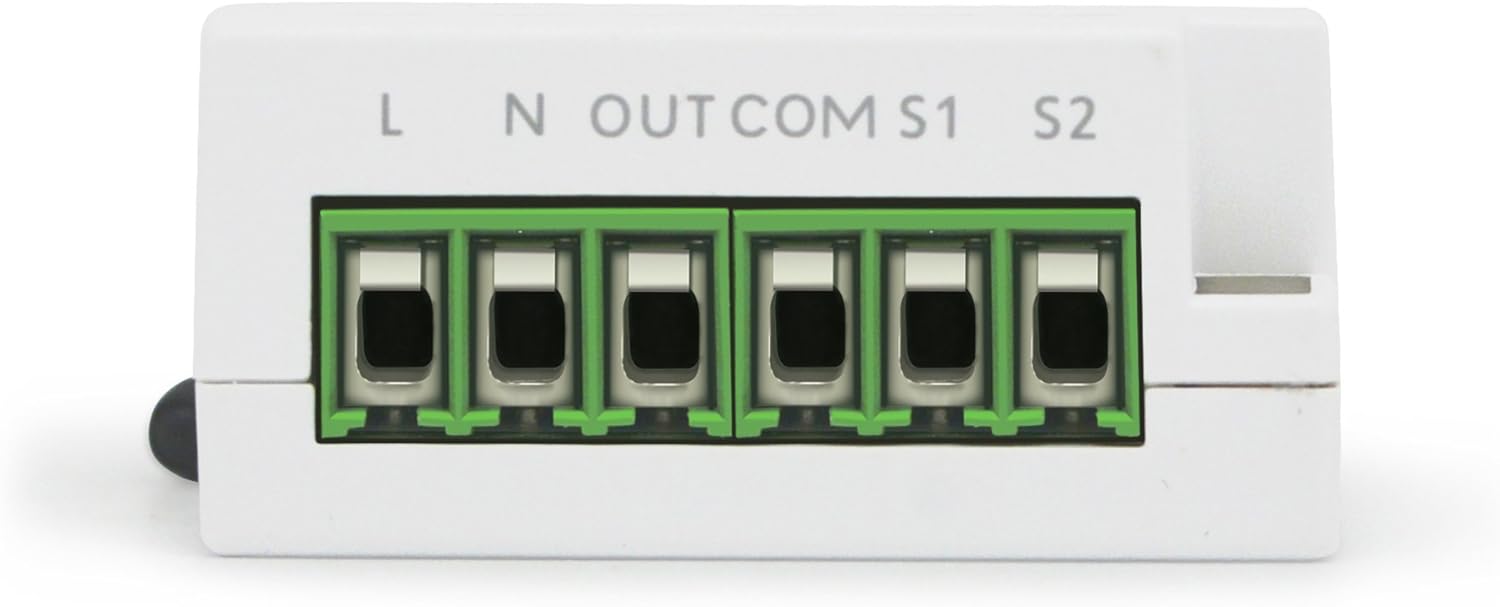
Image: Close-up view of the wiring terminals on the Nano Dimmer, showing screw connections.
Standard Wiring (with Neutral Wire)
- Connect the Live (L) wire from the mains to the 'L' terminal on the Nano Dimmer.
- Connect the Neutral (N) wire from the mains to the 'N' terminal on the Nano Dimmer.
- Connect the Load (OUT) wire (to the light fixture) to the 'OUT' terminal on the Nano Dimmer.
- Connect the Common (COM) wire from your wall switch to the 'COM' terminal on the Nano Dimmer.
- Connect the Switch 1 (S1) wire from your wall switch to the 'S1' terminal on the Nano Dimmer.
- If using a 3-way switch, connect the second traveler wire from the auxiliary switch to the 'S2' terminal.
2-Wire System Wiring (without Neutral Wire)
For installations without a neutral wire, the Nano Dimmer can still function. In this configuration, the 'N' terminal is not used. Ensure your load meets the minimum wattage requirement for stable operation (typically 20W for some LED/CFL bulbs, though the device may work with lower loads).
- Connect the Live (L) wire from the mains to the 'L' terminal on the Nano Dimmer.
- Connect the Load (OUT) wire (to the light fixture) to the 'OUT' terminal on the Nano Dimmer.
- Connect the Common (COM) wire from your wall switch to the 'COM' terminal on the Nano Dimmer.
- Connect the Switch 1 (S1) wire from your wall switch to the 'S1' terminal on the Nano Dimmer.
4.3. Physical Installation
- Once wired, carefully place the Nano Dimmer and all wires into the wall box. Ensure no wires are pinched or exposed.
- Mount your existing wall switch back into the electrical box.
- Restore power at the circuit breaker.
5. Operating Instructions
5.1. Adding to a Z-Wave Network (Inclusion)
To add your Nano Dimmer to a Z-Wave network, your Z-Wave gateway/controller must be in inclusion mode.
- Put your Z-Wave controller into inclusion/pairing mode (refer to your controller's manual).
- Press the Action Button on the Nano Dimmer once. The LED indicator will flash during the inclusion process.
- If inclusion is successful, the LED will become solid. If it fails, the LED will flash rapidly and then turn off.
5.2. Removing from a Z-Wave Network (Exclusion)
To remove your Nano Dimmer from a Z-Wave network, your Z-Wave gateway/controller must be in exclusion mode.
- Put your Z-Wave controller into exclusion/unpairing mode (refer to your controller's manual).
- Press the Action Button on the Nano Dimmer once. The LED indicator will flash during the exclusion process.
- If exclusion is successful, the LED will turn off.
5.3. Manual Control
Once installed and powered, your existing wall switch connected to the Nano Dimmer will function normally to turn the lights on/off and dim them (if supported by the switch type and configured correctly).
5.4. Advanced Configuration
The Nano Dimmer supports various Z-Wave configuration parameters to customize its behavior, such as dimming speed, external switch type detection, and power reporting. Refer to the official Aeotec documentation or your Z-Wave controller's interface for details on adjusting these parameters.
6. Maintenance
The Aeotec Nano Dimmer requires minimal maintenance. Ensure the device is kept dry and free from dust. Do not use harsh chemicals or abrasive cleaners. If cleaning is necessary, gently wipe with a dry, soft cloth. Periodically check wiring connections for tightness, ensuring power is off before inspection.
7. Troubleshooting
If you encounter issues with your Nano Dimmer, refer to the following common problems and solutions:
| Problem | Possible Cause / Solution |
|---|---|
| Lights do not turn on/off or dim. |
|
| Nano Dimmer not responding to Z-Wave commands. |
|
| Lights flicker or hum. |
|
7.1. Factory Reset
A factory reset will remove the Nano Dimmer from any Z-Wave network and restore all settings to their default values. Only perform this if your primary controller is missing or inoperable.
- Press and hold the Action Button for 20 seconds.
- The LED will flash rapidly, then turn solid for a few seconds, then turn off, indicating a successful reset.
8. Specifications
| Attribute | Value |
|---|---|
| Model Number | ZW111-A |
| Brand | AEOTEC |
| Connectivity Protocol | Z-Wave Plus |
| Current Rating | 1.2 Amps |
| Voltage | 120V~ (US/CA), 240V~ (EU/AU) - Note: Product data shows 240V, but also 120V in image. Confirm local model. |
| Max Load | 140 Watts |
| Dimensions (L x W x H) | 2.9 x 2.9 x 1.1 inches (73.66 x 73.66 x 27.94 mm) |
| Item Weight | 0.01 ounces (0.28 grams) |
| Circuit Type | 3-way compatible |
| International Protection Rating | IP54 |
| UPC | 810667023447 |
| First Available Date | February 27, 2017 |
9. Warranty and Support
9.1. Product Warranty
Aeotec products typically come with a limited warranty. Please refer to the warranty card included with your product or visit the official Aeotec website for the most current warranty terms and conditions applicable to your region.
9.2. Technical Support
For technical assistance, troubleshooting, or further information regarding your Aeotec Nano Dimmer, please visit the official Aeotec support website or contact their customer service. Support resources often include FAQs, detailed guides, and community forums.
Website: aeotec.com/support
Related documentsZW111-A


Ask a question about this manual
Ask about setup, troubleshooting, compatibility, parts, safety, or missing instructions. Manuals+ will review the question and use this page’s manual context to help answer it.