
1. Product Overview
The DALLUX 7" 1080P AHD Wired Reverse Rear View Backup Camera System is an industrial-grade solution designed to enhance visibility and safety for various large vehicles. This system includes a 7-inch color monitor and a 1080P camera, providing clear, real-color images with a 120-degree viewing angle. The camera features an IP69K waterproof rating and night vision capabilities, ensuring reliable performance in diverse weather conditions and environments. The system is compatible with DC12-24V power input and utilizes secure 4-pin screw connectors for stable operation.
2. Package Contents
Please verify that all components listed below are included in your package:
- 7-inch HD LCD Color Monitor
- 1080P AHD Camera
- 66ft Extension Cord (4-pin)
- Remote Control
- U-type Metal Bracket (Bracket 1)
- Adjustable Stand Bracket (Bracket 2)
- Butterfly Stand Bracket (Bracket 3)
- Power Cord
- Power Cord Fuse
- Mounting Accessories (Screws, Hex Key, Washers)

3. Setup and Installation
This section outlines the steps for installing your DALLUX backup camera system. Ensure the vehicle's power is off before beginning installation.
3.1 Camera Installation
- Mount the Camera: Select a suitable location at the rear of your vehicle for optimal viewing. Secure the camera using the provided mounting hardware. The camera is designed for heavy-duty use and can withstand 10G vibration.
- Connect the Camera Cable: Connect the camera's 4-pin aviation connector to the provided 66ft extension cord. Ensure the connection is secure and waterproof. Avoid using BNC/RCA connectors as this system uses 4-pin aviation type.
- Route the Cable: Carefully route the extension cable from the camera to the monitor's intended location, ensuring it is protected from sharp edges, heat, and moving parts.

3.2 Monitor Installation
- Choose Mounting Method: The monitor comes with three bracket options (U-type metal, adjustable stand, butterfly stand) for flexible mounting on your dashboard or overhead console. Select the bracket that best suits your vehicle and desired viewing angle.
- Secure the Monitor: Attach the chosen bracket to the monitor and then secure the entire assembly to your vehicle.
- Connect Power: Connect the monitor's power cord to a DC12-24V power source in your vehicle. The monitor has a built-in protector against reversed power polarities. Use the provided power cord fuse for protection.
- Connect Camera to Monitor: Connect the other end of the 66ft extension cord to the corresponding 4-pin input on the monitor. The monitor supports up to two cameras.


4. Operating Instructions
This section details how to operate your DALLUX backup camera system.
4.1 Powering On/Off
Press the POWER button on the monitor or remote control to turn the system on or off. The monitor retains previous option settings even after being turned off.
4.2 OSD Menu Navigation
Use the MENU button on the monitor or remote to access the On-Screen Display (OSD) menu. Navigate through options using the + and - buttons, and confirm selections with the SEL or MODE button.
4.3 Image Settings
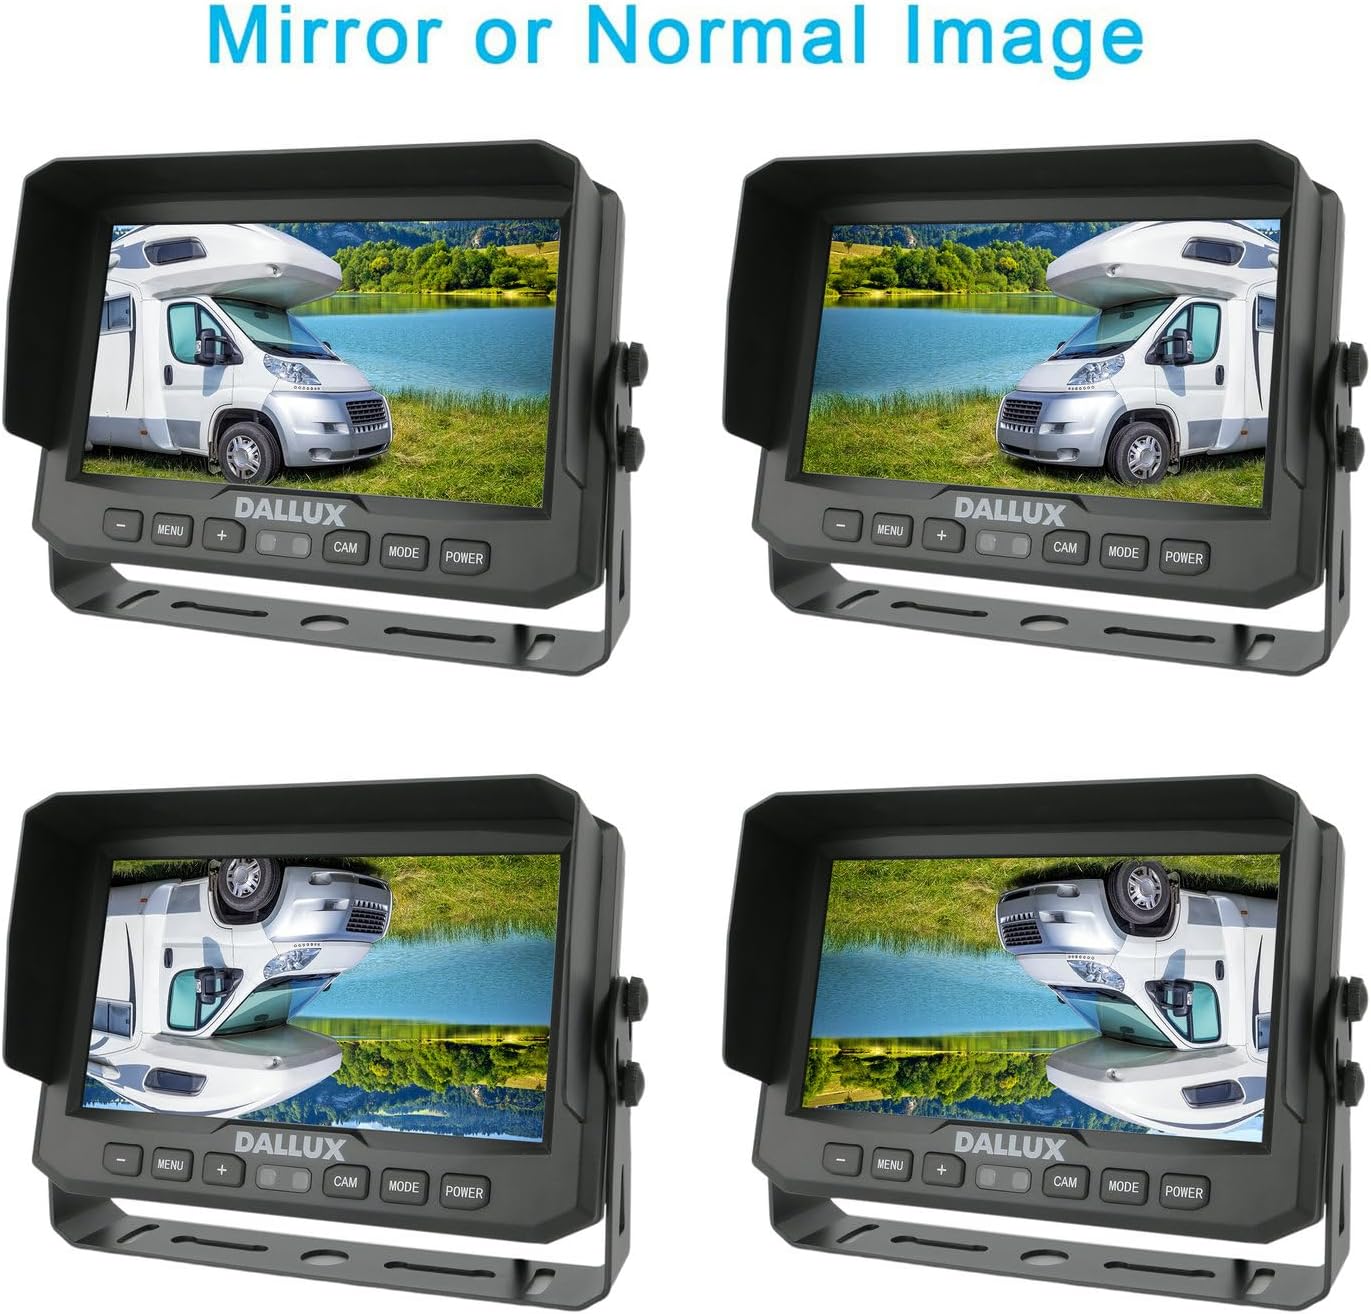
- Mirror/Non-Mirror Image: Within the OSD menu, you can set the camera's image as mirror, non-mirror, or up-side-down to suit your preference or vehicle configuration.
- Distance Grid Lines: The distance grid line feature can be turned on or off and adjusted via the OSD menu to assist with parking and maneuvering.
4.4 Camera Selection
If two cameras are connected, use the CAM or CH button on the monitor or remote to switch between camera views.
5. Maintenance
Proper maintenance ensures the longevity and optimal performance of your DALLUX camera system.
- Cleaning the Camera Lens: Regularly clean the camera lens with a soft, damp cloth to remove dirt, dust, or mud that may obstruct the view. Avoid abrasive cleaners.
- Cleaning the Monitor Screen: Use a soft, lint-free cloth to clean the monitor screen. For stubborn marks, a screen cleaner designed for electronics can be used.
- Cable Inspection: Periodically inspect all cables and connectors for signs of wear, damage, or loose connections. Ensure all 4-pin aviation connectors are securely fastened to maintain their waterproof integrity.
- Waterproof Rating: The camera has an IP69K waterproof rating, meaning it is protected against high-pressure, high-temperature jet sprays. While highly durable, avoid intentionally submerging the camera or monitor.

6. Troubleshooting
If you encounter issues with your DALLUX camera system, refer to the following troubleshooting guide:
- No Image on Monitor / Black Screen:
- Ensure the monitor is powered on and receiving power (check fuse).
- Verify all 4-pin aviation connectors are securely connected between the camera, extension cable, and monitor.
- If multiple cameras are connected, try switching camera channels.
- Fuzzy or Distorted Image / Poor Night Vision:
- Clean the camera lens thoroughly.
- Check for moisture inside the camera lens. If present, ensure the camera's seals are intact.
- Ensure the power supply to the camera and monitor is stable (DC12-24V).
- Verify the cable is not damaged or pinched.
- Image Orientation Incorrect (e.g., Upside Down, Mirrored):
- Access the OSD menu on the monitor and adjust the image settings (mirror, non-mirror, up-side-down) as needed.
- If the camera angle is incorrect, physically adjust the camera's mounting position.
- Delayed Image Display:
- Ensure the power connection is stable and providing sufficient voltage.
- Check for any loose cable connections.
- Cable Damage / Wire Burning:
- Ensure all wiring is properly insulated and routed away from heat sources, sharp edges, and areas of high friction or strain.
- If a cable is damaged, it must be replaced to prevent electrical hazards and ensure system functionality.
If these steps do not resolve the issue, please contact DALLUX customer support for further assistance.
7. Specifications
| Feature | Specification |
|---|---|
| Brand | DALLUX |
| Screen Size | 7 Inches |
| Product Dimensions (Monitor) | 13.5"L x 7.9"W x 1.5"H |
| Compatible Devices | Backup rearview camera car, RV, VAN, Pickup, Tractor, Truck, Excavator, Caravan, Skid Steer |
| Installation Type | Surface Mount |
| Voltage | DC 12-24 Volts |
| Optical Sensor Technology | CMOS |
| Lens Type | Macro lens, Wide viewing angle |
| Real Angle of View | 120 Degrees (Camera) |
| Connector Type | 4-pin wired Aviation Connector |
| Display Technology | LED |
| Video Capture Resolution | 1080p |
| Effective Still Resolution | 628 Pixels |
| Waterproof Rating (Camera) | IP69K |
| Vibration Resistance (Camera) | 10G |
| Item Weight | 1.5 Pounds |
8. Warranty Information
This DALLUX product comes with a 1-year warranty from the date of purchase. This warranty covers manufacturing defects and malfunctions under normal use. Please retain your proof of purchase for warranty claims. The warranty does not cover damage caused by improper installation, misuse, accidents, or unauthorized modifications.
9. Customer Support
For technical assistance, troubleshooting not covered in this manual, or warranty inquiries, please contact DALLUX customer support. Refer to the product packaging or the DALLUX official website for the most current contact information.
When contacting support, please have your product model number and purchase date available to expedite service.