1. Introduction
This manual provides essential instructions for the safe installation, operation, and maintenance of your KING KB2407-1-B2-ECO ECO2S 7500W Garage Heater. Please read this manual thoroughly before installation and use, and retain it for future reference. Proper installation and adherence to these instructions are crucial for optimal performance and safety.
2. Important Safety Information
WARNING: Risk of Fire, Electric Shock, or Injury to Persons.
- Read all instructions before installing or using this heater.
- This heater is hot when in use. To avoid burns, do not let bare skin touch hot surfaces. Keep combustible materials, such as furniture, pillows, bedding, papers, clothes, and curtains, at least 3 feet (0.9 m) from the front of the heater and keep them away from the sides and rear.
- Extreme caution is necessary when any heater is used by or near children or invalids and whenever the heater is left operating and unattended.
- Do not operate any heater with a damaged cord or plug or after the heater malfunctions, has been dropped, or damaged in any manner. Discard heater or return to authorized service facility for examination and/or repair.
- Do not use outdoors.
- This heater is not intended for use in bathrooms, laundry areas, and similar indoor locations. Never locate heater where it may fall into a bathtub or other water container.
- Do not run cord under carpeting. Do not cover cord with throw rugs, runners, or similar coverings. Arrange cord away from traffic area and where it will not be tripped over.
- To disconnect heater, turn controls to off, then remove plug from outlet.
- Do not insert or allow foreign objects to enter any ventilation or exhaust opening as this may cause an electric shock or fire, or damage the heater.
- To prevent a possible fire, do not block air intakes or exhaust in any manner. Do not use on soft surfaces, like a bed, where openings may become blocked.
- A heater has hot and arcing or sparking parts inside. Do not use it in areas where gasoline, paint, or flammable vapors or liquids are used or stored.
- Use this heater only as described in this manual. Any other use not recommended by the manufacturer may cause fire, electric shock, or injury to persons.
- Always plug heaters directly into a wall outlet/receptacle. Never use with an extension cord or relocatable power tap (outlet/power strip).
- This heater is for 240V applications only.
3. Package Contents
Verify that all components are present and undamaged. If any items are missing or damaged, contact your retailer.
- KING KB2407-1-B2-ECO ECO2S Garage Heater (7500W / 240V)
- Universal Wall/Ceiling Mounting Bracket
- Remote Control
- User Manual (this document)

Image 3.1: The KING KB2407-1-B2-ECO ECO2S Garage Heater, showing the main unit, the universal mounting bracket, and the remote control.
4. Setup and Installation
Installation must be performed by a qualified electrician in accordance with all local and national electrical codes.
4.1 Mounting Location
- Select a location where the heater is protected from water spray, dripping water, and excessive dust.
- Ensure adequate clearance from combustible materials (minimum 3 feet from front, sides, and rear).
- Mount the heater securely to a structural member (stud, joist) capable of supporting its weight (approximately 33.5 lbs).
- The universal bracket allows for wall or ceiling mounting.
4.2 Mounting the Heater
- Attach the universal mounting bracket to a sturdy wall stud or ceiling joist using appropriate fasteners (not included). Ensure the bracket is level and securely fastened.
- Lift the heater and align the hanging hooks on top of the heater with the slots on the mounting bracket.
- Slide the heater onto the bracket until it is securely seated.
- Adjust the heater's angle as desired and secure it using the provided hardware to prevent accidental movement.
4.3 Electrical Wiring
DANGER: Disconnect power at the main service panel before attempting any wiring to prevent electric shock.
- This heater requires a dedicated 240V circuit.
- The heater is rated for 7500W, drawing approximately 31.25 Amps. A circuit breaker and wiring sized appropriately for this load are required (e.g., 40 Amp breaker with 8-gauge wire, consult local codes).
- Access the internal wiring compartment by removing the appropriate cover plate on the heater.
- Connect the 240V supply wires to the heater's terminals as indicated in the wiring diagram inside the heater's compartment. Ensure proper grounding.
- Secure all wiring connections and replace the cover plate.

Image 4.1: Rear view of the heater, illustrating the fan and location of electrical warning labels. Ensure all wiring is done by a qualified professional.
5. Operation
Once properly installed and powered, the heater can be operated using its integrated control panel or the remote control.
5.1 Control Panel Overview

Image 5.1: Front view of the heater, highlighting the digital display and control buttons for direct operation.
The control panel features a digital display and several buttons:
- Digital Display: Shows current temperature, set temperature, and mode indicators.
- POWER Button: Turns the heater ON/OFF.
- MODE Button: Cycles through heating modes (ECO, HIGH, FAN ONLY).
- UP/DOWN Arrows: Adjusts the set temperature.
- TIMER Button: Activates or adjusts the timer function.
5.2 Remote Control
The included remote control provides convenient access to all heater functions from a distance.
- Ensure batteries are correctly installed in the remote control.
- Point the remote control towards the heater's control panel for optimal signal reception.
- Buttons on the remote mirror the functions of the control panel (Power, Mode, Up/Down Temperature, Timer).
5.3 Operating Modes
- ECO Mode: The heater automatically selects the lowest wattage needed to maintain the set temperature, optimizing energy consumption.
- HIGH Heat Mode: The heater operates at full wattage (7500W) to quickly reach and maintain the set temperature.
- FAN ONLY Mode: The fan operates without engaging the heating elements, providing air circulation.
5.4 Setting the Temperature
- Press the POWER button to turn the heater on.
- Use the UP or DOWN arrow buttons to set your desired temperature. The display will show the set temperature, then revert to the ambient temperature.
- The heater will automatically cycle on and off to maintain the set temperature.
5.5 Timer Function
The timer allows you to set a duration for the heater to operate before automatically turning off.
- With the heater on, press the TIMER button.
- Use the UP or DOWN arrow buttons to set the desired operating time (e.g., 1-12 hours).
- The heater will operate for the set duration and then power off.
6. Maintenance
WARNING: Always disconnect power to the heater at the main service panel before performing any maintenance or cleaning.
- Cleaning: Periodically clean the exterior of the heater with a soft, damp cloth. Do not use abrasive cleaners or solvents.
- Dust Removal: Use a vacuum cleaner with a brush attachment to remove dust from the grilles and internal components. Ensure the fan blades are free of obstructions.
- Inspection: Regularly inspect the power cord and plug for any signs of damage. If damage is found, discontinue use and contact a qualified electrician for repair.
- No lubrication is required for the motor.
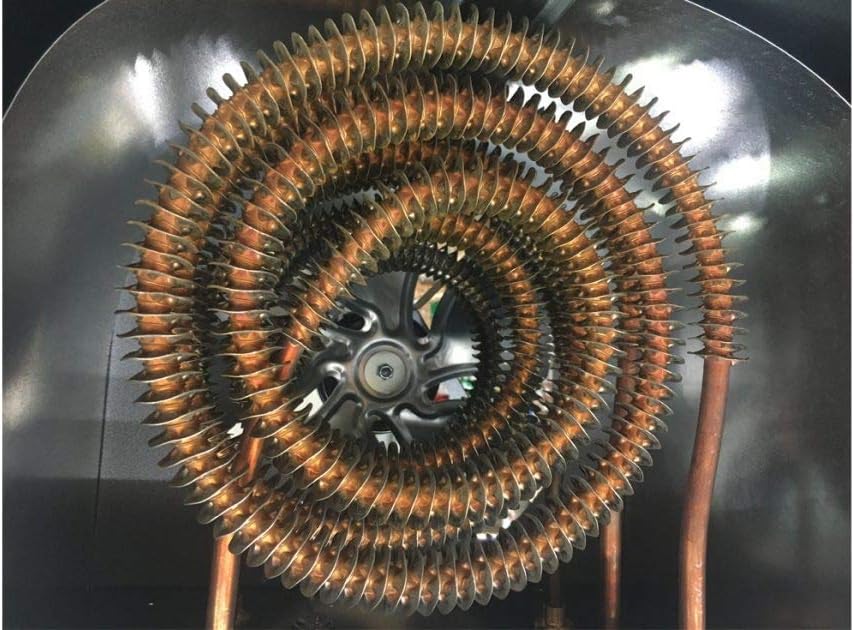
Image 6.1: Close-up of the spiral steel heating elements. Regular cleaning helps maintain efficiency and prolong heater life.
7. Troubleshooting
If your heater is not operating correctly, consult the following table before contacting customer support.
| Problem | Possible Cause | Solution |
|---|---|---|
| Heater does not turn on. | No power supply. Circuit breaker tripped. Overheat protection activated. | Ensure heater is properly wired and connected to 240V supply. Check and reset the circuit breaker. Turn off heater, allow to cool for 30 minutes, then restart. Clear any obstructions. |
| Heater produces insufficient heat. | Incorrect mode selected. Set temperature too low. Room size exceeds heating capacity. | Ensure HIGH or ECO mode is selected, not FAN ONLY. Increase the set temperature. Verify the heater's coverage area (700 sq ft for 7500W) is appropriate for your space. |
| Fan runs but no heat. | FAN ONLY mode selected. Heating elements malfunction. | Switch to ECO or HIGH heat mode. If problem persists, contact a qualified technician. |
| Remote control not working. | Dead batteries. Obstruction between remote and heater. | Replace remote control batteries. Ensure a clear line of sight to the heater's control panel. |

Image 7.1: Heating coverage chart for various KING garage heater wattages. The 7500W model covers up to 750 sq ft.
8. Specifications
| Feature | Detail |
|---|---|
| Model | KB2407-1-B2-ECO |
| Brand | KING |
| Wattage | 7500 Watts |
| Voltage | 240 Volts |
| Amperage | 31.25 Amps |
| Heating Coverage | Up to 700 ft² (based on 8 ft ceiling height and FHA standard insulation values) |
| Special Features | Remote Control, Built-In Fan Delay, Summer Fan Only & Timer Modes, ECO2S Electronic Thermostat |
| Mounting Type | Universal Wall/Ceiling Bracket |
| Product Dimensions | 13.5 x 15 x 16.5 inches |
| Item Weight | 33.5 pounds |
| UPC | 093319220405 |
9. Warranty and Support
For warranty information or technical support, please refer to the warranty card included with your product or visit the manufacturer's official website. Keep your purchase receipt as proof of purchase for warranty claims.
Manufacturer: King Electric
For further assistance, contact King Electric customer service.


