1. Introduction
This manual provides essential instructions for the installation, operation, and maintenance of your ANNKE i61dr 1080P WiFi IP Security Camera. Please read this manual thoroughly before using the product to ensure proper setup and functionality. Keep this manual for future reference.
2. Package Contents
Verify that all items listed below are present in your package. If any items are missing or damaged, please contact customer support.

Image: Contents of the ANNKE i61dr camera package, including the camera, power adapter, Ethernet cable, mounting hardware, drill template, and user manual.
- ANNKE i61dr 1080P WiFi IP Security Camera
- Power Adapter (DC12V)
- Ethernet Cable
- Mounting Screws and Wall Plugs
- Drill Template
- User Manual
- Software CD
3. Product Overview
Familiarize yourself with the components and indicators of your ANNKE i61dr camera.
Front View
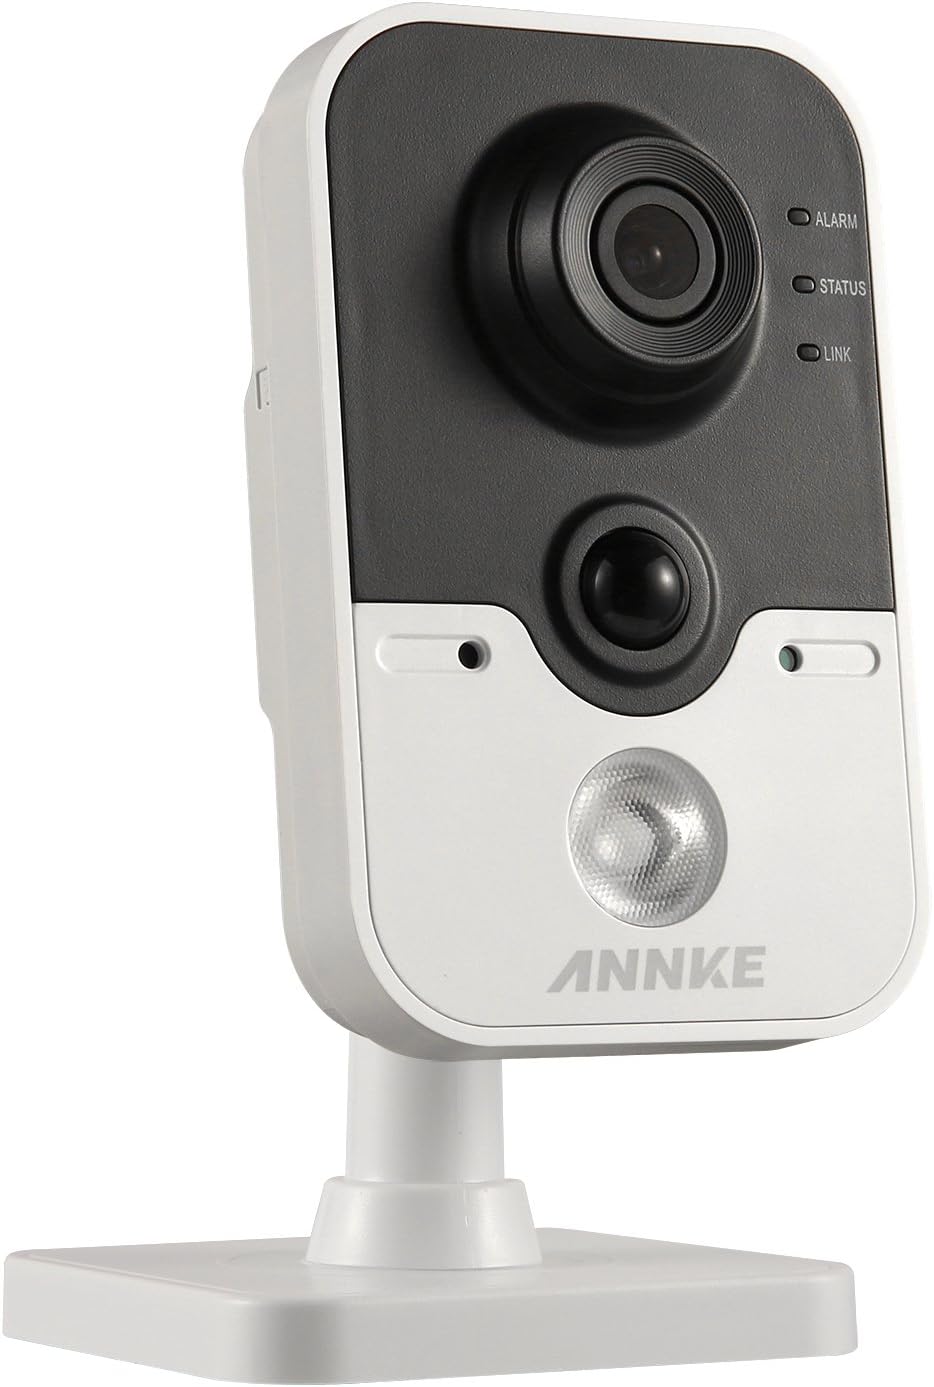
Image: The front of the ANNKE i61dr camera, featuring the main camera lens, a passive infrared (PIR) sensor, and three LED indicators labeled ALARM, STATUS, and LINK.
- Camera Lens: Captures 1080p HD video.
- PIR Sensor: Detects heat signatures for accurate motion detection.
- ALARM LED: Indicates alarm status.
- STATUS LED: Indicates camera operational status.
- LINK LED: Indicates network connectivity status.
Rear View

Image: The rear of the ANNKE i61dr camera, displaying the LAN port, WPS/RST button, Alarm I/O terminals, and DC12V power input.
- LAN Port: For wired Ethernet connection and Power over Ethernet (PoE).
- WPS/RST Button: Used for WPS Wi-Fi setup or to reset the camera to factory defaults.
- ALARM I/O: Terminals for external alarm devices.
- DC12V Power Input: Connects to the included power adapter.
Side View

Image: The side of the ANNKE i61dr camera, showing the accessible SD card slot for local storage.
- SD Card Slot: Insert a microSD card (not included) for local video storage.
4. Setup
Follow these steps to set up your ANNKE i61dr camera.
4.1 Powering the Camera
- Connect the included power adapter to the DC12V input port on the back of the camera.
- Plug the power adapter into a wall outlet.
- Alternatively, if using Power over Ethernet (PoE), connect an Ethernet cable from a PoE-enabled switch or injector to the LAN port.
4.2 Network Connection
The camera supports both Wi-Fi and wired Ethernet connections.
Wi-Fi Setup (One-Touch or WPS)
- Ensure your router supports WPS or follow the camera's app instructions for one-touch Wi-Fi setup.
- For WPS, press the WPS button on your router, then press the WPS/RST button on the camera within 2 minutes. The LINK LED will indicate successful connection.
- For app-guided setup, download the ANNKE app (compatible with Android) and follow the on-screen instructions to connect the camera to your Wi-Fi network.
Wired Ethernet Setup
- Connect an Ethernet cable from your router or network switch to the LAN port on the back of the camera.
- The camera will automatically obtain an IP address.
4.3 Mounting the Camera
The camera is designed for ceiling mounting but can also be placed on a flat surface.
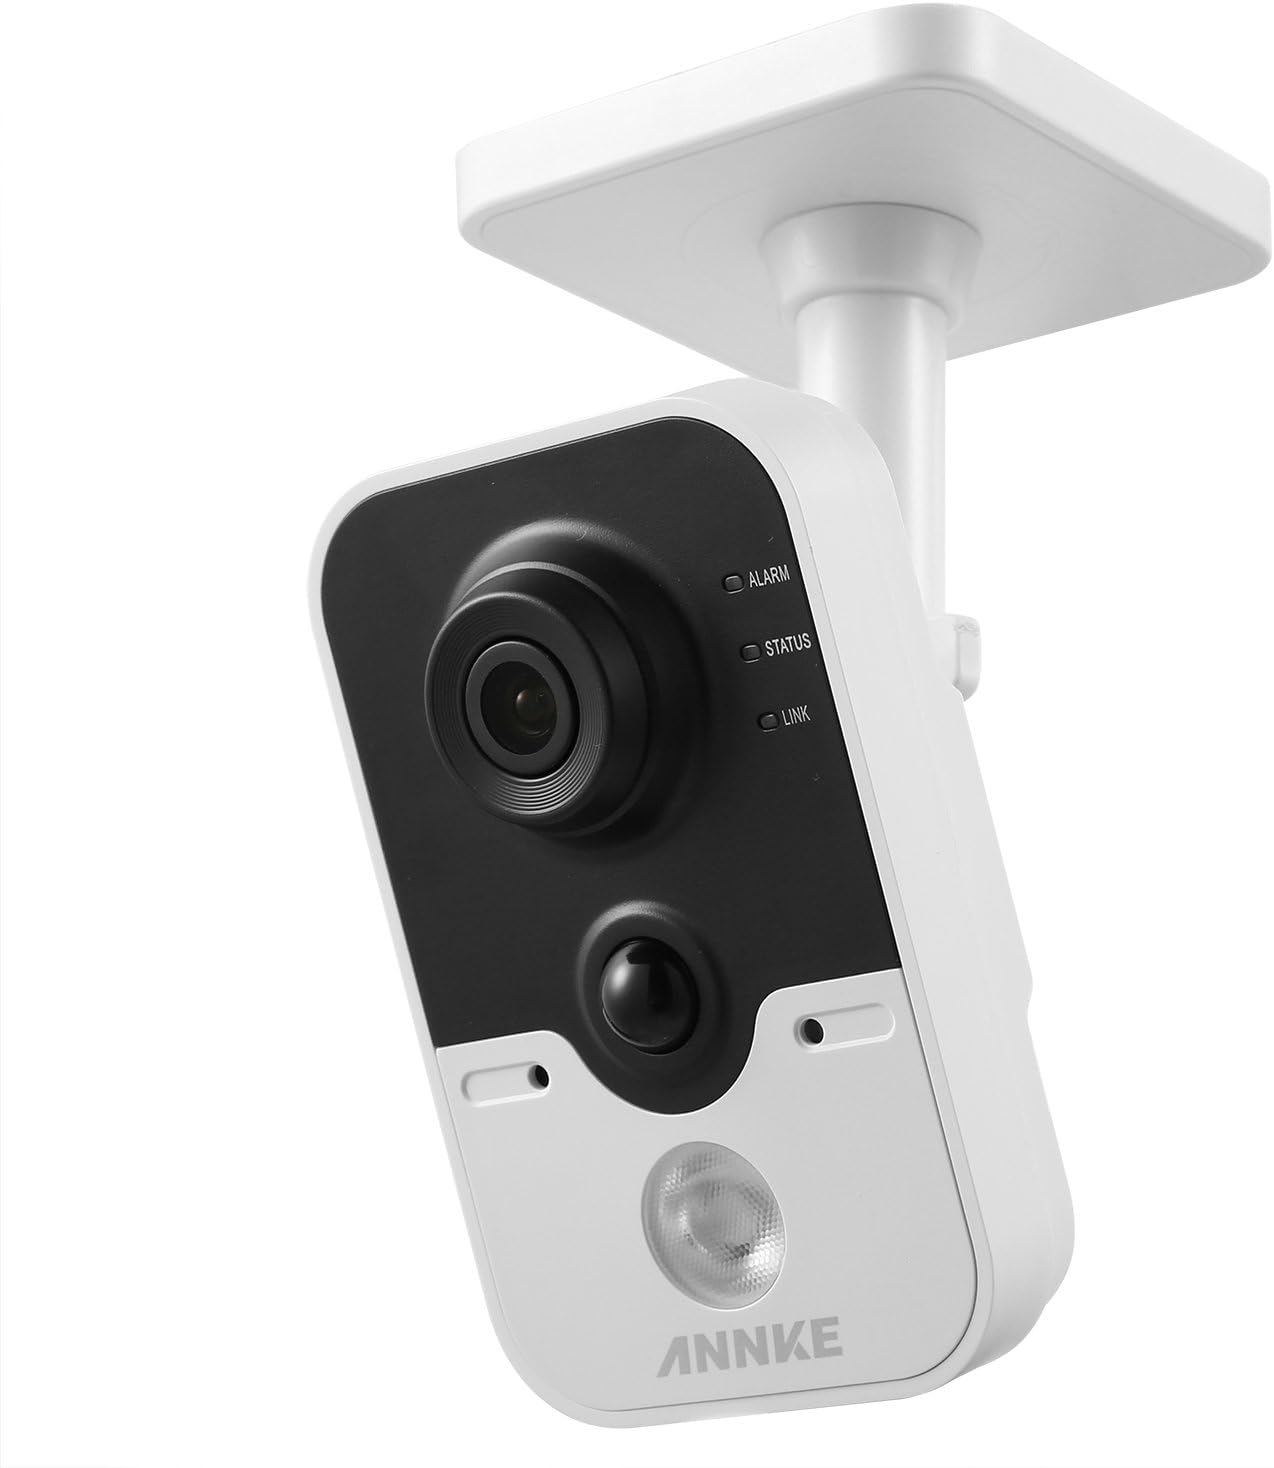
Image: The ANNKE i61dr camera shown mounted on a ceiling, demonstrating its intended installation method.
- Choose a suitable location for optimal viewing and network signal.
- Use the provided drill template to mark the screw holes on the mounting surface.
- Drill pilot holes and insert wall plugs if mounting on drywall or masonry.
- Secure the camera's base to the surface using the provided screws.
- Adjust the camera angle as needed.
5. Operating Instructions
Once set up, your ANNKE i61dr camera offers various monitoring and recording features.
5.1 Live View and Playback
- Access the live 1080p HD video feed through the ANNKE mobile application or compatible VCA NVR system.
- Review recorded footage stored on the microSD card or cloud storage (if subscribed).
5.2 Motion and PIR Detection
- The camera utilizes both pixel-based motion detection and advanced PIR (Passive Infrared) detection to minimize false alarms.
- Configure detection zones and sensitivity settings within the ANNKE app.
- Receive email alerts or push notifications to your smartphone upon detection of activity.
5.3 Two-Way Audio
- Use the built-in microphone and speaker to communicate with individuals near the camera via the mobile app.
5.4 Video Compression
- The camera uses H.264 video compression for efficient storage and bandwidth usage while maintaining high video quality.
5.5 Intrusion Detection
- Advanced intrusion detection features are available, compatible with VCA NVR systems for enhanced security monitoring.
6. Maintenance
Regular maintenance ensures optimal performance and longevity of your camera.
- Cleaning: Gently wipe the camera lens and body with a soft, dry cloth. Avoid abrasive cleaners or solvents.
- Firmware Updates: Periodically check for and install firmware updates through the ANNKE app to ensure the latest features and security enhancements.
- Network Stability: Ensure your Wi-Fi network is stable and has sufficient bandwidth for continuous video streaming.
- Storage Management: If using a microSD card, regularly check its status and ensure there is sufficient space for recordings. Back up important footage as needed.
7. Troubleshooting
Refer to this section for solutions to common issues.
7.1 No Power
- Check Power Connection: Ensure the power adapter is securely plugged into the camera and a working electrical outlet.
- Verify PoE: If using PoE, confirm the Ethernet cable is connected to a PoE-enabled port and the PoE device is functioning.
7.2 No Network Connection
- Wi-Fi Signal: Ensure the camera is within range of your Wi-Fi router. Relocate the camera or router if necessary.
- Router Settings: Verify your router's Wi-Fi settings (SSID, password) are correct.
- Reset Camera: Press and hold the WPS/RST button for approximately 10 seconds to reset the camera to factory defaults, then attempt setup again.
- Ethernet Cable: If using a wired connection, ensure the Ethernet cable is properly connected and undamaged.
7.3 Poor Video Quality
- Clean Lens: Gently clean the camera lens with a soft cloth.
- Network Bandwidth: Ensure your internet connection has sufficient upload speed for 1080p video streaming.
- Lighting: Adjust camera placement to optimize lighting conditions.
7.4 Motion Detection Not Working
- Sensitivity Settings: Adjust motion detection sensitivity in the ANNKE app.
- Detection Zones: Ensure detection zones are correctly configured to cover the desired areas.
- Obstructions: Check for any physical obstructions blocking the camera's view or the PIR sensor.
8. Specifications
| Feature | Specification |
|---|---|
| Model Number | I61DR |
| Video Resolution | 1080p HD |
| Connectivity | Wireless (Wi-Fi), Wired (Ethernet/PoE) |
| Power Source | DC12V Power Adapter, Power over Ethernet (PoE) |
| Motion Detection | PIR Detection, Pixel-based Motion Detection |
| Audio | Two-Way Audio |
| Video Compression | H.264 |
| Storage | MicroSD Card Slot (card not included) |
| Mounting Type | Ceiling Mount (also suitable for flat surfaces) |
| Dimensions (L x W x H) | 13 x 7 x 9 cm |
| Material | Plastic |
9. Warranty and Support
ANNKE products are designed for reliability and performance. For warranty information, technical support, or service inquiries, please refer to the official ANNKE website or contact their customer service directly. Keep your purchase receipt as proof of purchase for warranty claims.


