Introduction
This manual provides detailed instructions for the setup, operation, and maintenance of your SINGER 7640 Confidence Computerized Sewing Machine. Designed for ease of use, this machine offers a wide range of features to enhance your sewing projects, from basic repairs to intricate decorative work. Please read this manual thoroughly before operating the machine to ensure safe and efficient use.
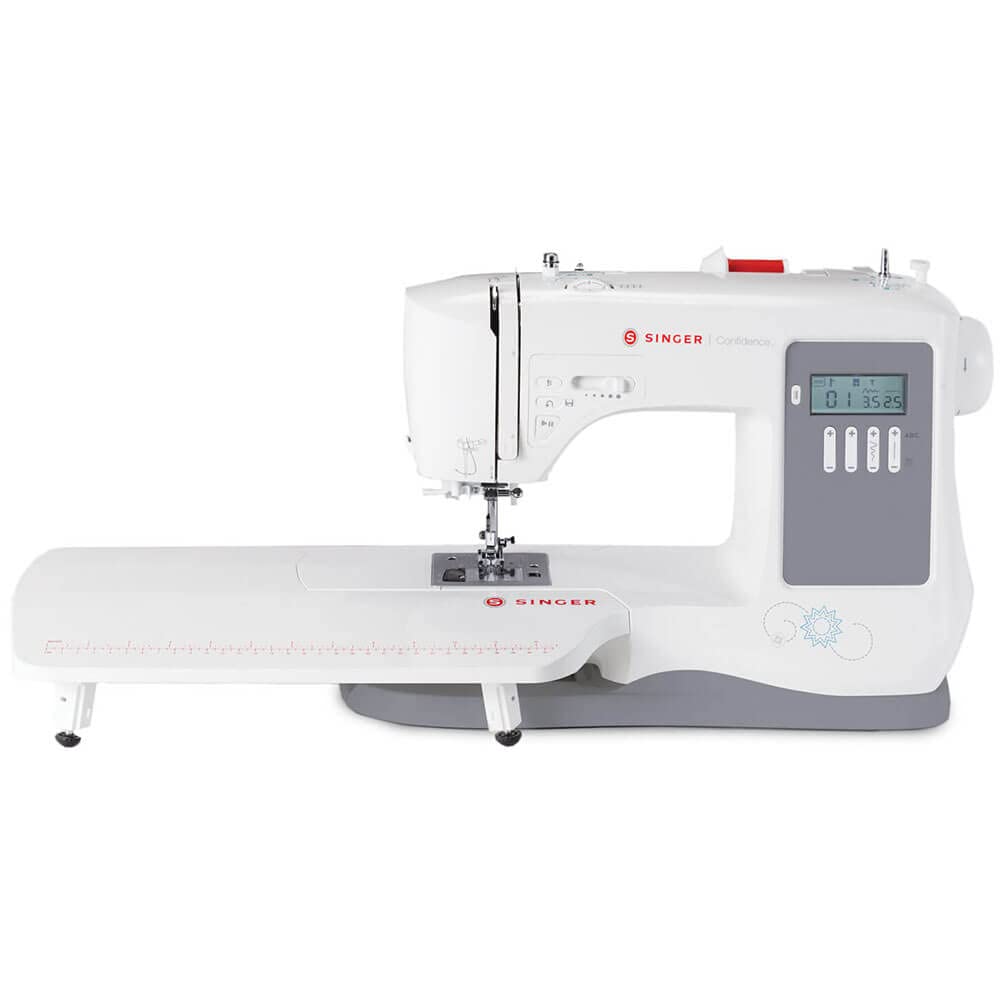
Figure 1: Overview of the SINGER 7640 Confidence Computerized Sewing Machine.
Setup
1. Unpacking and Initial Inspection
Carefully remove the machine from its packaging. Ensure all components and accessories are present. The included accessories are located in the storage area at the front of your machine.

Figure 2: Included accessories such as various presser feet, bobbins, needles, and the foot pedal.
2. Power Connection
Connect the power cord to the machine and then to a suitable electrical outlet. The machine operates on corded electric power.
3. Bobbin Winding and Insertion
The SINGER 7640 uses Class 15 Transparent bobbins. Wind a bobbin according to the instructions in the full owner's manual. The top drop-in bobbin system allows for easy insertion and monitoring of your thread supply through the transparent cover.
4. Threading the Machine
Follow the numbered threading path on the machine. Utilize the built-in needle threader for effortless threading of the needle's eye, reducing eye strain and saving time.

Figure 3: Proper threading of the upper thread through the needle area.
5. Attaching Presser Feet
The machine features snap-on presser feet for easy removal and attachment. Select the appropriate presser foot for your desired sewing technique and snap it into place.
6. Extension Table Setup
For larger projects like quilts, attach the included extension table to provide a larger, level sewing surface. Slide off the removable storage compartment to access the free arm, then attach the extension table.
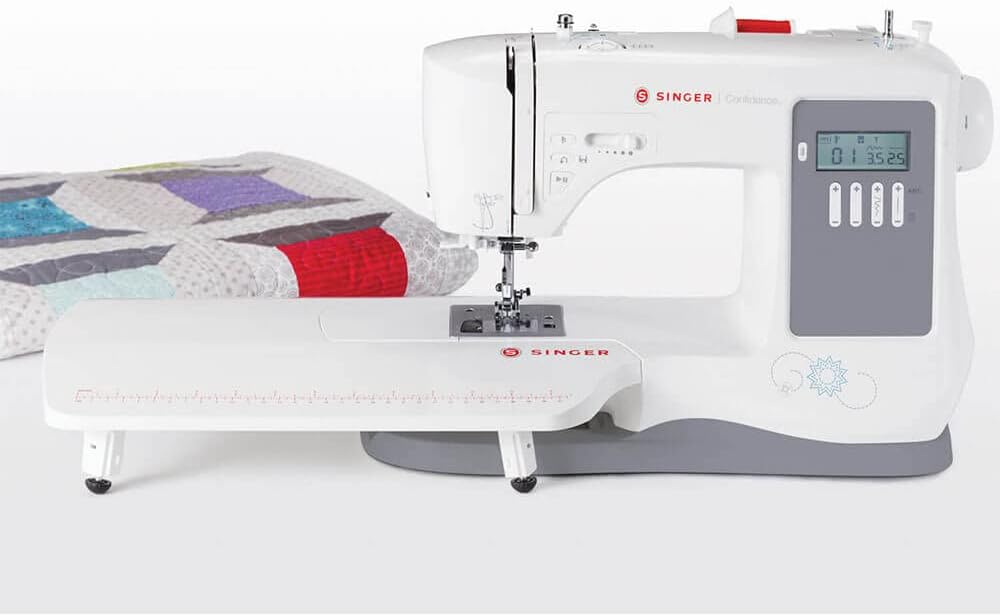
Figure 4: The sewing machine with the extension table providing an expanded work area.
Operating Instructions
1. Stitch Selection and Adjustment
The SINGER 7640 offers 200 built-in stitches and 379 stitch applications. Use the touch buttons to select your desired stitch. The LCD screen clearly displays the selected stitch, along with its optimum length and width settings.

Figure 5: The LCD screen displaying stitch number, width, and length settings.
- Adjustable Stitch Length: Customize the distance between stitches up to 4.5mm for various techniques like applique or basting.
- Adjustable Stitch Width: Modify the stitch width up to 7mm to make stitches narrower or wider as needed.
- Built-In Lettering: Personalize projects with words, phrases, or monograms using the alpha-numeric patterns.
- Temporary Memory: Combine stitch patterns into unique sequences with a 40-character memory capacity.
2. Sewing Controls
- Start/Stop Button: Allows you to sew without the foot control. Press to start, press again to stop.
- Needle Up/Down: Select the needle's stopping position. The programmable needle up/down feature is useful for applique and topstitching.
- Reverse: Press the reverse button to secure seams at the beginning and end of your stitching.
- Speed Control: Adjust the maximum sewing speed using the mechanical speed control lever for intricate or long seams.
- Drop Feed: Lower the feed teeth for button sewing or free-motion sewing by sliding the drop feed lever.
- Twin-Needle Function: Reduces stitch width for sewing with a twin needle, ensuring needles clear the presser foot.
3. One-Step Buttonhole
The machine features 8 styles of one-step buttonholes. Place the button in the buttonhole foot, and the machine will sew a perfectly sized buttonhole automatically, ensuring consistent results.
4. Free Arm Sewing
Remove the storage compartment to access the free arm, which simplifies sewing trouser hems, sleeve cuffs, and other tubular or small projects.
Maintenance
1. Cleaning
Regularly clean the bobbin area and feed dogs to remove lint and thread buildup. Use a soft brush or lint brush. Keep the machine covered with the provided soft dust cover when not in use to prevent dust accumulation.
2. Needle Replacement
Replace the needle frequently, especially when working on new projects or if you notice skipped stitches or fabric damage. Always use the correct needle type and size for your fabric.
3. Bobbin Type
For optimal performance, use SINGER or INSPIRA branded Class 15 Transparent bobbins.
Troubleshooting
This section addresses common issues you might encounter. For more detailed troubleshooting, refer to the full owner's manual or the online owner's class.
- Skipped Stitches: Ensure the needle is inserted correctly, is not bent or dull, and is the appropriate type for your fabric. Re-thread the machine completely.
- Thread Breakage: Check for proper threading, correct needle size, and tension settings. Ensure the thread is not old or damaged.
- Fabric Not Feeding: Verify that the presser foot is lowered and the feed dogs are not dropped (unless free-motion sewing). Adjust stitch length if necessary.
- Machine Jams: Remove the bobbin case and clear any tangled threads. Ensure the bobbin is wound evenly and inserted correctly.
- Difficulty with Thick Fabrics: While the machine has a heavy-duty metal frame, extremely thick or dense fabrics may require specific needles, slower speeds, or manual assistance to feed. Avoid forcing the fabric.
- Auto Needle Threader Issues: Ensure the needle is in its highest position and the thread is correctly positioned in the guide. If issues persist, manually thread the needle.
Specifications
| Feature | Detail |
|---|---|
| Model Number | 7640 |
| Product Dimensions | 9.45 x 27.17 x 0.98 inches |
| Item Weight | 17.3 pounds |
| Manufacturer | SINGER |
| Material | Metal (internal frame) |
| Power Source | Corded Electric |
| Built-In Stitches | 200 |
| Stitch Applications | 379 |
| One-Step Buttonholes | 8 styles |
| Max Stitch Length | 4.5mm |
| Max Stitch Width | 7mm |
| Sewing Space (Needle to Tower) | 6.4 inches |
| Bobbin Class | 15 Transparent |
| Memory Capability | 40 characters (for stitch sequences) |
| UPC | 037431885982 |
Warranty and Support
The SINGER 7640 Confidence Computerized Sewing Machine comes with a limited warranty: 1 year for electrical components, 5 years for mechanical components, and 25 years for the machine head. For complete warranty terms and conditions, please refer to the official SINGER website or the documentation included with your machine.
For additional assistance, SINGER provides an online Owner's Class video. This resource covers machine basics such as correct threading, stitch selection, buttonhole creation, and needle changes. It is available online for your convenience.
For further support, please visit the official SINGER website or contact SINGER customer service.