Introduction
This manual provides essential information for the safe and efficient operation of your Onkyo SR-211MPRO Surround Processor. Please read it thoroughly before using the unit and retain it for future reference.
Product Overview and Features
The Onkyo SR-211MPRO is a high-quality surround sound processor designed for integration into your audio-visual system. It is part of the INTEC275 series and offers advanced audio processing capabilities.
- Integrated Dolby Pro Logic circuit with built-in center and rear channel amplifiers.
- Equipped with an S-terminal 3-system AV selector for versatile connectivity.
- Features a 3-band tone control for precise audio customization.
- Allows for adjustment of delay time and independent control of center/rear channel levels.
- Remote control compatibility with Onkyo models A-911M, A-911MLTD, and R-811M.
Setup
1. Unpacking
Carefully remove the SR-211MPRO from its packaging. Ensure all accessories are present. Keep the packaging for potential future transport or service.
2. Placement
Place the unit on a stable, level surface with adequate ventilation. Avoid direct sunlight, heat sources, and areas with high humidity or dust. Do not block ventilation openings.
3. Connections
Connect your audio and video sources (e.g., DVD player, TV) to the appropriate input terminals on the rear of the SR-211MPRO using S-terminal or RCA cables. Connect your main amplifier and speakers to the output terminals. Ensure all connections are secure before powering on.
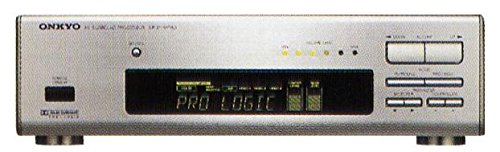
Front view of the Onkyo SR-211MPRO Surround Processor, showing its controls and display. This image illustrates the general appearance of the unit for connection reference.
4. Power Connection
Once all audio/video connections are made, plug the power cord into a suitable AC outlet. Ensure the unit's power switch is in the OFF position before plugging it in.
Operating Instructions
1. Power On/Off
Press the POWER button on the front panel or the remote control to turn the unit ON or OFF.
2. Source Selection
Use the INPUT SELECTOR buttons on the front panel or remote to choose your desired audio/video source (e.g., CD, DVD, VCR).
3. Volume Control
Adjust the MASTER VOLUME knob on the front panel or the VOLUME +/- buttons on the remote control to set the overall sound level.
4. Surround Mode Selection
Engage the Dolby Pro Logic mode for surround sound processing. Refer to the display for the active mode. Adjust delay time and center/rear levels as needed for optimal sound staging.
5. Tone Control
Utilize the BASS, MID, and TREBLE controls to fine-tune the audio characteristics to your preference.
Maintenance
Cleaning
Wipe the unit with a soft, dry cloth. For stubborn stains, use a cloth lightly dampened with water and a mild detergent, then wipe dry. Do not use abrasive cleaners, solvents, or alcohol, as these can damage the finish.
Storage
If storing the unit for an extended period, disconnect it from the power outlet and store it in a cool, dry place, away from direct sunlight and extreme temperatures.
Troubleshooting
- No Power: Ensure the power cord is securely plugged into both the unit and the AC outlet. Check if the power switch is ON.
- No Sound: Verify that the correct input source is selected. Check all audio cable connections between the SR-211MPRO, your sources, and your main amplifier/speakers. Ensure the volume is not set to minimum or muted.
- Distorted Sound: Check speaker connections for proper polarity. Reduce the volume if it's too high. Ensure source components are functioning correctly.
- Remote Control Not Working: Check the batteries in the remote control and replace them if necessary. Ensure there are no obstructions between the remote and the unit's remote sensor.
If problems persist, consult a qualified service technician.
Specifications
| Model | SR-211MPRO |
| Type | Surround Processor |
| Series | INTEC275 Series |
| Key Features | Dolby Pro Logic, S-terminal 3-system AV selector, 3-band tone control, Delay time/Center/Rear level control |
| First Available on Amazon.co.jp | 2016/12/07 |
Warranty and Support
For warranty information and technical support, please refer to the documentation provided at the time of purchase or contact your retailer or the official Onkyo customer support. Keep your proof of purchase for warranty claims.


