
1. Important Safety Information
Read all instructions before using this machine. Keep this manual for future reference. Always follow basic safety precautions to reduce the risk of fire, electric shock, and injury to persons.
- Always disconnect the machine from the electrical outlet immediately after using and before cleaning, servicing, or making any adjustments.
- Do not operate the machine with a damaged cord or plug, or if it has been dropped or damaged.
- Keep fingers away from all moving parts. Special care is required around the sewing machine needle.
- Use only attachments recommended by the manufacturer.
- Never drop or insert any object into any opening.
- Do not use outdoors.
- Do not operate where aerosol (spray) products are being used or where oxygen is being administered.
2. Product Overview
The Yamata FY2100 series industrial overlock sewing machine is designed for high-speed, efficient overlocking operations. It features a robust machine head, an Ikonix servo motor for precise speed control, and an integrated LED light for improved visibility.
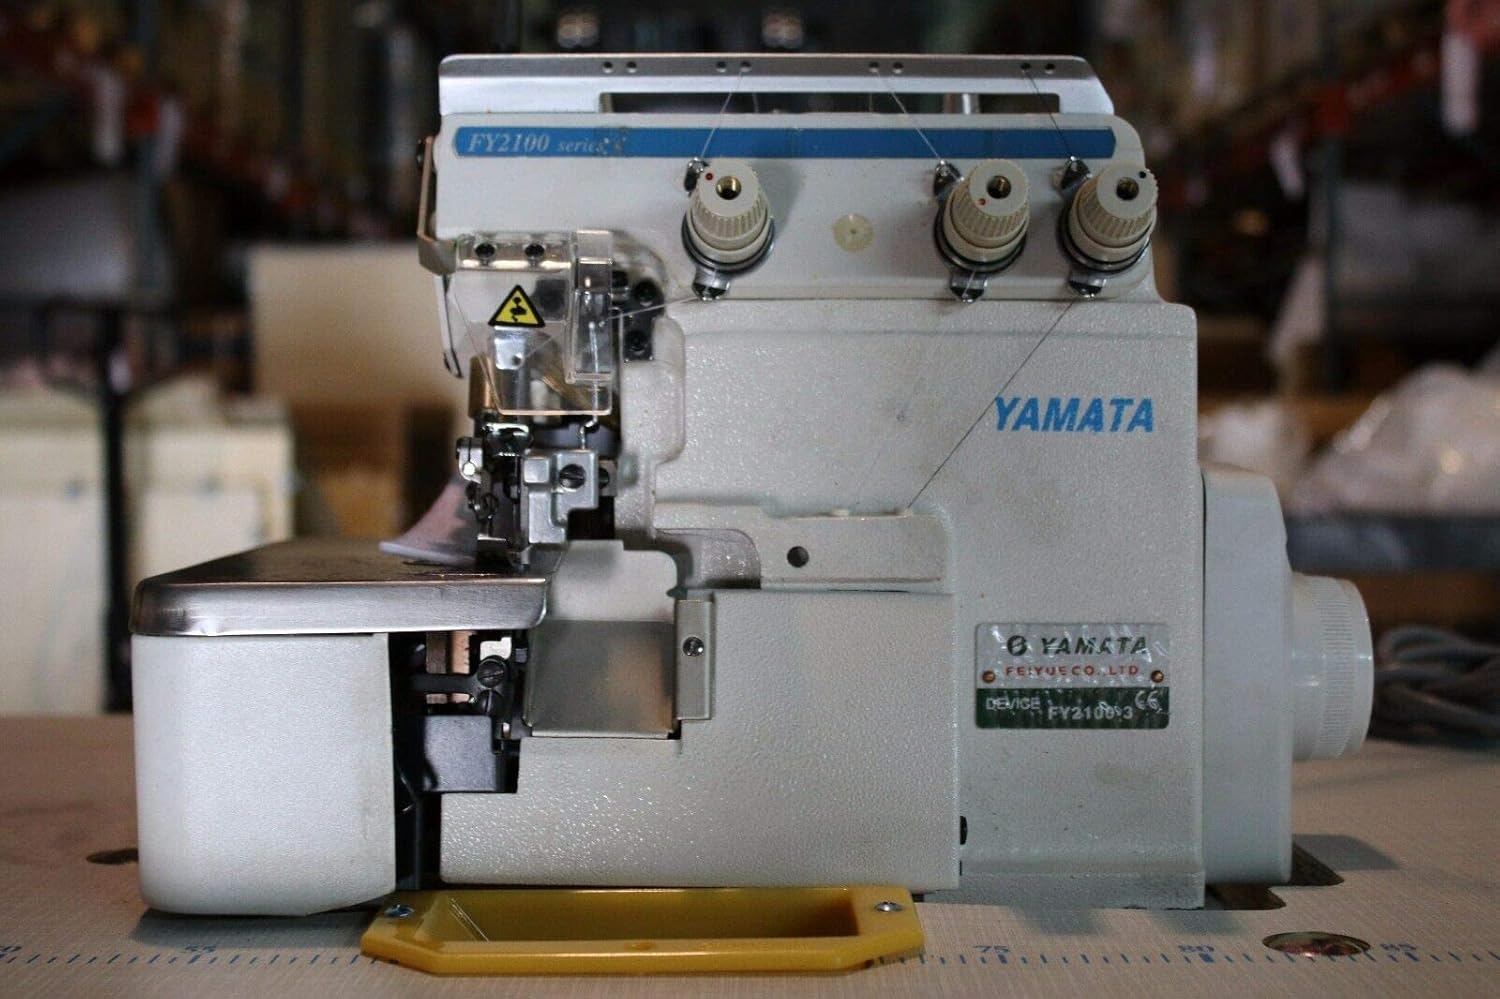
Figure 2.1: Front view of the Yamata FY2100 industrial overlock sewing machine head. This image displays the main body of the sewing machine, including the needle area, presser foot, and thread tension dials.

Figure 2.2: Side view of the Yamata FY2100 industrial overlock sewing machine head. This perspective highlights the machine's profile and the location of the handwheel and motor connection point.

Figure 2.3: Close-up view of the Yamata FY2100 series machine head, showing the threading guides and tension discs. This detailed shot provides a clearer view of the upper threading path and the adjustment knobs.
3. Setup and Installation
3.1 Machine Head Placement
Carefully place the machine head onto a sturdy K.D. (knock-down) table designed for industrial sewing machines. Ensure the machine is stable and level.
3.2 Servo Motor Installation
The Ikonix servo motor provides variable speed control and energy efficiency. Mount the motor securely under the table, aligning the motor pulley with the machine's handwheel pulley. Use the provided belt to connect the two pulleys. Ensure the belt tension is appropriate – not too tight to strain the motor, and not too loose to slip.

Figure 3.1: Ikonix 550W servo motor with control box and mounting hardware. This image shows the motor unit, its power switch, and various components required for installation, including bolts and washers.
3.3 LED Light Installation
Attach the LED light to the machine head using its magnetic base. Position the flexible arm to illuminate the needle area effectively. Plug the LED light's power cord into an appropriate electrical outlet.

Figure 3.2: Flexible LED light with magnetic base and power plug. This image displays the complete LED lighting unit, designed to provide illumination to the sewing area.
3.4 Power Connection
Connect the servo motor's power cord to a grounded electrical outlet. Ensure the voltage matches the motor's requirements (110V as indicated on the motor). The LED light should also be plugged into a suitable outlet.
4. Operating Instructions
4.1 Threading the Machine
Threading an industrial overlock machine requires precision. Refer to the threading diagram usually found on the machine or a separate guide. Generally, thread paths are color-coded. Ensure each thread passes through its designated guides, tension discs, and loopers/needles in the correct sequence. Incorrect threading is a common cause of stitch problems.
4.2 Adjusting Thread Tension
The quality of the overlock stitch depends on balanced thread tension. Adjust the tension dials for each thread (typically 3 or 4, depending on the machine configuration) until the stitches lie flat and even on both sides of the fabric. Test on a scrap piece of the same fabric you intend to sew.
4.3 Basic Operation
- Power On: Turn on the main power switch for the servo motor.
- Speed Control: The Ikonix servo motor allows for variable speed control, often adjusted via a dial or button on the motor's control box or foot pedal. Start at a slow speed until comfortable.
- Foot Pedal: Press the foot pedal to start sewing. The harder you press, the faster the machine will sew (depending on speed settings).
- Fabric Feeding: Guide the fabric gently under the presser foot. The differential feed mechanism can be adjusted to prevent stretching or puckering of different fabric types.
- Cutting Knives: The overlock machine trims the fabric edge as it sews. Ensure the knives are sharp and correctly positioned.
5. Maintenance
Regular maintenance ensures the longevity and optimal performance of your industrial overlock machine.
5.1 Cleaning
- Daily: Use a brush and vacuum cleaner to remove lint and thread scraps from the needle plate, feed dogs, and looper area.
- Weekly: Remove the needle plate and clean thoroughly underneath.
- Monthly: Clean the entire machine, including the motor and table, to prevent dust buildup.
5.2 Lubrication (Oiling)
Refer to the machine's oiling points diagram (if available). Apply a few drops of high-quality sewing machine oil to all designated oiling points daily or after every 8 hours of operation. Overlock machines typically have many moving parts that require lubrication.
5.3 Needle Replacement
Replace needles regularly (e.g., after 8-10 hours of sewing or when they show signs of dullness or bending). Use the correct type and size of industrial overlock needles as specified by Yamata (e.g., DCx27). Ensure the needle is inserted correctly with the flat side facing the appropriate direction.
6. Troubleshooting
This section addresses common issues you might encounter.
- Skipped Stitches: Check needle insertion, ensure the correct needle type/size is used, re-thread the machine, or check for bent/dull needles.
- Thread Breakage: Verify correct threading, adjust thread tension, check for burrs on thread guides or needle eye, ensure thread quality is good.
- Fabric Puckering/Stretching: Adjust differential feed settings, check presser foot pressure, or adjust thread tension.
- Machine Not Starting: Check power connections, ensure the motor switch is on, and verify the foot pedal connection.
- Noisy Operation: Lubricate the machine, check for loose parts, or ensure the belt tension is correct.
7. Specifications
The following table outlines the key specifications for the Yamata FY2100 series industrial overlock sewing machine, specifically model FY-2100-3.

Figure 7.1: Image of the specifications table for Yamata FY2100 series, including models FY2100-3, FY2100-4, and FY2100-5. This table provides technical details such as needle type, stitch width, stitch length, presser foot lift, needle size, maximum speed, and weight.
| Feature | Specification |
|---|---|
| Brand | Yamata |
| Model Number | FY-2100-3 |
| Part Number | FY2100 |
| UPC | 760781218833 |
| ASIN | B01NABAW1U |
| Power Source | Corded Electric |
| Is Electric | Yes |
| Material | Carbide (referring to specific components) |
| Color | White |
| Needle Type | DCx27 |
| Needle Size | 11# - 14# |
| Max Speed | 7000 s.p.m (stitches per minute) |
| Stitch Width | 1.0 - 3.6 mm |
| Stitch Length | 0.7 - 2 mm |
| Presser Foot Lift | 7 mm |
| Weight | 25 kg |
| Dimensions (L x W x H) | 580 x 425 x 355 mm |
8. Warranty and Support
For warranty information, technical support, or to purchase replacement parts, please contact your original retailer or the Yamata customer service department. Keep your purchase receipt and machine serial number handy when contacting support.
Always use genuine Yamata replacement parts to ensure compatibility and maintain machine performance.