
be quiet! Pure Base 600
Contents
be quiet! Pure Base 600 ATX Midi Tower PC Case Instruction Manual
Model: Pure Base 600 (BG022)
Introduction
This manual provides detailed instructions for the installation, operation, and maintenance of your be quiet! Pure Base 600 ATX Midi Tower PC Case. Designed for quiet operation and versatility, this case offers a robust foundation for your computer system. Please read these instructions carefully before beginning assembly to ensure proper setup and optimal performance.

Figure 1: Front-left view of the be quiet! Pure Base 600 PC Case.
Setup and Installation
1. Unpacking and Inspection
Carefully remove the PC case from its packaging. Inspect the case for any signs of damage during transit. Ensure all accessories, including screws and cable ties, are present. A list of included accessories can be found in the "What's in the Box" section.

Figure 2: Included accessory kit with various screws and cable management ties.
2. Removing Side Panels
Locate the thumbscrews on the rear of the case securing the side panels. Unscrew them and carefully slide the side panels backward, then lift them off. Store them safely to prevent scratches.
3. Motherboard Installation
Install the necessary motherboard standoffs into the tray according to your motherboard's form factor (ATX, Micro-ATX). Carefully place your motherboard onto the standoffs, aligning the screw holes. Secure the motherboard with the provided screws. The case features a central standoff for easier alignment.

Figure 3: Internal chassis view, highlighting the motherboard mounting area and modular drive bays.
4. Power Supply Unit (PSU) Installation
Mount your PSU at the bottom rear of the case. Secure it with screws from the rear. Ensure the PSU fan faces downwards if the case has a bottom vent, or upwards if placed on a solid surface.
5. Drive Installation (HDD/SSD/ODD)
- 3.5" HDDs: The Pure Base 600 features repositionable HDD slots. Slide the drive into a drive cage and secure it with the provided screws. The cages can be moved or removed as needed.
- 2.5" SSDs: SSDs can be mounted on the back of the motherboard tray or in the 3.5" drive cages using adapters (not included).
- 5.25" ODDs: The case includes a removable ODD cage. Remove the front panel cover, slide in your optical drive, and secure it.

Figure 4: Example of internal component installation, showing organized cables and installed drives.
6. Graphics Card and Expansion Card Installation
Remove the necessary expansion slot covers from the rear of the case. Insert your graphics card or other expansion cards into the PCIe slots on your motherboard and secure them with screws.
7. Cable Management
Utilize the cable routing options behind the motherboard tray to organize and hide cables. This improves airflow and aesthetics. Use the included cable ties to bundle cables neatly.
8. Fan and Water Cooling Installation
The case comes with two pre-installed Pure Wings 2 fans (one 140mm front, one 120mm rear). Additional fans or radiators can be installed:
- Front: Up to 3x 120mm or 2x 140mm fans / Radiator up to 360mm.
- Top: Up to 3x 120mm or 2x 140mm fans / Radiator up to 360mm.
- Rear: 1x 120mm fan / Radiator up to 120mm.
Ensure proper airflow direction for optimal cooling.

Figure 5: Close-up of the pre-installed be quiet! Pure Wings 2 fan at the rear exhaust position.
Operating Instructions
1. Front Panel Connections
The front panel provides convenient access to essential ports and controls:
- Power Button: Press to turn the system on or off.
- Reset Button: Press to restart the system.
- USB 3.0 Ports: For high-speed data transfer with compatible devices.
- Audio Jacks: Headphone and microphone ports.
- Fan Controller: A three-speed switch to adjust the speed of connected case fans for optimal balance between cooling and noise.
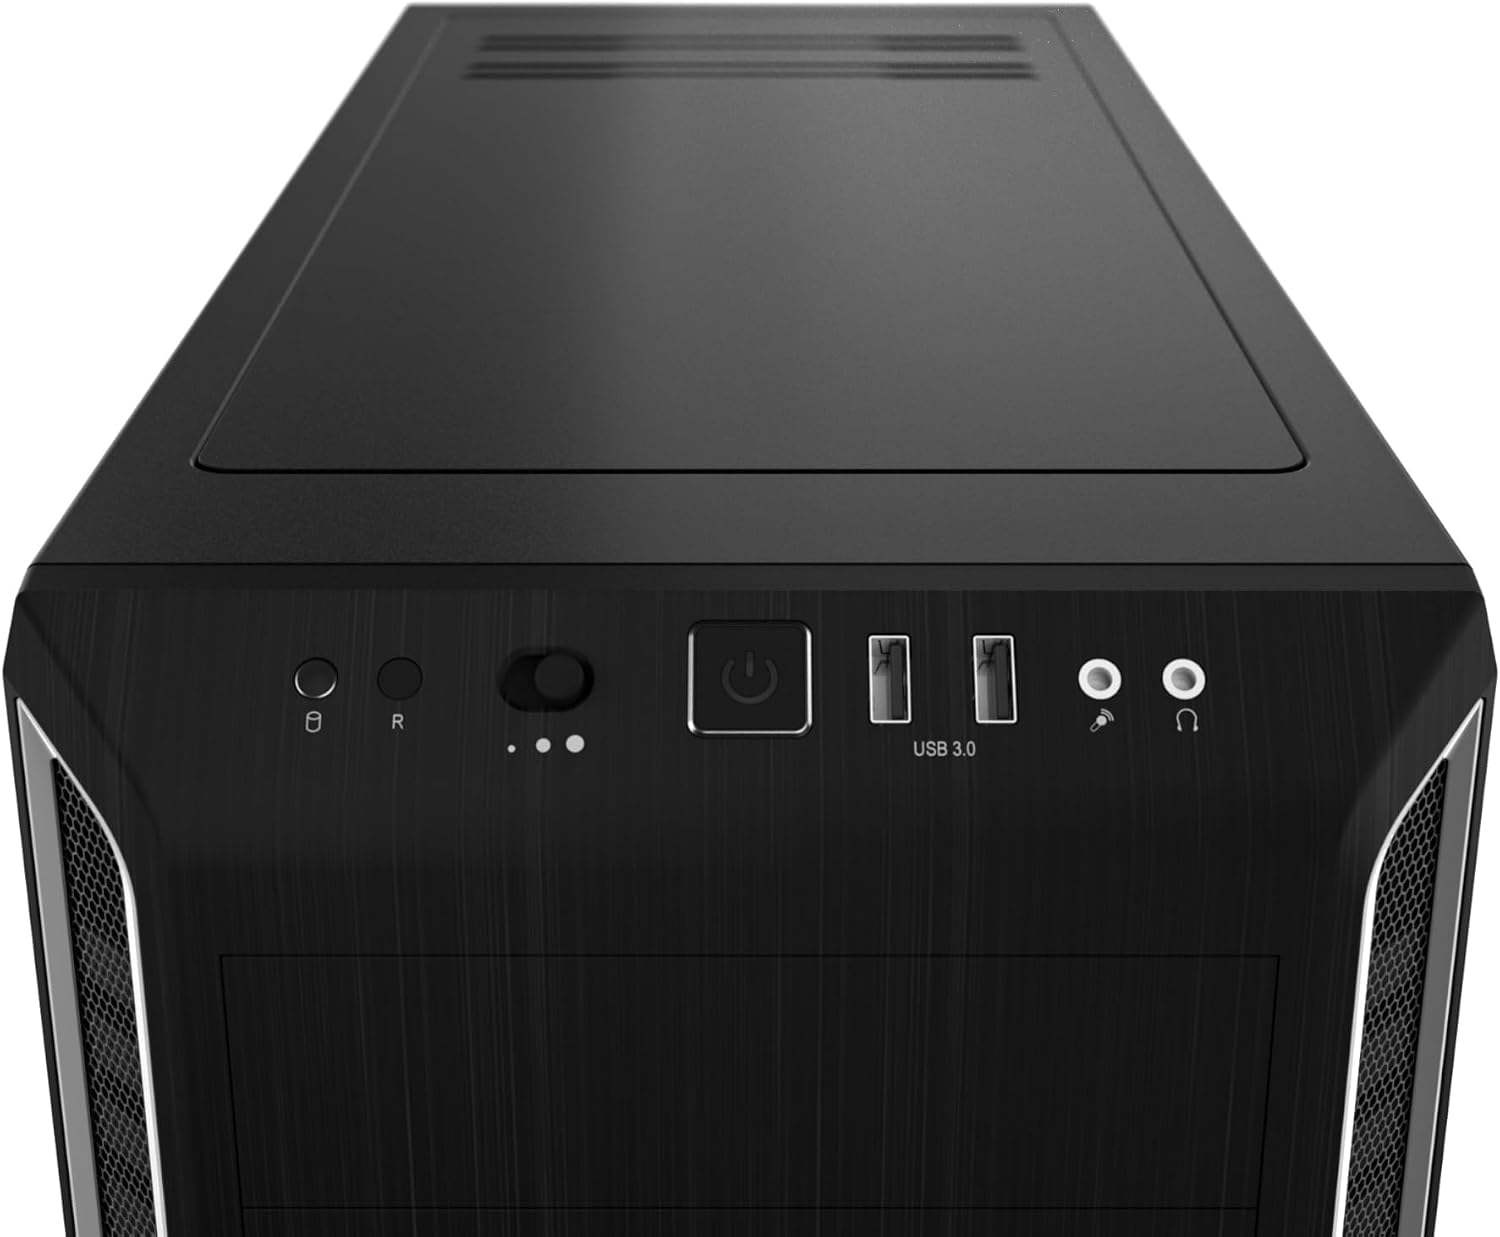
Figure 6: Front panel I/O, including power button, USB 3.0 ports, audio jacks, and fan controller switch.
2. Adjustable Top Cover Vent
The Pure Base 600 features an adjustable top cover vent. This cover can be opened in three positions to enhance cooling performance or closed for quieter operation. Adjust it based on your system's thermal requirements.

Figure 7: The removable and adjustable top cover vent, designed for flexible airflow control.
Maintenance
1. Dust Filter Cleaning
To maintain optimal airflow and prevent dust buildup, regularly clean the dust filters. The Pure Base 600 includes easily removable dust filters at the front and bottom. Gently slide them out, clean them with water or a soft brush, and ensure they are completely dry before reinserting.
2. General Cleaning
Wipe the exterior of the case with a soft, damp cloth. Avoid abrasive cleaners or solvents that could damage the finish. For internal cleaning, use compressed air to remove dust from components and fans.
Troubleshooting
- System not powering on:
- Ensure the PSU is properly connected to the wall outlet and switched on.
- Verify all power cables from the PSU are securely connected to the motherboard and components.
- Check that the front panel power switch cable is correctly connected to the motherboard's front panel header.
- Excessive fan noise:
- Adjust the fan speed using the front panel fan controller.
- Ensure fans are securely mounted and not vibrating against the case.
- Clean any dust buildup on fan blades.
- Poor airflow or high temperatures:
- Ensure the adjustable top cover vent is open for better exhaust.
- Clean all dust filters (front and bottom).
- Verify that fans are oriented correctly for intake and exhaust.
- Check for obstructions to airflow inside the case, such as poorly managed cables.
- Components not fitting correctly:
- Refer to the "Setup and Installation" section for guidance on modular drive bays and component clearances.
- Ensure you are using the correct screws and mounting hardware for each component.
Specifications
| Model Name | Pure Base 600 (BG022) |
| Case Type | ATX Midi Tower |
| Motherboard Compatibility | ATX, Micro-ATX, Mini-ITX |
| Dimensions (L x W x H) | 20.36 x 22.37 x 11.34 inches (517 x 220 x 493 mm) |
| Weight | 16.28 pounds (7.38 kg) |
| Material | Acrylonitrile Butadiene Styrene (ABS), Alloy Steel |
| Pre-installed Fans | 1x Pure Wings 2 140mm (front), 1x Pure Wings 2 120mm (rear) |
| Front I/O Ports | 2x USB 3.0, Audio In/Out, Fan Controller |
| Drive Bays | 3x 3.5" (repositionable), 2x 2.5" (behind MB tray), 2x 5.25" (removable cage) |
| Cooling Method | Air |

Figure 8: Dimensional drawing of the Pure Base 600 case, showing height, width, and depth.
Warranty and Support
The be quiet! Pure Base 600 PC Case is backed by a 3-year manufacturer's warranty. This warranty covers defects in materials and workmanship under normal use.
For technical support, warranty claims, or further assistance, please visit the official be quiet! website or contact their customer service department. Keep your proof of purchase for warranty validation.
Official be quiet! Website: www.bequiet.com
Documents and downloads
Ask a question about this manual
Ask about setup, troubleshooting, compatibility, parts, safety, or missing instructions. Manuals+ will review the question and use this page’s manual context to help answer it.