
1. Introduction
This manual provides essential information for the safe and effective use of your Norifon VW-VBK180 USB Charger. This charger is designed to provide convenient power for compatible Panasonic camcorder batteries, ensuring your devices are always ready for use. Please read these instructions carefully before operating the charger.
2. Product Overview
The Norifon VW-VBK180 USB Charger is a compact and lightweight device, ideal for travel and everyday use. It features a micro USB input for versatile power options.

Image 1: Norifon VW-VBK180 USB Charger showing its compact dimensions (3.31 x 1.85 x 0.79 inches).
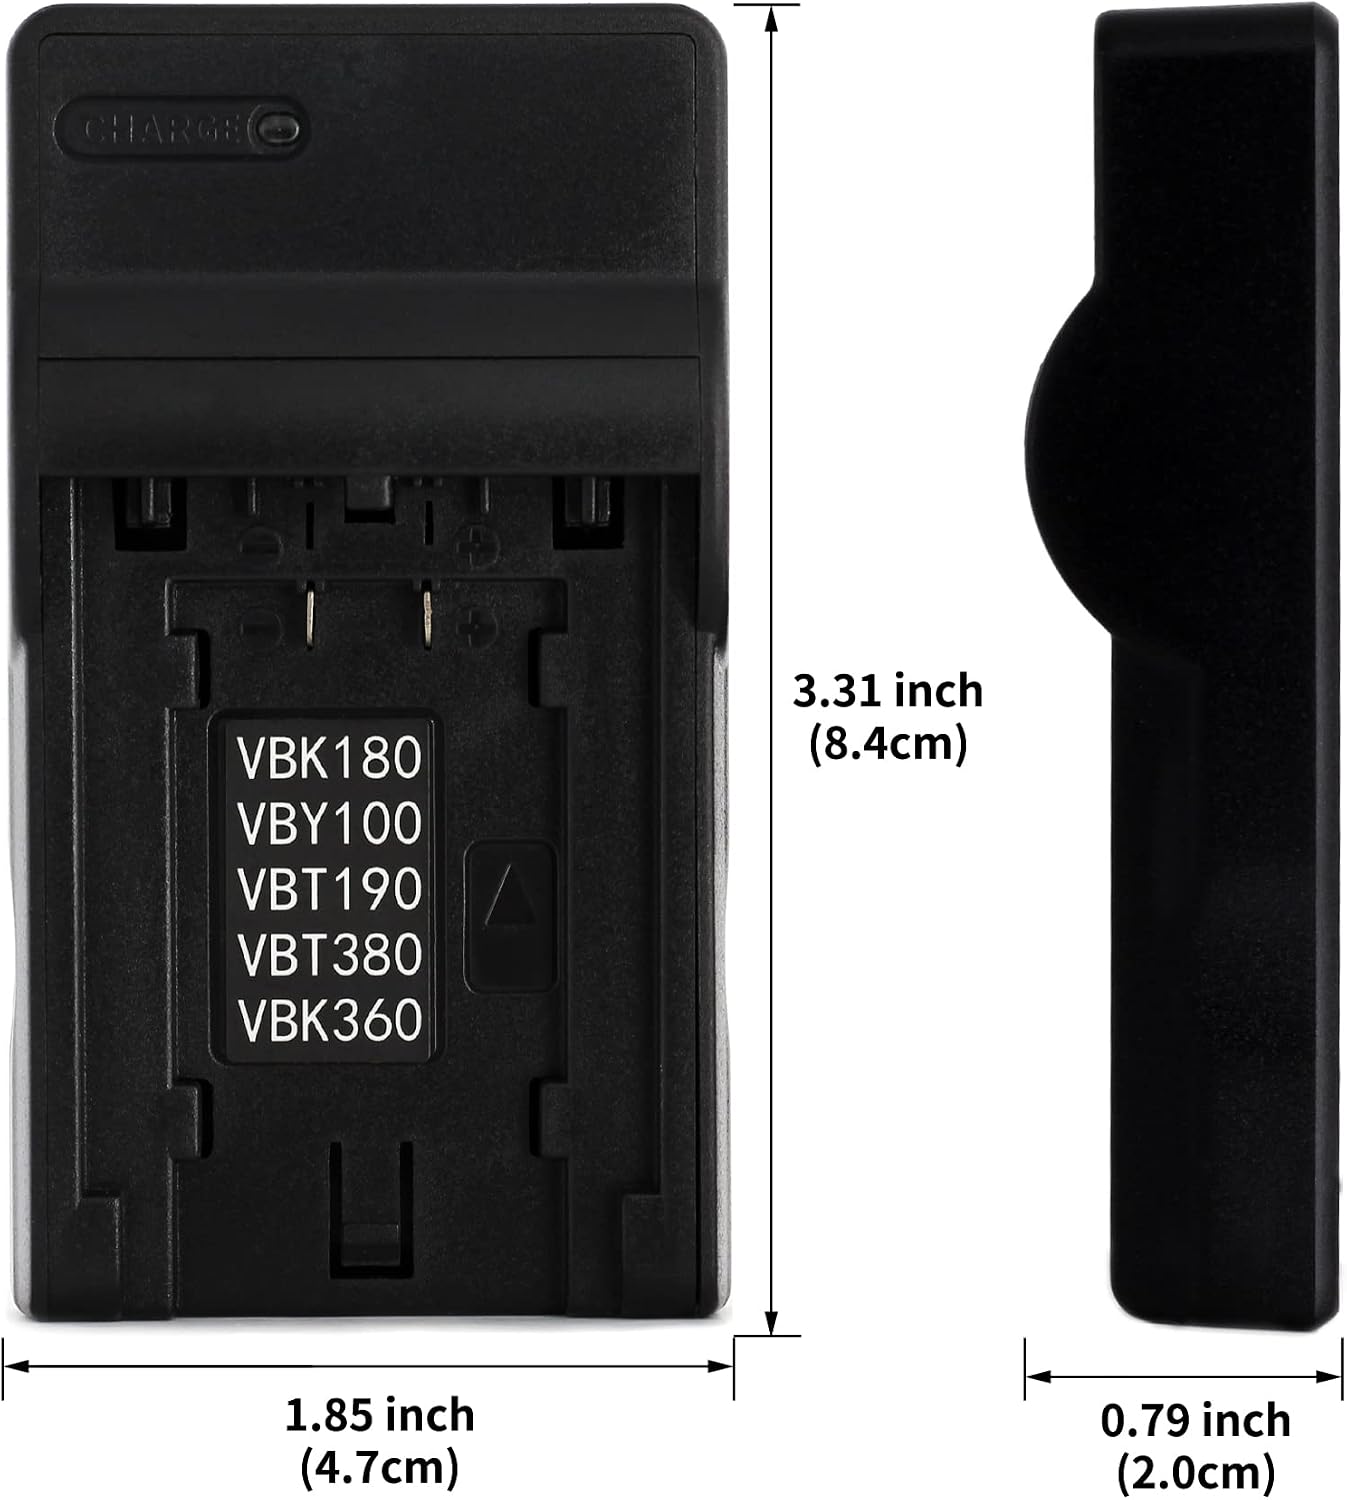
Image 2: The charger can be powered by various USB sources such as a PC, AC charger, car charger, or power bank.

Image 3: Detail of the Micro USB Port for connecting the power cable.

Image 4: The included USB charging cable measures 11.8 inches (30cm) in length.
3. Compatibility
This charger is compatible with a wide range of Panasonic batteries and camcorder models. To ensure proper fit and function, always verify the battery model printed on your battery's label (not the camera itself).
Compatible Battery Models:
- VW-VBK180, VW-VBK180-K, VW-VBK180GK
- VW-VBK360, VW-VBK360-K, VW-VBK360GK
- VW-VBL090, VW-VBL090GK, VW-VBL090PPK
- VW-VBL360
Compatible Panasonic Camera Models:
- HC-V Series: HC-V10, HC-V100, HC-V100EG-K, HC-V100EG-W, HC-V100K, HC-V100M, HC-V100MK, HC-V10EB-K, HC-V10EB-R, HC-V10EG-K, HC-V10EG-R, HC-V10GK, HC-V10K, HC-V10M, HC-V11M, HC-V300M, HC-V500, HC-V500EG-K, HC-V500EG-R, HC-V500EG-S, HC-V500GK, HC-V500K, HC-V500M, HC-V500MGK, HC-V500MK, HC-V600M, HC-V700, HC-V700GK, HC-V700K, HC-V700M, HC-V700MGK, HC-V700MK, HC-V707, HC-V707EG-K, HC-V707EG-S, HC-V707M
- HDC-H Series: HDC-H80, HDC-HS60, HDC-HS60K, HDC-HS60P, HDC-HS80, HDC-HS80GK, HDC-HS80K, HDC-HS80P, HDC-HS80PC
- HDC-SD Series: HDC-SD40, HDC-SD40GK, HDC-SD40K, HDC-SD40P, HDC-SD40PC, HDC-SD60, HDC-SD60K, HDC-SD60P, HDC-SD60PC, HDC-SD60S, HDC-SD66, HDC-SD80, HDC-SD80GK, HDC-SD80P, HDC-SD80PC, HDC-SD80R, HDC-SD90, HDC-SD90EB-W-2012, HDC-SD90GK, HDC-SD90GK-3D, HDC-SD90K, HDC-SD90P, HDC-SD90PC, HDC-SD99, HDC-SDX1, HDC-SDX1H
- HDC-TM Series: HDC-TM25, HDC-TM35, HDC-TM40, HDC-TM40GK, HDC-TM40K, HDC-TM40P, HDC-TM40PC, HDC-TM41H, HDC-TM41P, HDC-TM41PC, HDC-TM45, HDC-TM55, HDC-TM55K, HDC-TM55P, HDC-TM55PC, HDC-TM60, HDC-TM60P, HDC-TM60PC, HDC-TM70, HDC-TM80, HDC-TM80GK, HDC-TM80K, HDC-TM80P, HDC-TM80PC, HDC-TM85, HDC-TM90, HDC-TM90GK, HDC-TM90GK-3D, HDC-TM90K, HDC-TM90P, HDC-TM90PC, HDC-TM99
- SDR Series: SDR-H100, SDR-H100K, SDR-H100P, SDR-H100PC, SDR-H101, SDR-H101GK, SDR-H85, SDR-H85A, SDR-H85K, SDR-H85S, SDR-H95, SDR-HS85P, SDR-HS85PC, SDR-S45, SDR-S50, SDR-S50A, SDR-S50K, SDR-S50N, SDR-S50P, SDR-S50PC, SDR-S70, SDR-S70K, SDR-S70P, SDR-S70PC, SDR-S70R, SDR-S70S, SDR-S71, SDR-S71GK, SDR-S71P, SDR-S71PC, SDR-T50, SDR-T50K, SDR-T50P, SDR-T50PC, SDR-T55, SDR-T55P, SDR-T55PC, SDR-T70, SDR-T70K, SDR-T70P, SDR-T70PC, SDR-T71, SDR-T76, SDR-T95

Image 5: Always check the battery code (P/N) on your battery's label to confirm compatibility.
4. Setup and Operation
Follow these steps to correctly set up and operate your Norifon VW-VBK180 USB Charger.
Video Guide: How to Use the Charger
Video 1: This official seller video demonstrates how to choose the correct VW-VBK180 charger and provides a step-by-step guide on its usage.
Step-by-Step Instructions:
- Connect the Battery: Ensure the positive (+) and negative (-) terminals of the battery align correctly with the charger's terminals. This is crucial for proper charging. Gently push the battery into the charger slot until it is securely seated.
- Connect to Power: Plug the micro USB cable into the charger's micro USB port. Connect the other end of the USB cable to a compatible USB power source (e.g., laptop, PC, power bank, USB wall adapter, USB car adapter).
- Monitor Charging Status: The charger features an LED indicator to show the charging status:
- Blue Light (No-load): Indicates the charger is powered on but no battery is inserted, or the battery is fully charged.
- Red Light: Indicates the battery is currently charging.
- Blue Light (Solid): Indicates the battery is fully charged.
- Remove Battery: Once the blue light indicates a full charge, disconnect the charger from the power source and carefully remove the battery.
5. Important Safety Information
Adhering to these safety guidelines will help prevent damage to the charger, battery, and potential injury.
- Do not open or modify the charger.
- Do not immerse the charger in water or any other liquid.
- Use the charger in a dry location only.
- Only use compatible batteries with this charger as listed in the compatibility section.

Image 6: Charger label displaying model, input/output specifications, and safety warnings.
6. Specifications
| Feature | Detail |
|---|---|
| Model Number | VW-VBK180 |
| Product Dimensions | 3.31 x 1.85 x 0.79 inches |
| Item Weight | 1.12 ounces (0.07 Pounds) |
| Input Voltage | 5 Volts |
| Output Voltage | 4.2 Volts |
| Manufacturer | VN/Norifon |
| Color | Blue, Red (LED indicators) |
7. Maintenance
To ensure the longevity and optimal performance of your charger, follow these simple maintenance tips:
- Keep the charger clean and free from dust and debris. Use a soft, dry cloth for cleaning.
- Store the charger in a cool, dry place when not in use.
- Avoid dropping the charger or subjecting it to strong impacts.
- Do not expose the charger to extreme temperatures.
8. Troubleshooting
If you encounter issues with your charger, refer to the following common problems and solutions:
- Charger not turning on (no light):
- Ensure the USB cable is securely connected to both the charger and the power source.
- Try a different USB power source or cable to rule out issues with external components.
- Battery not charging (blue light remains on with battery inserted):
- Verify that the battery is correctly inserted with positive and negative terminals aligned.
- Confirm that your battery model is listed as compatible with this charger.
- The battery might already be fully charged.
- The battery may be faulty or at the end of its lifespan. Try charging a different compatible battery if available.
- Slow charging:
- Ensure your USB power source provides sufficient current (e.g., a wall adapter typically charges faster than a laptop USB port).
- Avoid using excessively long or low-quality USB cables, which can reduce charging efficiency.
If the issue persists after trying these steps, please contact customer support.
9. Warranty and Support
For warranty information or technical support, please refer to the product packaging or contact Norifon customer service directly. Keep your purchase receipt as proof of purchase.