
Introduction
The RICOH SP-1425 is a versatile color duplex scanner designed for efficient document management in office environments. It features both an Auto Document Feeder (ADF) for multi-page scanning and a flatbed for scanning delicate or bound documents. This manual provides essential information for setting up, operating, and maintaining your scanner.

Figure 1: The Ricoh SP-1425 scanner, showcasing its compact design with both the Automatic Document Feeder (ADF) and flatbed scanning areas clearly visible.
Package Contents
Before beginning the setup process, ensure all components are present in the package:
- RICOH SP-1425 Document Scanner Unit
- Drivers & Utilities DVD
- Presto! PageManager Software
- ABBYY FineReader Sprint Software
- Software Operation Panel
- PaperStream IP for SP Series Software
- Scanner Central Admin Agent
- Error Recovery Guide
- PaperStream Capture Lite Software
- USB Cable
- AC Adapter and Power Cord
Setup Guide
Follow these steps to set up your RICOH SP-1425 scanner:
- Unpacking: Carefully remove the scanner and all accessories from the packaging.
- Placement: Place the scanner on a stable, flat surface with adequate space for document feeding and output.
- Power Connection: Connect the AC adapter to the scanner's power input and then plug the power cord into a wall outlet.
- USB Connection: Connect the provided USB cable from the scanner to an available USB port on your computer.
- Software Installation:
- Insert the Drivers & Utilities DVD into your computer's optical drive.
- Follow the on-screen instructions to install the necessary drivers and bundled software, including PaperStream IP, PaperStream Capture Lite, and PaperStream ClickScan.
- It is recommended to install all software components for full functionality.
- After installation, check for and install any available software updates to ensure optimal performance.
- Initial Power On: Press the power button on the scanner. The power indicator light should illuminate.
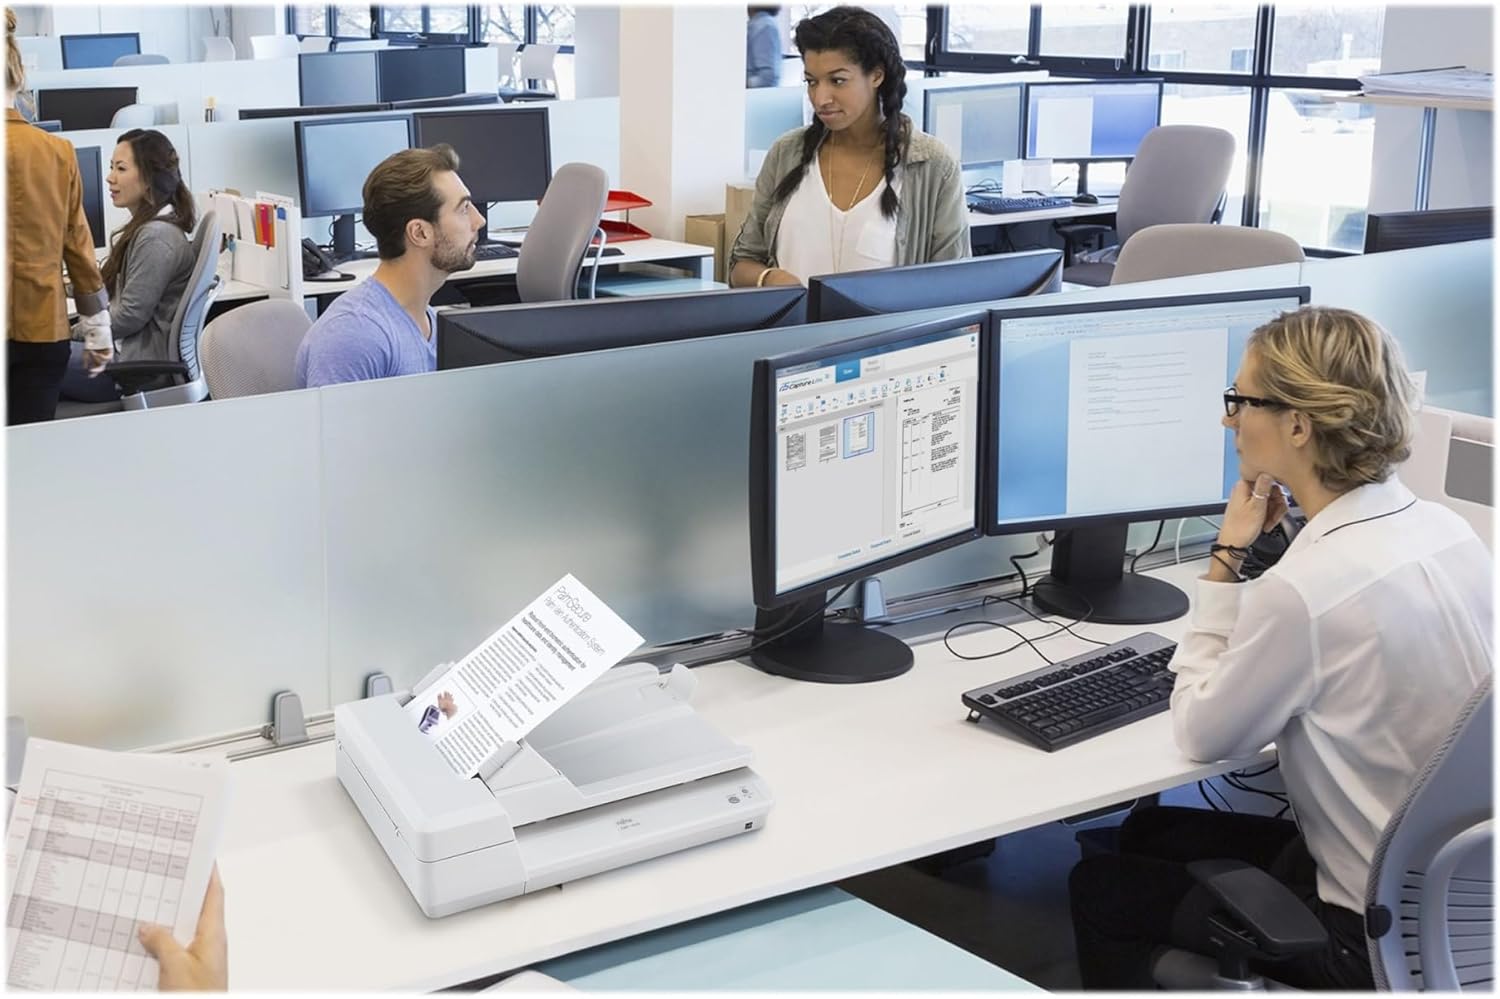
Figure 2: The Ricoh SP-1425 scanner integrated into a typical office workspace, demonstrating its compact footprint and ease of use in a professional environment.
Operating Instructions
Using the Automatic Document Feeder (ADF)
The ADF allows for efficient scanning of multiple pages simultaneously.
- Prepare Documents: Ensure documents are free of staples, paper clips, or any obstructions. Fan the edges to prevent misfeeds.
- Load Documents: Place the stack of documents face-down into the ADF input tray. Adjust the paper guides to fit the width of your documents.
- Select Scan Profile: Open your preferred scanning software (e.g., PaperStream ClickScan, PaperStream Capture Lite) on your computer and select the desired scan profile (e.g., color, grayscale, resolution, destination).
- Initiate Scan: Press the "Scan" button on the scanner or click the scan command in the software. The scanner will automatically feed and scan each page.

Figure 3: A document being fed into the Automatic Document Feeder (ADF) of the Ricoh SP-1425 scanner, illustrating the multi-page scanning capability.

Figure 4: Another view of the Ricoh SP-1425 scanner with a document actively being processed by the ADF, highlighting the paper path.
Using the Flatbed Scanner
The flatbed is ideal for scanning single pages, delicate documents, books, or irregularly shaped items.
- Open Cover: Lift the flatbed cover.
- Place Document: Place the document face-down on the glass surface, aligning it with the corner guide.
- Close Cover: Gently close the flatbed cover.
- Select Scan Profile: In your scanning software, select the flatbed as the source and choose your desired scan settings.
- Initiate Scan: Click the scan command in the software.

Figure 5: The Ricoh SP-1425 scanner with its flatbed cover lifted, exposing the glass scanning surface, ready for document placement.

Figure 6: A hand carefully placing a document onto the flatbed of the Ricoh SP-1425 scanner, demonstrating the process for scanning single or delicate items.
Software Features
The RICOH SP-1425 comes bundled with powerful software to enhance your scanning experience:
- PaperStream IP for SP Series: Provides advanced image processing functions, automatically optimizing image quality for OCR (Optical Character Recognition) and improving readability.
- PaperStream Capture Lite: Offers robust batch scanning capabilities, allowing for efficient processing of large volumes of documents with customizable settings.
- PaperStream ClickScan: Designed for simplicity, enabling one-touch scanning directly to email, print, or a specified folder. Ideal for quick and frequent scanning tasks.
- Presto! PageManager & ABBYY FineReader Sprint: Additional tools for document management and optical character recognition.

Figure 7: An illustration demonstrating the image enhancement capabilities of PaperStream IP, showing how it transforms a scanned document from its original state and a state without correction into a clear, optimized image.
Maintenance
Regular maintenance ensures optimal performance and longevity of your scanner.
- Cleaning the Glass Surface: Use a soft, lint-free cloth lightly dampened with a non-abrasive glass cleaner to wipe the flatbed glass. Avoid spraying cleaner directly onto the glass.
- Cleaning Rollers: Periodically clean the ADF rollers with a soft, damp cloth to prevent paper jams and ensure smooth feeding. Refer to the Error Recovery Guide for detailed instructions on accessing rollers.
- Dust Removal: Use a can of compressed air to gently remove dust from the scanner's interior and exterior vents.
- Software Updates: Regularly check for and install the latest driver and software updates from the Ricoh support website to ensure compatibility and performance improvements.
Troubleshooting
If you encounter issues with your scanner, try the following troubleshooting steps:
- Scanner Not Detected:
- Ensure the USB cable is securely connected to both the scanner and the computer.
- Verify the scanner is powered on.
- Try connecting the USB cable to a different USB port on your computer.
- Restart your computer and the scanner.
- Reinstall the scanner drivers if necessary.
- Paper Jams:
- Turn off the scanner and carefully remove any jammed paper following the instructions in the Error Recovery Guide.
- Ensure documents are properly prepared and loaded into the ADF, free of staples or tears.
- Clean the ADF rollers if jams occur frequently.
- Poor Scan Quality:
- Clean the flatbed glass and ADF rollers.
- Adjust scan settings (resolution, color mode) in your scanning software.
- Ensure documents are placed correctly on the flatbed or fed straight through the ADF.
- Utilize PaperStream IP for automatic image enhancement.
- Software Issues:
- Ensure your operating system is compatible with the scanner software.
- Verify that all scanner software components are installed correctly.
- Check for and install the latest software updates from the Ricoh support website.
- If issues persist, consider uninstalling and reinstalling the scanner software.
For further assistance, refer to the detailed Error Recovery Guide included with your scanner or visit the official Ricoh support website.
Specifications
| Feature | Detail |
|---|---|
| Product Dimensions | 17.9 x 13 x 5.1 inches |
| Item Weight | 6.3 pounds |
| Model Name | SP-1425 |
| Connectivity Technology | USB |
| Resolution | 600 dpi |
| Scanner Type | Document, Receipt (Duplex ADF & Flatbed) |
| Media Type | ID Card, Paper, Photo, Receipt |
| Sheet Size | 4.5 x 5.5, 8.5 x 14, 8.5 x 120, 8.5 x 11.7 inches |
| Color Depth | 24-bit |
| Wattage | 16 watts |
| Manufacturer | PFU Ltd. |
| Date First Available | December 7, 2016 |
Warranty and Support
For information regarding product warranty, please refer to the warranty card included in your product packaging or visit the official Ricoh support website. For technical support, driver downloads, and additional resources, please contact Ricoh customer service or visit their official support portal.
Manufacturer: PFU Ltd.