1. Product Overview
The Miditech Audiolink III is a versatile USB audio interface designed for recording and monitoring audio. It features two microphone preamps with phantom power, instrument/line inputs, and a class-compliant USB connection for easy setup across various operating systems. This device is USB bus powered, eliminating the need for an external power supply.
Key features include:
- 16-bit / 48 kHz USB Stereo Interface
- 2 x XLR/TRS Combo Inputs
- 2 x HI-Z (Guitar/Bass) Inputs
- Microphone Preamps with 48V Phantom Power
- Adjustable Headphone Output
- Signal and Peak LEDs
- USB bus powered, Class Compliant (driverless operation)
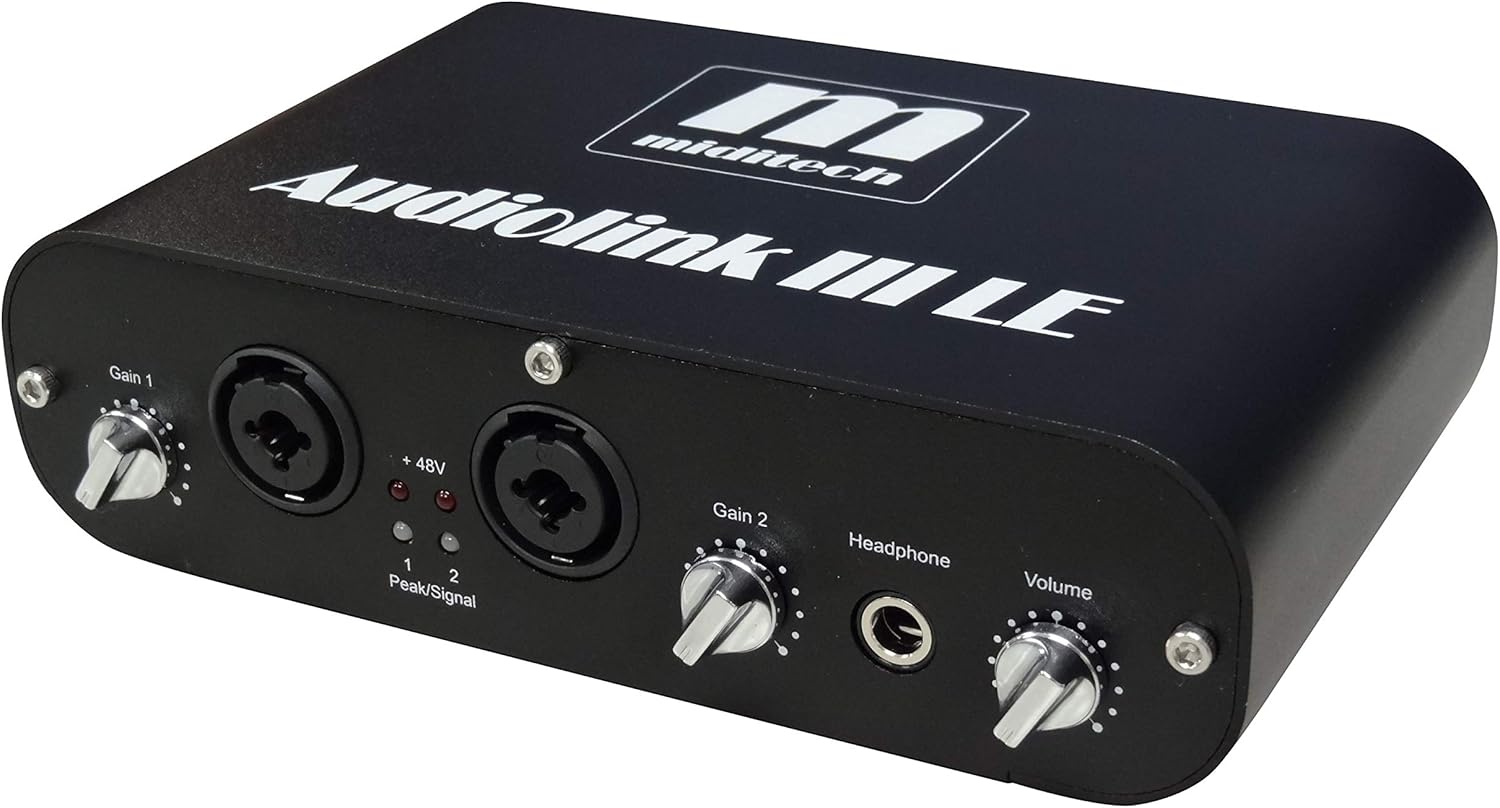
Figure 1: Front view of the Miditech Audiolink III, showing Gain controls, XLR/TRS combo inputs, +48V indicator, Peak/Signal LEDs, Headphone output, and Volume knob.
2. Setup and Installation
The Audiolink III is a 'Class Compliant' USB audio interface, meaning it does not require specific driver installation for most modern operating systems. It works driverless with Mac OS/X, Windows XP SP2, Windows Vista, Windows 7, 8, and Windows 10.
2.1 Connecting to Your Computer
- Locate the USB port on the rear panel of the Audiolink III.
- Connect one end of the provided USB cable to the Audiolink III and the other end to an available USB port on your computer.
- The device will be powered via the USB connection. No external power adapter is required.
- Your operating system should automatically detect and configure the Audiolink III as an audio device.
2.2 Connecting Audio Devices
The Audiolink III offers various input and output options:
- Microphones: Connect microphones to the XLR inputs on the front panel. If your microphone requires phantom power (e.g., condenser microphones), activate the +48V switch for the respective channel.
- Instruments (HI-Z): Connect guitars or basses directly to the 1/4-inch TRS inputs on the front panel. These inputs are designed for high-impedance instruments.
- Line-Level Devices: Connect line-level sources (e.g., synthesizers, drum machines) to the 1/4-inch TRS inputs on the front panel. Ensure the LINE switch is engaged if available for optimal signal level.
- Line Outputs: Use the 'Line Out L' and 'Line Out R' 1/4-inch jacks on the rear panel to connect to studio monitors or an amplifier.
- Headphones: Connect headphones to the 1/4-inch headphone jack on the front panel.

Figure 2: Rear view of the Miditech Audiolink III, showing the USB port, +48V On/Off switches for channels 1 and 2, Monitor On/Off switch, Stereo/Mono switch, and Line Out jacks.
3. Operating Instructions
3.1 Input Gain Control
Each input channel (Gain 1 and Gain 2) has a dedicated rotary knob on the front panel to adjust the input level. Turn the knob clockwise to increase gain and counter-clockwise to decrease it. Adjust the gain so that the 'Signal' LED illuminates consistently during input, and the 'Peak' LED only flashes occasionally during the loudest parts of your audio, avoiding constant illumination which indicates clipping.
3.2 Phantom Power (+48V)
For condenser microphones that require external power, activate the '+48V On/Off' switch located on the rear panel for the corresponding input channel. Ensure the microphone is connected before activating phantom power to prevent damage.
3.3 Monitoring
The Audiolink III features a direct monitoring function. The 'Monitor On/Off' switch on the rear panel allows you to listen to your input signal directly through the headphone output and line outputs with minimal latency. The 'Stereo/Mono' switch allows you to monitor inputs in stereo (separate left/right channels) or summed to mono.
3.4 Headphone Output
The 'Headphone' jack on the front panel provides a dedicated output for monitoring. The 'Volume' knob next to it controls the overall output level for the headphones.
4. Maintenance
To ensure the longevity and optimal performance of your Miditech Audiolink III, follow these maintenance guidelines:
- Cleaning: Use a soft, dry cloth to clean the exterior of the device. Avoid using abrasive cleaners, solvents, or waxes, as these can damage the finish and internal components.
- Storage: When not in use, store the interface in a cool, dry place away from direct sunlight, extreme temperatures, and high humidity.
- Handling: Handle the device with care. Avoid dropping it or subjecting it to strong impacts.
- Ventilation: Ensure proper ventilation around the unit to prevent overheating. Do not block any vents.
- Cable Management: Keep cables organized and avoid excessive bending or crimping, which can lead to damage.
5. Troubleshooting
If you encounter issues with your Audiolink III, refer to the following common problems and solutions:
| Problem | Possible Cause / Solution |
|---|---|
| No power / Device not recognized by computer |
|
| No sound from inputs |
|
| No sound from headphones/line outputs |
|
| Distorted or noisy audio |
|
| Latency (delay) during monitoring |
|
6. Specifications
The following are the technical specifications for the Miditech Audiolink III Audio Interface:
- Model Number: AL3
- Audio Resolution: 16 Bit / 48 kHz
- Inputs: 2 x XLR/TRS Combo (Mic/Line), 2 x HI-Z (Guitar/Bass)
- Preamps: 2 x Microphone Preamps with 48V Phantom Power
- Outputs: 2 x 1/4-inch TRS Line Outputs (L/R), 1 x 1/4-inch Headphone Output
- Connectivity: USB (Class Compliant)
- Power: USB Bus Powered
- Compatible Operating Systems: Mac OS/X, Windows XP SP2, Windows Vista, Windows 7, 8, 10
- Product Dimensions: 5.06 x 1.75 x 7.09 inches (12.85 x 4.45 x 18 cm)
- Item Weight: 1.14 pounds (0.52 kg)
7. Warranty and Support
For detailed warranty information, please refer to the documentation included with your purchase or visit the official Miditech website. Miditech provides support resources and potential driver updates (if applicable) through their official channels.
It is recommended to register your product on the manufacturer's website to receive updates and support.


