
OEMTOOLS 27212
OEMTOOLS 27212 Manual Bushing Removal Tool Set
User Manual
1. Introduction
The OEMTOOLS 27212 Manual Bushing Installation and Removal Tool Set is designed for the precise and efficient removal and installation of bushings, seals, and bearings in various automotive applications. This comprehensive kit provides the necessary components for suspension, wheel bearing, control arm, and axle repair tasks, ensuring professional results while minimizing damage to vehicle components.
This manual provides detailed instructions for the safe and effective use of your OEMTOOLS 27212 tool set. Please read all instructions carefully before operation.
2. Safety Information
Always observe the following safety precautions when using this tool set:
- Wear appropriate personal protective equipment (PPE), including safety glasses, gloves, and sturdy footwear.
- Ensure the vehicle is properly supported on jack stands or a lift before beginning any work.
- Never use damaged or modified tools. Inspect all components of the set before each use.
- Apply appropriate lubricants to threaded rods and contact surfaces to reduce friction and prevent damage to the tool and component.
- Do not exceed the intended force of the tool. If excessive force is required, re-evaluate the setup or consult a professional.
- Keep hands and fingers clear of pinch points during operation.
- Store the tool set in its case in a clean, dry place when not in use.
3. Package Contents
The OEMTOOLS 27212 Manual Bushing Removal Tool Set includes the following components, neatly organized in a durable carrying case:

Image 3.1: The complete OEMTOOLS 27212 Manual Bushing Removal Tool Set, including various cups, adapters, and forcing screws, stored in its green carrying case.
- 20 x Cups and Adapters (various sizes)
- 4 x ACME Threaded Forcing Screws (various sizes)
- 4 x Sleeve End Caps
- 1 x Adapter for Shop Press Use
- 1 x Durable Carrying Case
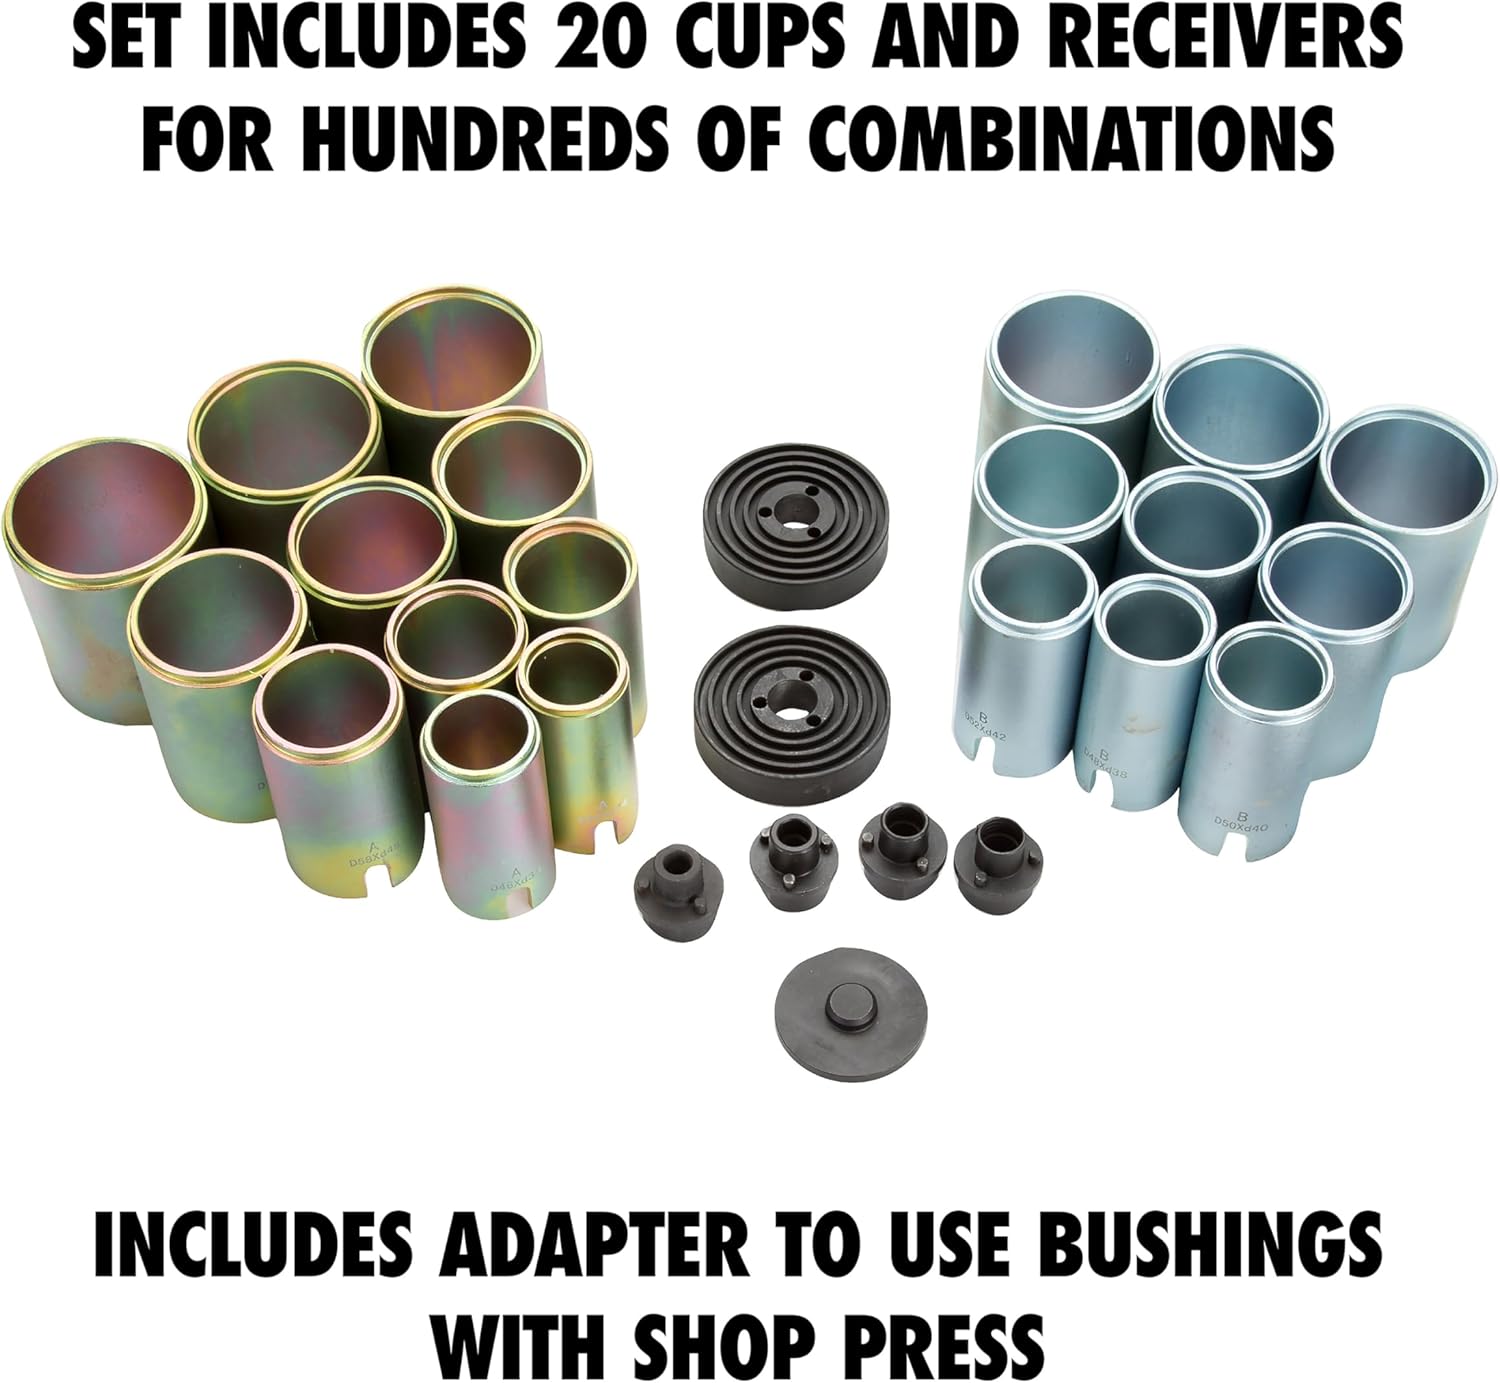
Image 3.2: A selection of the 20 cups and receivers included in the set, offering numerous combinations for different bushing sizes. Also shown are the shop press adapter and various end caps.
4. Components Overview
Familiarize yourself with the key components of the tool set:
4.1 Cups and Adapters
The set includes 20 cups and adapters of varying external sleeve diameters, ranging from 44 mm to 82 mm, with a consistent sleeve height of 94 mm and a wall thickness of 5 mm. These are used to press bushings in or out, accommodating a wide range of vehicle components.
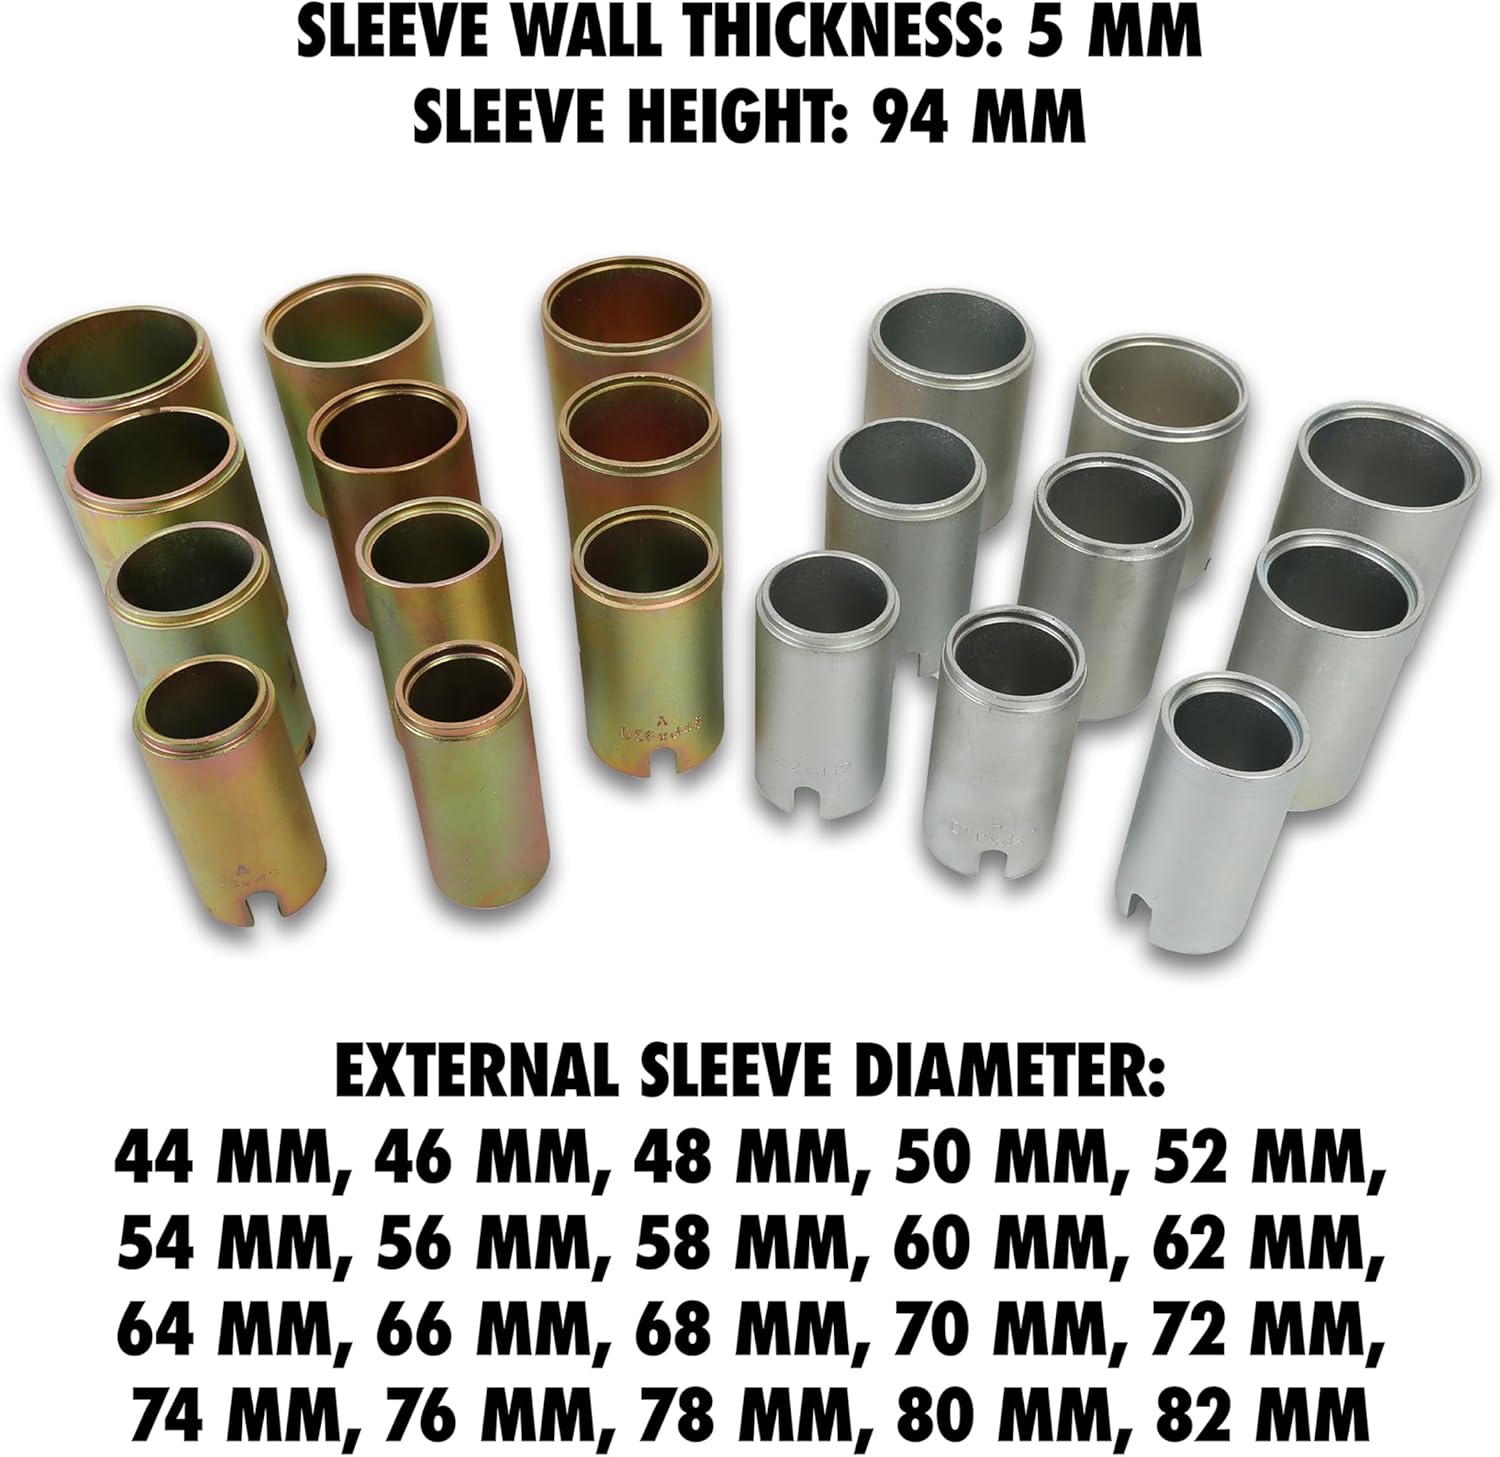
Image 4.1: A visual representation of the various sleeve sizes, highlighting their external diameters, sleeve height, and wall thickness.
4.2 Sleeve End Caps
Four sleeve end caps, measuring 83 x 20 mm, are provided. These caps are used to distribute force evenly across the bushing or bearing during installation or removal, preventing damage to the component or the tool.

Image 4.2: The four sleeve end caps, designed to provide stable contact during pressing operations.
4.3 ACME Threaded Forcing Screws
The kit includes four ACME threaded forcing screws of different sizes (10 x 1.5 mm, 12 x 2.0 mm, 14 x 2.0 mm, 16 x 2.5 mm), each with a length of 450 mm. These screws provide the necessary mechanical advantage to press components in or out.

Image 4.3: The four ACME threaded forcing screws, varying in diameter and thread pitch, all 450 mm in length.
5. Setup and Operation
This section details the general procedure for using the OEMTOOLS 27212 set for bushing, seal, and bearing removal and installation.

Image 5.1: The tool set prepared for use in an automotive workshop setting, demonstrating its readiness for various tasks.
5.1 General Assembly for Pressing
The basic principle involves using a forcing screw to draw two cups together, with the bushing/bearing positioned between them. One cup acts as a receiver, and the other as a driver.

Image 5.2: A diagram illustrating the correct assembly of the tool components for pressing, showing the force screw, end plates, bushing/bearing, housing, and nut/thrust washer.
- Select Components: Choose the appropriate forcing screw, cups, and end caps that match the size of the bushing/bearing and the component housing. The receiver cup should be large enough to allow the bushing to pass into it, and the driver cup should match the outer diameter of the bushing.
- Lubricate: Apply a suitable lubricant to the threads of the forcing screw and the contact surfaces of the cups and end caps to ensure smooth operation and prevent galling.
- Assemble for Removal:
- Place the receiver cup on one side of the component housing, ensuring it is aligned with the bushing to be removed.
- Place the driver cup on the opposite side, against the bushing.
- Insert the forcing screw through the center of the assembly.
- Secure with the appropriate nut and thrust washer on the forcing screw.
- Assemble for Installation:
- Position the new bushing into the housing opening.
- Place the driver cup against the bushing.
- Place a suitable support cup or end cap on the opposite side of the housing.
- Insert the forcing screw through the assembly and secure with the nut and thrust washer.
- Operate: Use a wrench or ratchet to slowly turn the nut on the forcing screw. Observe the bushing as it moves. Ensure it remains straight and does not bind. Continue until the bushing is fully removed or installed.
5.2 Using with a Shop Press
For more demanding jobs, the kit's plates and sleeves can be used in conjunction with a standard shop press. This expands the tool's versatility for heavier-duty applications.
- Select Components: Choose the appropriate cups and the dedicated shop press adapter.
- Position: Carefully position the component, bushing, and selected cups on the bed of the shop press. Ensure all components are stable and aligned.
- Press: Slowly apply pressure with the shop press, monitoring the bushing's movement. Ensure even pressure and alignment throughout the process.
6. Maintenance
Proper maintenance ensures the longevity and reliable performance of your OEMTOOLS 27212 tool set:
- Cleaning: After each use, wipe all components clean of grease, dirt, and debris.
- Lubrication: Periodically apply a light coat of oil to the threaded rods to prevent rust and ensure smooth operation.
- Inspection: Regularly inspect all cups, adapters, and forcing screws for signs of wear, bending, or damage. Replace any damaged components immediately.
- Storage: Store the tool set in its original carrying case in a dry, climate-controlled environment to protect it from moisture and corrosion.
7. Troubleshooting
If you encounter issues while using the tool set, consider the following:
- Bushing is stuck or requires excessive force:
- Ensure proper lubrication of the forcing screw and contact surfaces.
- Verify that the correct size cups and adapters are being used.
- For extremely stubborn bushings, consider applying heat to the housing (if safe and appropriate for the material) or using a shop press if the manual method is insufficient.
- Tool components are bending or deforming:
- This indicates excessive force or improper alignment. Re-evaluate the setup and ensure components are aligned straight.
- Ensure the correct forcing screw size is used for the load.
- Do not use smaller rods for heavy-duty applications.
- Bushing is not pressing straight:
- Check for proper alignment of all cups and the forcing screw.
- Ensure the driver cup is making even contact with the bushing.
- Apply pressure slowly and consistently.
8. Specifications
| Feature | Detail |
|---|---|
| Model Number | 27212 |
| Brand | OEMTOOLS |
| Item Weight | 42.2 pounds |
| Product Dimensions | 19.6 x 4.8 x 14.9 inches |
| Sleeve Wall Thickness | 5 mm |
| Sleeve Height | 94 mm |
| External Sleeve Diameters | 44 mm, 46 mm, 48 mm, 50 mm, 52 mm, 54 mm, 56 mm, 58 mm, 60 mm, 62 mm, 64 mm, 66 mm, 68 mm, 70 mm, 72 mm, 74 mm, 76 mm, 78 mm, 80 mm, 82 mm |
| Forcing Screw Length | 450 mm |
| Forcing Screw Thread Sizes | 10 x 1.5 mm, 12 x 2.0 mm, 14 x 2.0 mm, 16 x 2.5 mm |
| Sleeve End Cap Dimensions | 83 x 20 mm |
9. Warranty Information
Specific warranty details for the OEMTOOLS 27212 Manual Bushing Removal Tool Set are not provided in this manual. Please refer to the product packaging or the official OEMTOOLS website for the most current warranty information.
10. Customer Support
For technical assistance, replacement parts, or further inquiries regarding your OEMTOOLS 27212 Manual Bushing Removal Tool Set, please visit the official OEMTOOLS website or contact their customer service department. Contact information can typically be found on the brand's official website or product packaging.
You can visit the OEMTOOLS Store at Amazon.com/OEMTOOLS for more information and product support.
Ask a question about this manual
Ask about setup, troubleshooting, compatibility, parts, safety, or missing instructions. Manuals+ will review the question and use this page’s manual context to help answer it.