
1. Introduction
The OWC Mercury Elite Pro Dual is a high-performance, dual-drive external storage solution designed for professional workflows, data archiving, and system backups. It features both Thunderbolt 2 and USB 3.1 Gen 1 connectivity, offering versatile compatibility and high-speed data transfer. This enclosure supports various RAID configurations, including RAID 0, RAID 1, Span, and Independent modes, allowing users to optimize for speed or data redundancy based on their specific needs. The robust aluminum design and integrated cooling system ensure reliable operation.
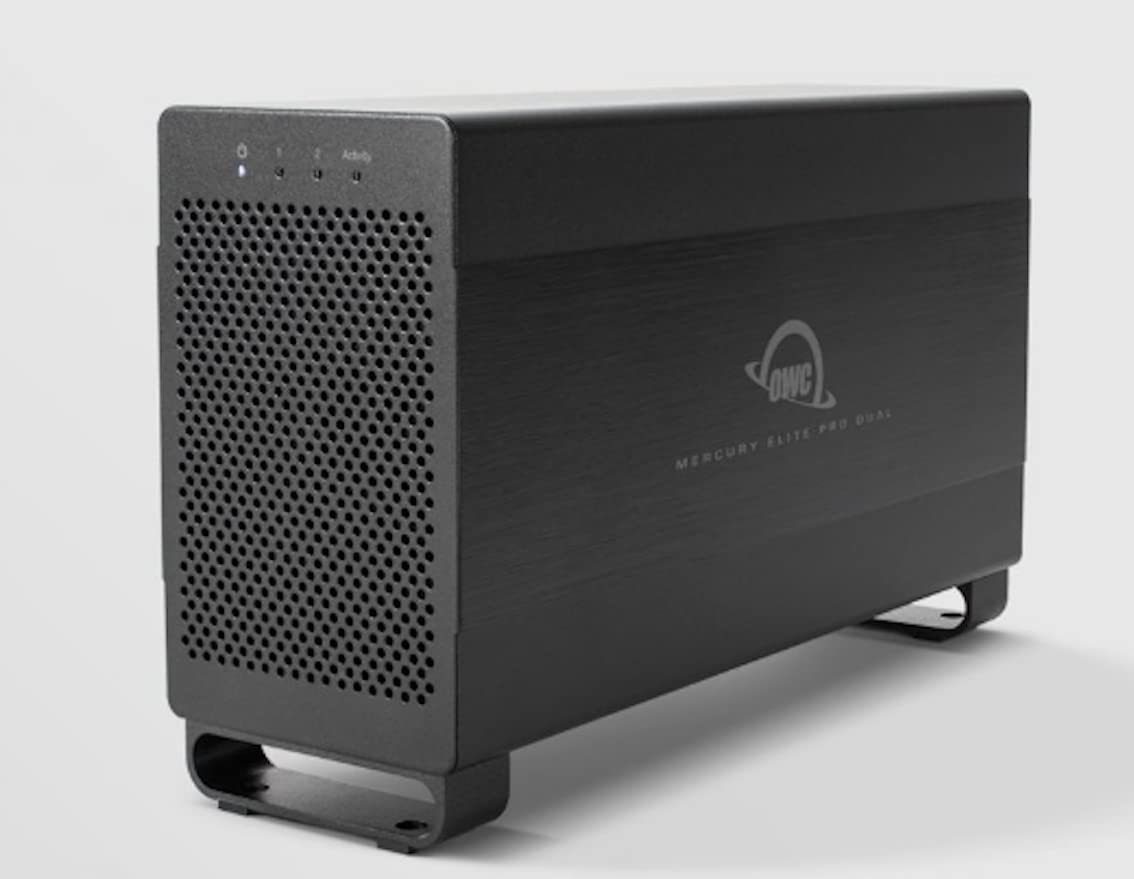
Figure 1: Front view of the OWC Mercury Elite Pro Dual enclosure.
2. Package Contents
Verify that all items are present in the package:
- OWC Mercury Elite Pro Dual Enclosure
- 0.6 meter (24 inch) USB 3.1 Gen 1 cable
- 1.0 meter (39 inch) Thunderbolt cable
- Power Adapter
- User Manual (this document)
3. Setup
3.1. Hard Drive Installation
The Mercury Elite Pro Dual enclosure is designed to accommodate two 3.5-inch hard drives. Follow these steps to install your drives:
- Ensure the enclosure is powered off and disconnected from your computer.
- Locate the drive bays. Depending on the model, you may need to open a latch or remove screws to access the bays.
- Carefully slide each 3.5-inch hard drive into its respective bay, ensuring the SATA connectors align with the enclosure's backplane.
- Secure the drives using the provided screws or locking mechanism.
- Close the enclosure cover.
3.2. Connecting to Your Computer
The enclosure offers both Thunderbolt 2 and USB 3.1 Gen 1 connectivity.
- Thunderbolt 2 Connection: Use the provided Thunderbolt cable to connect one of the Thunderbolt 2 ports on the enclosure to a Thunderbolt 2 port on your computer. You can daisy-chain up to five additional Thunderbolt devices using the second Thunderbolt 2 port.
- USB 3.1 Gen 1 Connection: Use the provided USB 3.1 Gen 1 cable to connect the USB 3.1 Gen 1 port on the enclosure to a compatible USB port on your computer.
Connect the power adapter to the DC IN port on the enclosure and then to a power outlet.
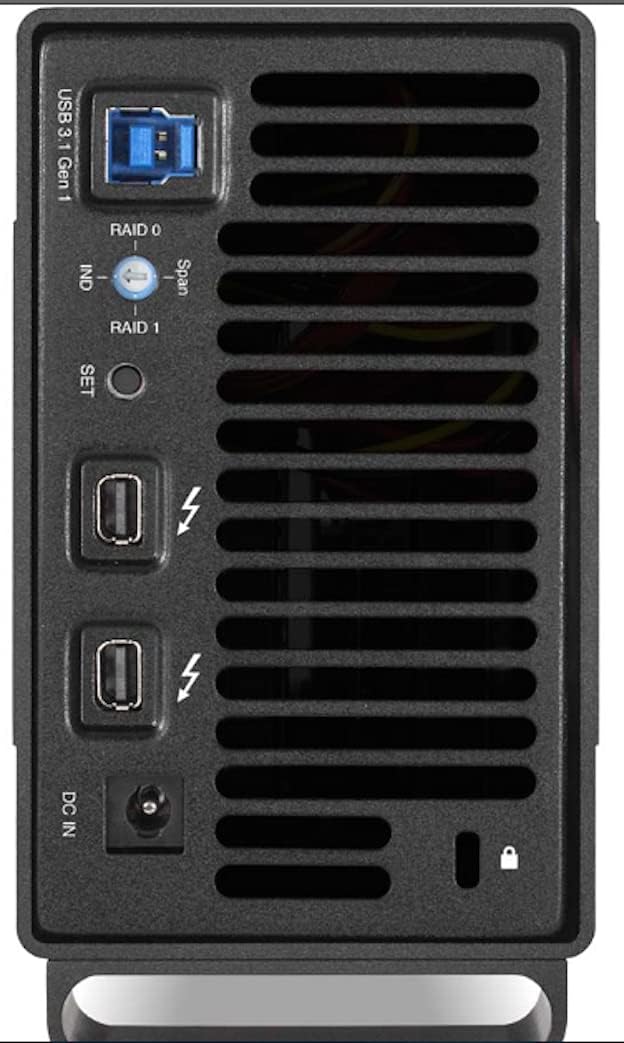
Figure 2: Rear panel with connectivity and RAID configuration options.
3.3. RAID Configuration
The Mercury Elite Pro Dual supports hardware RAID modes. The default configuration is RAID 0. To change the RAID mode, use the RAID selector dial and SET button on the rear panel (refer to Figure 2).
- Power off the enclosure and disconnect it from your computer.
- Using a small pointed object (e.g., a paperclip), rotate the RAID selector dial to your desired mode:
- RAID 0 (Striping): Combines both drives into a single volume for maximum speed and capacity. No data redundancy.
- RAID 1 (Mirroring): Creates an exact copy of data on both drives for data redundancy. Capacity is limited to a single drive's size.
- Span: Combines both drives into a single large volume without striping or mirroring. Data fills one drive then the next.
- Independent (IND): Each drive operates as a separate volume.
- Press and hold the SET button for approximately 3-5 seconds until the enclosure's LEDs indicate the change.
- Release the SET button.
- Reconnect the enclosure to your computer and power it on.
- The drives will need to be formatted by your operating system after a RAID configuration change. Refer to your operating system's disk utility for formatting instructions.
Important: Changing the RAID mode will erase all data on the drives. Back up any important data before reconfiguring the RAID.
4. Operating Instructions
4.1. Power Management
The Mercury Elite Pro Dual features Smart Power technology. This allows the enclosure to automatically shut down during periods of inactivity and power on/off in conjunction with your connected workstation, optimizing energy consumption and extending drive lifespan.
4.2. Data Transfer
Once connected and formatted, the enclosure will appear as an external drive on your computer. You can drag and drop files, use backup software, or perform any standard file operations as you would with an internal drive. The Thunderbolt 2 interface provides data transfer rates up to 474 MB/s in RAID 0 configuration, suitable for demanding tasks like 4K video editing.
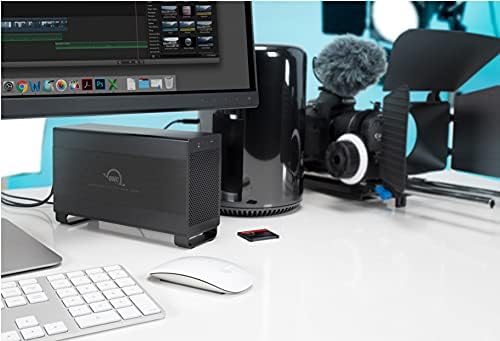
Figure 3: OWC Mercury Elite Pro Dual integrated into a workstation setup.
5. Maintenance
- Cleaning: Use a soft, dry cloth to clean the exterior of the enclosure. Avoid liquid cleaners or solvents. Ensure ventilation grilles are free from dust to maintain optimal cooling.
- Firmware Updates: Periodically check the OWC support website for any available firmware updates for your Mercury Elite Pro Dual. Firmware updates can improve performance, add features, or resolve issues. Follow the instructions provided with the update carefully.
- Data Backup: Regularly back up important data from your enclosure to another storage device. While RAID 1 provides redundancy against a single drive failure, it does not protect against accidental deletion, software corruption, or other catastrophic events.
6. Troubleshooting
| Problem | Possible Cause | Solution |
|---|---|---|
| Enclosure not recognized by computer | Loose cable connection, incorrect port, unformatted drives, power issue. |
|
| Drive disconnects during large file transfers | Faulty Thunderbolt/USB cable, power supply issue, system instability. |
|
| LED indicators not functioning correctly | Internal hardware issue, specific RAID mode behavior. |
|
| Slow data transfer speeds | Incorrect RAID mode, cable quality, computer port limitations, drive health. |
|
7. Specifications
| Brand | OWC |
| Model | Mercury Elite Pro Dual |
| Hardware Interface | Thunderbolt 2, USB 3.1 Gen 1 |
| Supported Drives | 2 x 3.5-inch Hard Drives |
| RAID Modes | RAID 0, RAID 1, Span, Independent |
| Data Transfer Rate | Up to 474 MB/s (RAID 0) |
| Material | Aluminum |
| Color | Black |
| Item Weight | 2.5 Pounds (without drives) |
| Compatible Devices | Laptop (and other computers with Thunderbolt 2 or USB 3.1 Gen 1) |
| Manufacturer | Other World Computing |
| UPC | 812437024036 |
| ASIN | B01N6ILXX6 |
8. Warranty Information
The OWC Mercury Elite Pro Dual enclosure comes with a 3-Year OWC Limited Warranty. For detailed terms and conditions, please refer to the warranty documentation included with your product or visit the official OWC website.
9. Customer Support
If you encounter any issues or have questions regarding your OWC Mercury Elite Pro Dual, please visit the official OWC support website for FAQs, drivers, firmware updates, and contact information. You can also reach out to OWC customer service for technical assistance.
OWC Website: www.owcdigital.com/support


