
EL-SKY W-335
EL-SKY W-335 Smart Electronic Kit
Instruction Manual
Introduction
The EL-SKY W-335 Smart Electronic Kit is designed to introduce users, aged 8 and above, to the fundamental principles of electronics and circuit building. This kit allows for the construction of over 335 different projects, fostering creativity and hands-on learning. Each component features a unique code and snap-together design, eliminating the need for additional tools.
Explore various functions including light, sound, power, and recording, through engaging experiments such as lamps, fans, doorbells, and FM radios.

Image 1: The EL-SKY W-335 Smart Electronic Kit packaging, displaying the kit's contents and capabilities.
Safety Information
WARNING: CHOKING HAZARD — Small parts. Not suitable for children under 3 years. Adult supervision is recommended for all users, especially those new to electronics.
Ensure all connections are secure before applying power. Do not attempt to modify components or use them in ways not described in this manual. Keep batteries away from small children.
Package Contents
Upon opening the EL-SKY W-335 Smart Electronic Kit, please verify that all components are present and undamaged. The kit includes:
- 1 x Electronic Discovery Kit Base Board
- Over 31 unique circuit snap parts (e.g., wires, buzzer, touch plate, switch, LED, motor, battery holder, speaker, ICs)
- 1 x User Manual (this document)
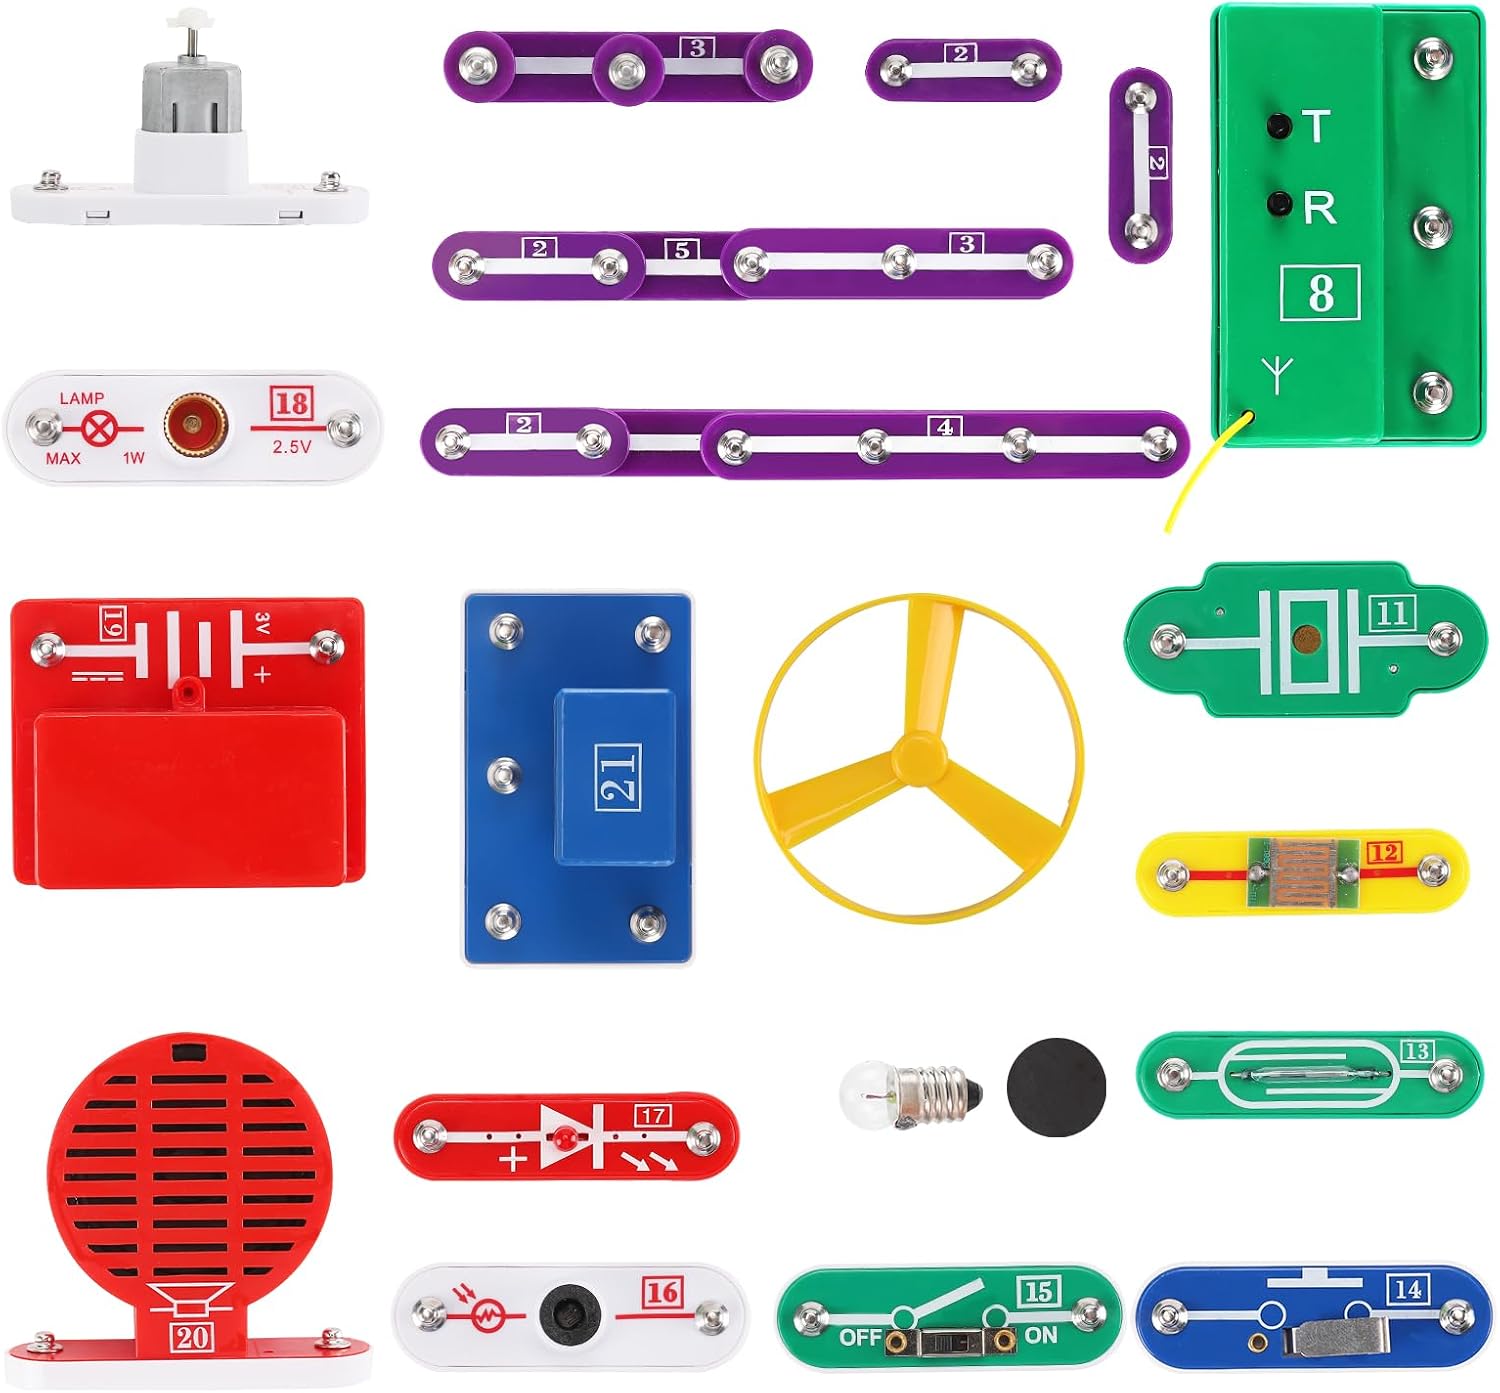
Image 2: A selection of individual snap-together electronic components included in the kit.
Components Overview
Each component in the kit is clearly labeled with a code number and has a graphical representation to aid in circuit construction. Refer to the following table for a detailed list of components and their functions.

Image 3: A detailed chart illustrating the various components, their code numbers, names, and symbolic representations for circuit diagrams.
Familiarize yourself with these components before beginning any projects. The snap-together design ensures easy assembly and disassembly.
Setup
- Unpack: Carefully remove all components from the packaging.
- Battery Installation: The kit requires 2 x AA batteries (not included). Locate the battery holder component (typically labeled with a code number, e.g., 19 for 3V Battery). Insert the batteries, ensuring correct polarity (+ and -).
- Workspace: Choose a clean, flat, and well-lit surface for building your circuits.
- Review Manual: Before starting any project, review the corresponding circuit diagram and instructions in this manual or the included project booklet.

Image 4: An example of the kit assembled on the baseboard, demonstrating battery placement and component connections for a fan circuit.
Operating Instructions: Building Circuits
The EL-SKY W-335 kit allows for the creation of numerous electronic projects. Each project involves connecting specific components in a particular sequence on the baseboard. Always refer to the provided circuit diagrams for accurate assembly.
General Steps for Building a Circuit:
- Identify Components: Locate all the necessary components for your chosen project using the component overview (Image 3).
- Follow Diagram: Place the components on the baseboard according to the circuit diagram. The numbers on the baseboard correspond to connection points.
- Snap Connections: Firmly snap the components together. Ensure all connections are secure to prevent intermittent operation.
- Power On: Once the circuit is fully assembled and checked, switch on the power (if applicable for the project).
- Observe and Learn: Observe the circuit's behavior. If it doesn't work as expected, review your connections against the diagram.
Example Project: Flying Disk
This project demonstrates a simple motor circuit that can launch a flying disk.
- Components Needed: Motor (24), Push-button Switch (14), Battery Holder (19), Wires (various lengths), Flying Disk blades.
- Assembly:
- Install the blades onto the motor (24).
- Connect the motor, push-button switch, and battery holder using the appropriate wires as shown in the diagram.
- Ensure the battery holder has 2 x AA batteries installed.
- Operation: Press the Push-button Switch (14). The motor will spin, and if pressed abruptly, the flying disk will launch.

Image 5: A visual guide for constructing the 'Flying Disk' project, including a circuit diagram and a photograph of the assembled circuit.
Other Assembled Examples:
The kit supports a wide range of projects, including:
- Lamp Circuit
- Electric Fan
- Sound Controlled Music Doorbell
- AND Gate Logic Circuit
- OR Gate Logic Circuit
- Voice Control Music Doorbell
- Water Control Music Doorbell
- FM Radio

Image 6: A collage of various completed circuit projects that can be built with the kit, demonstrating its versatility.
Maintenance
- Cleaning: Use a soft, dry cloth to gently wipe components if they become dusty. Do not use water or cleaning solutions.
- Storage: Store all components in their original box or a similar container to prevent loss and damage. Keep the kit in a cool, dry place away from direct sunlight and extreme temperatures.
- Battery Removal: Always remove batteries from the battery holder when the kit is not in use for extended periods to prevent leakage.
Troubleshooting
- Circuit Not Working:
- Check battery polarity and ensure batteries are fresh.
- Verify all connections are secure and snapped together correctly.
- Double-check the circuit diagram against your assembly. Even a single misplaced component can prevent operation.
- Ensure switches are in the correct position (ON/OFF).
- Intermittent Operation:
- Loose connections are a common cause. Re-snap components firmly.
- Weak batteries may cause inconsistent performance. Replace them.
- Component Damage: If a component appears physically damaged, discontinue use and contact support.
Specifications
| Product Dimensions | 14.05 x 1.85 x 10.63 inches (35.7 x 4.7 x 27 cm) |
| Item Weight | 1 pound (0.45 kg) |
| Model Number | W-335 |
| Manufacturer | EL-SKY |
| Recommended Age | 8 years and up |
| Batteries Required | 2 x AA batteries (not included) |
| Number of Projects | 335+ |

Image 7: Product dimensions of the EL-SKY W-335 Smart Electronic Kit packaging.
Warranty and Support
For specific warranty information or technical support regarding your EL-SKY W-335 Smart Electronic Kit, please refer to the contact information provided on the product packaging or the official EL-SKY website. Keep your purchase receipt as proof of purchase.
Manufacturer: EL-SKY
Related documentsW-335

Ask a question about this manual
Ask about setup, troubleshooting, compatibility, parts, safety, or missing instructions. Manuals+ will review the question and use this page’s manual context to help answer it.