
1. Introduction
The Notifier FST-851R is an intelligent, addressable plug-in heat detector designed for use with Notifier fire alarm control panels. This device utilizes a thermistor sensing circuit to provide both fixed temperature and rate-of-rise thermal detection. The FST-851R is engineered for high performance and reliability in fire detection systems, offering advanced features for monitoring and reporting. This manual provides essential information for the proper installation, operation, and maintenance of your FST-851R heat detector.
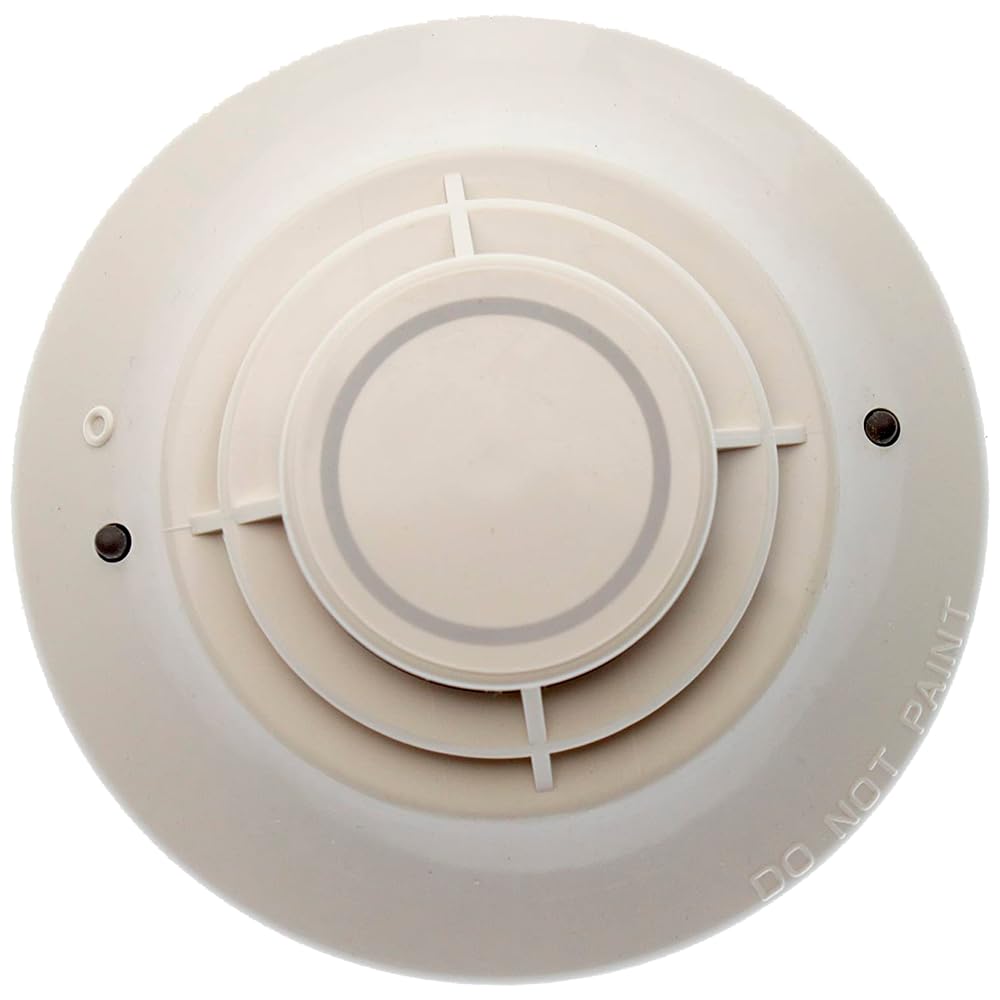
Figure 1: Top view of the Notifier FST-851R Intelligent Plug-in Heat Detector.
2. Safety Information
Important: Read all instructions carefully before installation and operation. Failure to follow these instructions may result in property damage, injury, or death. This device must be installed by qualified personnel in accordance with all local and national electrical and fire codes.
- Disconnect all power to the fire alarm control panel before installing or servicing the detector.
- Do not paint the detector. Paint can interfere with the sensor's ability to detect heat.
- Ensure proper wiring connections as specified in the installation instructions and wiring diagrams.
- Test the detector regularly as recommended in this manual and by local codes.
- This detector is not intended for use in hazardous locations.
- Refer to NFPA 72, the National Fire Alarm and Signaling Code, for detailed information on placement, installation, testing, and maintenance.
3. Setup and Installation
The FST-851R detector is designed for easy plug-in installation into a compatible Notifier detector base (sold separately). Ensure the detector base is securely mounted to a standard electrical box.
3.1 Mounting the Detector Base
- Ensure power to the circuit is OFF.
- Mount the appropriate Notifier detector base (e.g., B210LP, B710LP) to a standard electrical junction box using the provided screws.
- Route wiring through the base and make connections as per the base's wiring diagram and the fire alarm control panel's instructions.
3.2 Wiring Connections
The FST-851R connects to the Signaling Line Circuit (SLC) of a Notifier fire alarm control panel. Refer to the specific detector base installation manual for detailed wiring diagrams. Typical connections include:
- Terminal 1: SLC (+) IN and OUT
- Terminal 2: SLC (-) IN and OUT
- Terminal 3: Remote Annunciator (if used)
- Terminal 4: Remote Annunciator (if used)

Figure 2: Bottom view of the detector base, showing wiring terminals and model information. Ensure correct wiring to the SLC.
3.3 Addressing the Detector
The FST-851R is an addressable device. Set the detector's address using the rotary switches on the back of the detector head before plugging it into the base. The address must correspond to the programming in the fire alarm control panel. Refer to the control panel's manual for valid address ranges and programming procedures.

Figure 3: Side view of the FST-851R detector, highlighting the rotary address switches for setting the device address.
3.4 Installing the Detector Head
- Align the detector head with the detector base.
- Gently push the detector into the base while turning it clockwise until it seats firmly into place.
- Ensure the detector is fully engaged and cannot be easily removed without turning.
4. Operating Principles
The Notifier FST-851R is an intelligent heat detector that operates on two primary principles:
- Fixed Temperature Detection: The detector will alarm when the ambient temperature reaches a predetermined fixed threshold, typically 135°F (57.2°C).
- Rate-of-Rise Detection: The detector will alarm if the temperature rises rapidly over a short period, regardless of the absolute temperature. This feature allows for earlier detection of fast-developing fires.
Upon detecting a fire condition, the FST-851R will communicate an alarm signal to the fire alarm control panel. The detector features a visible LED indicator that flashes during normal operation and illuminates steadily when in alarm. The specific behavior of the LED may vary based on the control panel's programming.
5. Maintenance
Regular maintenance ensures the continued reliable operation of your FST-851R heat detector. Adhere to the following guidelines:
5.1 Testing
- Annual Testing: Test the detector annually, or more frequently as required by local codes, using a heat source (e.g., a hairdryer on a low setting, or a manufacturer-approved heat test tool). Direct the heat towards the thermistor until the alarm activates.
- Functional Test: Verify that the detector's LED illuminates and that the fire alarm control panel receives and processes the alarm signal correctly.
- After testing, ensure the detector returns to its normal operating state.
5.2 Cleaning
- Frequency: Clean the detector at least once a year, or more often if environmental conditions warrant.
- Procedure:
- Notify the appropriate authorities that maintenance is being performed and the system will be temporarily out of service.
- Disable the zone or system undergoing maintenance at the fire alarm control panel.
- Remove the detector head from its base by turning it counter-clockwise.
- Use a soft brush or a vacuum cleaner with a soft brush attachment to remove any dust or debris from the detector's exterior and sensing elements.
- Do not use solvents or abrasive cleaners.
- Reinstall the detector head onto its base.
- Test the detector to ensure proper operation.
- Restore the system to normal operation and notify authorities.
5.3 Battery Replacement
The Notifier FST-851R is a wired device and does not contain user-replaceable batteries. It draws power directly from the fire alarm control panel's Signaling Line Circuit (SLC).
6. Troubleshooting
If the FST-851R detector is not functioning as expected, consult the following table for common issues and solutions. For persistent problems, contact qualified service personnel.
| Problem | Possible Cause | Solution |
|---|---|---|
| Detector LED not flashing (normal operation) | No power to the detector; incorrect wiring; detector not seated properly; faulty detector. | Check power to the SLC. Verify wiring connections. Re-seat the detector. Replace detector if necessary. |
| Detector in constant alarm (LED steady on) without fire | High ambient temperature; detector fault; false alarm source. | Check ambient temperature. Clean detector. Test detector. If problem persists, replace detector. |
| Control panel reports a 'Trouble' or 'Fault' for the detector | Wiring issue; incorrect address; detector fault; dirty detector. | Verify wiring integrity. Check detector address. Clean detector. Replace detector if fault persists. |
| Detector does not alarm during test | Insufficient heat applied; faulty detector; wiring issue. | Ensure adequate heat is applied directly to the thermistor. Verify wiring. Replace detector. |
7. Specifications
The following are the technical specifications for the Notifier FST-851R Intelligent Plug-in Heat Detector:
| Feature | Detail |
|---|---|
| Brand | Notifier |
| Model Number | FST-851R |
| Product Type | Intelligent Plug-in Heat Detector (Rate-of-Rise Thermal Sensor) |
| Fixed Temperature Alarm | 135°F (57.2°C) |
| Power Source | Powered by Fire Alarm Control Panel (SLC) |
| Alarm Type | Audible (via control panel), Visual (detector LED) |
| Item Weight | 0.12 Kilograms |
| UPC | 647358697843 |
| GTIN | 647358697843 |

Figure 4: Product label showing model number FST-851R and UPC for identification.
8. Warranty and Support
For warranty information, technical support, or service inquiries, please contact your authorized Notifier distributor or the manufacturer directly. Specific warranty terms and conditions may vary by region and purchase agreement. Always refer to the official Notifier documentation or website for the most current support information.
Notifier Contact Information: Please visit the official Notifier website or consult your product packaging for current contact details.