
APS CL6360H
APS CL6360H Main Upper Stainless Steel Black Mesh Rivet Grille Insert Instruction Manual
For Chevy Silverado 1500 (2016-2018 & 2019 1500 LD)
1. Product Overview
This document provides installation and maintenance instructions for the APS CL6360H Main Upper Stainless Steel Black Mesh Rivet Grille Insert. This product is designed to enhance the front appearance of your vehicle by adding a custom grille overlay.

Image 1.1: Two APS CL6360H black mesh rivet grille inserts, showing their design and construction.
2. Compatibility
This grille insert is compatible with the following vehicle models:
- Chevy Silverado 1500 (Model Years: 2016, 2017, 2018)
- Chevy Silverado 1500 LD (Model Year: 2019)
Important Note:
- Not compatible with Z71 and High Country models.
- This product is a grille insert only; the original equipment (OE) grille shell remains on the vehicle after installation. Logo, emblem, frame, or shell are not included.
3. Package Contents
Upon opening the package, verify that all components are present and undamaged:
- Main Upper Grille Insert (1.8mm Wire Mesh Rivet Style, Black, Quantity: 2 pieces)
- Mounting Hardware (screws, clamps, etc.)
- Installation Paper (detailed instructions)
If any items are missing or damaged, please contact customer support immediately.
4. Setup (Installation)
This grille insert utilizes a Bolt Over/Overlay/Bolton installation method, which requires drilling. The original grille shell must remain on the vehicle. Professional installation is recommended.
Required Tools (Not Included):
- Drill
- Drill bits (appropriate size for mounting hardware)
- Measuring tape or ruler
- Marker or pencil
- Protective eyewear and gloves
Installation Steps:
- Preparation: Ensure the vehicle's front end, particularly the existing grille area, is clean and free of debris.
- Positioning: Carefully place the new grille insert over the existing OE grille shell. Align it to ensure proper fitment and desired aesthetic.
- Marking Drill Points: Once aligned, use a marker or pencil to accurately mark the drilling locations through the tabs on the new grille insert onto the OE grille shell.
- Drilling: Remove the new grille insert. Using the marked points, carefully drill pilot holes into the OE grille shell. Ensure drill bit size matches the provided mounting hardware to avoid damage.
- Securing the Insert: Reposition the new grille insert. Align the tabs with the drilled holes. Use the provided mounting hardware (screws, clamps) to secure the insert firmly to the OE grille shell. Ensure all connections are tight and secure.
- Final Check: Verify that the grille insert is securely mounted and does not obstruct any vehicle functions or lighting.
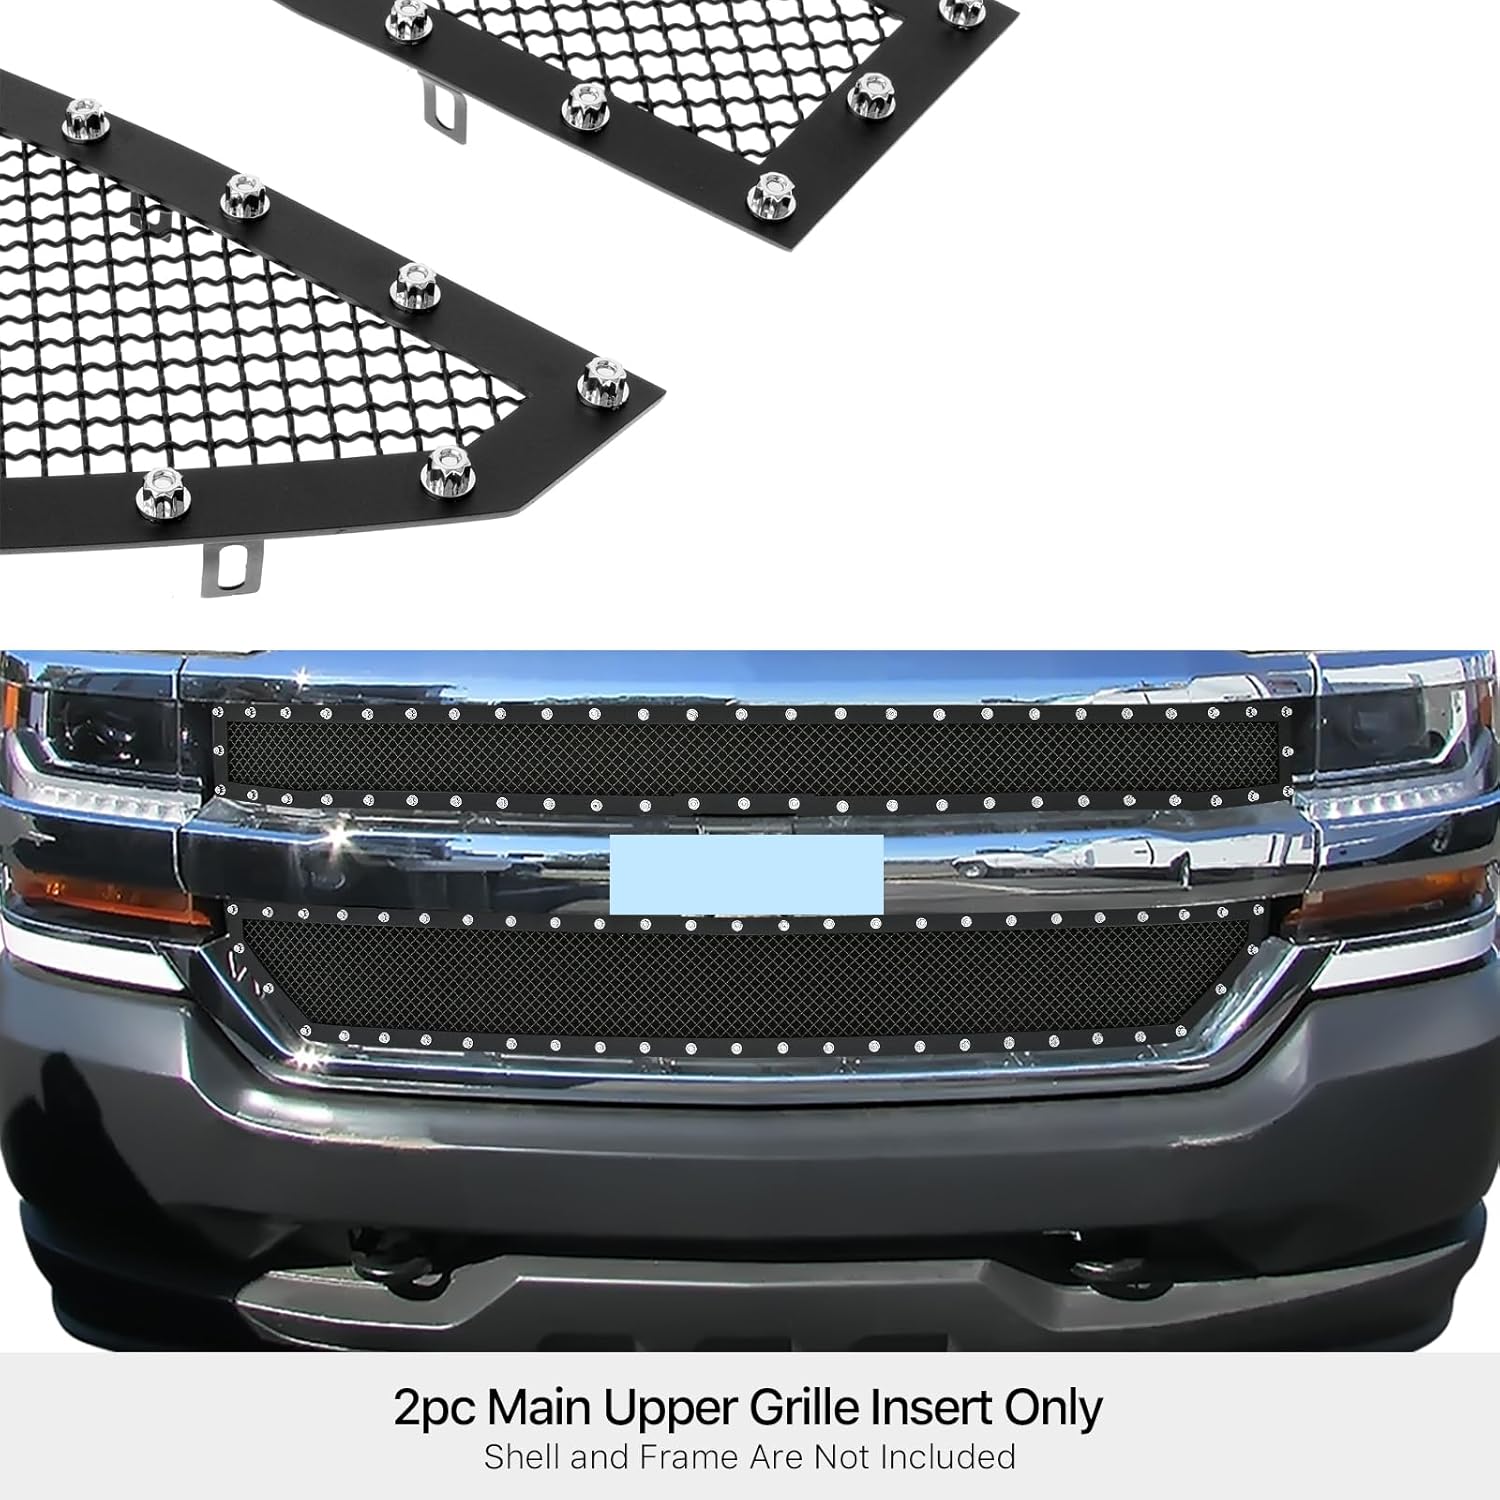
Image 4.1: Example of the APS CL6360H grille insert installed on a compatible Chevy Silverado 1500. Note that the original grille shell remains.
5. Operating Instructions
The APS CL6360H grille insert is a static cosmetic and protective component. It does not require any operational procedures after installation. Once properly installed, it functions passively to enhance vehicle aesthetics and provide a layer of protection to the radiator area.
6. Maintenance
To ensure the longevity and appearance of your grille insert, follow these maintenance guidelines:
- Regular Cleaning: Clean the grille insert regularly with mild automotive soap and water. Use a soft cloth or sponge to avoid scratching the powder-coated finish.
- Avoid Harsh Chemicals: Do not use abrasive cleaners, solvents, or harsh chemicals, as these can damage the finish.
- Inspect Fasteners: Periodically check all mounting hardware to ensure they remain tight and secure. Re-tighten if necessary.
- Damage Inspection: Inspect the grille for any signs of damage (e.g., bent mesh, loose rivets) after impacts or off-road driving. Address any issues promptly.
7. Troubleshooting
This section addresses common concerns that may arise during or after installation.
Issue: Grille insert does not align properly or fit flush.
Possible Causes:
- Incorrect vehicle model or year.
- Tabs on the insert are bent or misaligned.
- Drill holes on the OE grille shell are not accurately placed.
Solution:
- Double-check vehicle compatibility against the product specifications.
- Carefully inspect the grille insert for any manufacturing defects or shipping damage. Gently adjust tabs if slightly bent, but avoid excessive force.
- Ensure precise marking and drilling of holes. If holes are significantly off, professional assistance may be required.
Issue: Mounting hardware feels loose after installation.
Possible Causes:
- Hardware not tightened sufficiently.
- Incorrect drill bit size used, resulting in oversized holes.
Solution:
- Re-tighten all mounting hardware. Do not overtighten to avoid stripping threads or damaging components.
- If holes are oversized, consider using larger washers or alternative fastening methods (e.g., rivet nuts) with professional guidance.
For issues not covered here, please refer to the "Warranty and Support" section.
8. Specifications
| Feature | Detail |
|---|---|
| Brand | APS |
| Model Number | CL6360H |
| Material | Stainless Steel |
| Finish | Powder Coated (Black) |
| Grille Style | 1.8mm Wire Mesh Rivet Style |
| Installation Type | Bolt-Over/Overlay (Drilling Required) |
| Vehicle Service Type | Car (Chevy Silverado 1500) |
| Item Weight | 8.2 pounds |
| Package Dimensions | 53 x 7 x 4 inches |
9. Warranty and Support
APS is committed to customer satisfaction. If you encounter any quality problems with your grille insert, please do not hesitate to contact our customer service team.
While specific warranty details are not provided in this manual, APS offers professional and sincere service to resolve product-related issues.
For assistance, please contact APS customer support through the retailer's platform or the official APS website.
Related documentsCL6360H


Ask a question about this manual
Ask about setup, troubleshooting, compatibility, parts, safety, or missing instructions. Manuals+ will review the question and use this page’s manual context to help answer it.