
Oster GCSTBS6051
Oster GCSTBS6051 Steam Iron Instruction Manual
Model: GCSTBS6051 | Brand: Oster
1. Introduction
Thank you for choosing the Oster GCSTBS6051 Steam Iron. This iron is designed for efficient and effective garment care, offering powerful steam distribution and smooth gliding for excellent results with less effort. Its advanced features ensure your clothes are perfectly ironed and cared for.
2. Important Safety Instructions
When using your iron, basic safety precautions should always be followed, including the following:
- Read all instructions before using the iron.
- Use iron only for its intended use.
- To avoid the risk of electric shock, do not immerse the iron in water or other liquids.
- Always turn the iron OFF before plugging or unplugging from the electrical outlet. Never pull on the cord to disconnect from the outlet; instead, grasp plug and pull to disconnect.
- Do not allow cord to touch hot surfaces. Let iron cool completely before putting away. Loop cord loosely around iron when storing.
- Always disconnect iron from electrical outlet when filling with water or emptying, and when not in use.
- Do not operate iron with a damaged cord or if the iron has been dropped or damaged. To avoid the risk of electric shock, do not disassemble the iron; take it to a qualified serviceman for examination and repair. Incorrect reassembly can cause a risk of electric shock when the iron is used.
- Close supervision is necessary for any appliance being used by or near children. Do not leave iron unattended while connected or on an ironing board.
- Burns can occur from touching hot metal parts, hot water, or steam. Use caution when you turn a steam iron upside down – there may be hot water in the reservoir.
- To avoid a circuit overload, do not operate an iron on the same circuit with another high wattage appliance.
- If an extension cord is absolutely necessary, a 15-ampere cord should be used. Cords rated for less amperage may overheat. Care should be taken to arrange the cord so that it cannot be pulled or tripped over.
3. Product Overview
Familiarize yourself with the components of your Oster Steam Iron.

Figure 3.1: The Oster GCSTBS6051 Steam Iron in red and gray, showcasing its sleek design and ceramic soleplate.

Figure 3.2: Detailed diagram highlighting key features: Aeroceramic Soleplate, Anti-Calc system, Precision Tip, Nano Grooves, Plexi Channels, Spray Trigger, Steam Shot, and Metalized Body.

Figure 3.3: The temperature selector dial, allowing you to adjust the ideal temperature for each fabric type.

Figure 3.4: The powerful vertical steam function, delivering up to 80 grams of steam per minute for hanging garments.

Figure 3.5: The precision tip design, allowing for easy ironing around buttons, collars, and pleats.
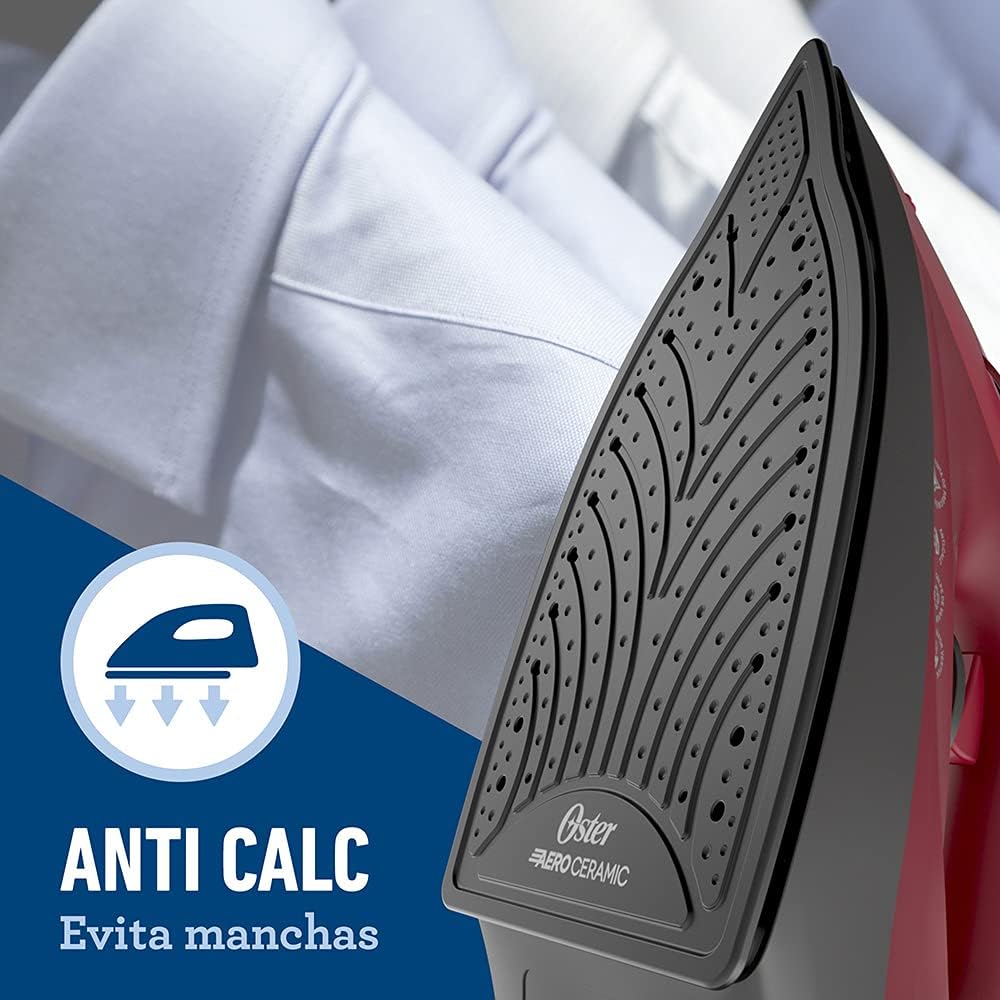
Figure 3.6: The Anti-Calc feature, designed to prevent mineral buildup and avoid stains on your garments.

Figure 3.7: The 360-degree swivel cord, designed to prevent tangles and provide flexibility during ironing.
4. Setup
Before first use, or after extended storage, follow these steps:
- Unpack: Carefully remove the iron from its packaging and remove any protective materials or labels.
- Clean: Wipe the soleplate with a damp cloth to remove any residue from manufacturing.
- Fill Water Tank (for steam ironing): Ensure the iron is unplugged. Open the water fill cap and slowly pour distilled or demineralized water into the water tank up to the MAX fill line. Do not overfill. Close the cap securely.
- Initial Heating: Plug the iron into a suitable electrical outlet. Set the temperature dial to the maximum setting. Allow the iron to heat up for a few minutes until the indicator light turns off, signaling it has reached the desired temperature.
- First Use Steam (Optional): For the first steam use, iron an old cloth to ensure any manufacturing residue is cleared and to test steam function.
5. Operating Instructions
Your Oster Steam Iron offers various functions for optimal ironing.
5.1 Dry Ironing
- Ensure the water tank is empty or the steam control is set to 'Dry' or 'No Steam'.
- Plug in the iron and set the temperature dial according to the fabric type.
- Wait for the indicator light to turn off, indicating the iron has reached the set temperature.
- Begin ironing your garments.
5.2 Steam Ironing
- Fill the water tank with distilled or demineralized water (refer to Section 4: Setup).
- Plug in the iron and set the temperature dial to the 'Steam' range (usually indicated by a steam icon or higher temperature settings).
- Wait for the indicator light to turn off.
- Adjust the steam control to your desired steam level.
- Iron your garments, moving the iron smoothly over the fabric.
5.3 Vertical Steam
- Ensure the water tank is filled.
- Set the temperature dial to the maximum setting.
- Allow the iron to heat up fully until the indicator light turns off.
- Hold the iron vertically, about 1-2 inches away from the hanging garment (e.g., on a hanger).
- Press the steam shot button repeatedly to release bursts of steam, moving the iron up and down the garment to remove wrinkles.
- This function is also suitable for refreshing upholstery and curtains.
5.4 Spray Function
- Ensure the water tank is filled.
- Press the spray button (often located near the handle) to mist water onto stubborn wrinkles, making them easier to iron out.
5.5 Steam Shot / Burst of Steam
- Ensure the water tank is filled and the iron is set to a steam-compatible temperature.
- Press the steam shot button (often located on top of the handle) to release a powerful burst of steam, ideal for removing tough wrinkles.
- Wait a few seconds between bursts to allow the iron to generate sufficient steam.
6. Maintenance and Cleaning
Regular maintenance ensures the longevity and performance of your iron.
6.1 Cleaning the Soleplate
- Always ensure the iron is unplugged and completely cool before cleaning.
- Wipe the soleplate with a damp cloth and a non-abrasive liquid cleaner.
- Do not use abrasive scouring pads or metal cleaners as these can scratch the ceramic soleplate.
- If starch or other residue sticks to the soleplate, wipe it with a cloth dipped in a mild vinegar solution while the iron is cool.
6.2 Anti-Calc System (Self-Cleaning)
Your iron is equipped with an Anti-Calc system to reduce mineral buildup. For optimal performance, perform a self-cleaning cycle periodically, especially if you notice reduced steam output or mineral residue.
- Fill the water tank to the MAX line with tap water.
- Plug in the iron and set the temperature to maximum.
- Once the iron reaches temperature (indicator light off), unplug it.
- Hold the iron horizontally over a sink.
- Press and hold the self-clean button (if available, otherwise use steam shot button repeatedly) to flush out hot water and steam, along with any mineral deposits.
- Gently shake the iron back and forth until the water tank is empty.
- Plug the iron back in and let it heat up to dry out any remaining water.
- Unplug and store once cool.
6.3 Storage
- Always unplug the iron and allow it to cool completely before storing.
- Empty any remaining water from the tank.
- Store the iron upright on its heel rest to prevent soleplate damage.
- Do not wrap the cord tightly around the iron; loop it loosely.
7. Troubleshooting
If you encounter issues with your iron, refer to the following common problems and solutions:
| Problem | Possible Cause | Solution |
|---|---|---|
| Iron does not heat up. | Not plugged in; power outlet not working; temperature dial set to MIN. | Ensure iron is securely plugged in; check power outlet with another appliance; turn temperature dial to a higher setting. |
| No steam or insufficient steam. | Water tank empty; temperature too low for steam; steam control set to 'Dry'; mineral buildup. | Fill water tank; set temperature to steam range; adjust steam control; perform self-cleaning cycle. |
| Water leaking from soleplate. | Temperature too low for steam; water tank overfilled; iron not hot enough for steam shot. | Increase temperature setting; do not overfill water tank; wait for iron to fully heat before using steam shot. |
| White flakes/residue on clothes. | Mineral buildup in water tank/steam vents. | Use distilled or demineralized water; perform self-cleaning cycle. |
8. Specifications
| Feature | Detail |
|---|---|
| Model Number | GCSTBS6051 |
| Brand | Oster |
| Color | Red-Gray |
| Wattage | 1250 Watts |
| Item Weight | 2.5 Kilograms |
| Product Dimensions | 28.7 x 12.4 x 0.1 cm |
| Special Feature | Lightweight |
| Included Components | Iron |
| Care Instructions | Hand Wash (referring to the iron's care, not clothes) |
9. Warranty and Support
Your Oster GCSTBS6051 Steam Iron comes with a manufacturer's warranty.
- Warranty Period: 12 months from the date of purchase.
- This warranty covers defects in materials and workmanship under normal use. It does not cover damage resulting from misuse, abuse, accidents, or unauthorized modifications.
- For warranty claims or technical support, please contact Oster customer service. Refer to the contact information provided in your product packaging or visit the official Oster website.
Ask a question about this manual
Ask about setup, troubleshooting, compatibility, parts, safety, or missing instructions. Manuals+ will review the question and use this page’s manual context to help answer it.