
Goobay 45241
Goobay 45241 Soldering Aid with LED Lamp and Magnifying Glass User Manual
Model: 45241
1. Introduction
The Goobay 45241 Soldering Aid is a versatile tool designed to assist with delicate soldering and assembly tasks. It features a magnifying glass with LED illumination, flexible gooseneck crocodile clips, and an integrated soldering iron holder, providing stability and enhanced visibility for precision work.

Image 1.1: The Goobay 45241 Soldering Aid unit, showcasing its main components including the magnifying glass, LED lamp, gooseneck arms, and base with accessories.
2. Safety Instructions
Please read and understand all safety instructions before using this product. Failure to follow these instructions may result in injury or damage to the product.
- Always use the soldering aid on a stable, non-slip surface.
- Keep the device away from water and other liquids.
- Do not look directly into the LED light for extended periods to avoid eye strain.
- Ensure proper ventilation when soldering, as fumes can be harmful.
- Keep out of reach of children.
- Disconnect power when not in use or when cleaning.
- Use only the provided power adapter or recommended batteries.
3. Package Contents
Verify that all items listed below are present in your package:
- Goobay 45241 Soldering Aid main unit (base with magnifying glass, LED lamp, gooseneck arms, crocodile clips)
- Soldering iron holder
- Cleaning sponge
- Cleaning wool (brass wire)
- Soldering resin (flux)
- AC Power Adapter

Image 3.1: Overview of the soldering aid's features, including 16 LEDs, 3x magnification, soldering iron holder, sponge, cleaning wool, and flux.

Image 3.2: Detailed view of the included accessories: brass tip cleaner, soldering resin (rosin), and cleaning sponge.
4. Assembly
The Goobay 45241 Soldering Aid comes largely pre-assembled. Follow these steps for final setup:
- Unpack all components from the packaging.
- Place the main unit on a stable, flat work surface. The robust metal base ensures stability.
- Ensure the gooseneck arms for the magnifying glass and crocodile clips are securely attached to the base. Adjust their positions as needed.
- Insert the soldering iron holder into its designated slot on the base.
- Place the cleaning sponge, cleaning wool, and soldering resin into their respective compartments on the base.
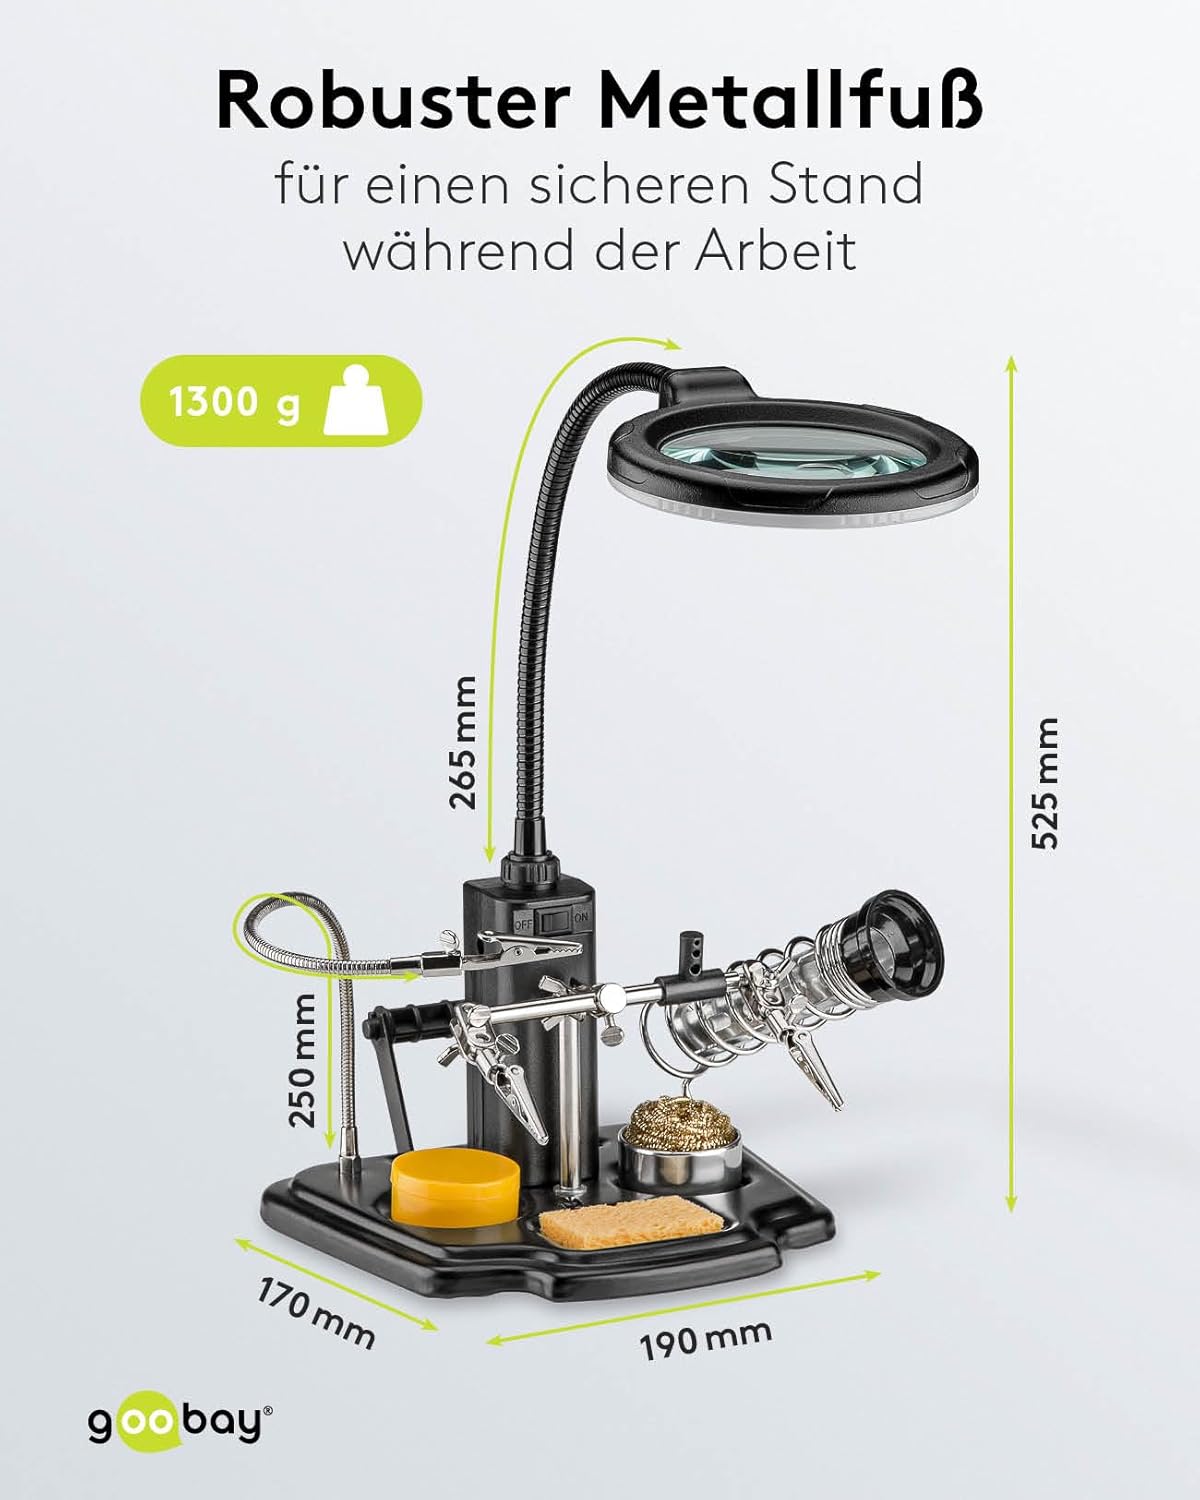
Image 4.1: The soldering aid with key dimensions, highlighting the robust metal base for secure positioning during work.
5. Power Options
The LED illumination can be powered either by batteries or via the included AC power adapter.
5.1. Battery Operation
For portable use, the LED light can be powered by 4x AA batteries (not included).
- Locate the battery compartment on the main unit.
- Open the battery compartment cover.
- Insert 4x AA batteries, ensuring correct polarity (+/-).
- Close the battery compartment cover securely.

Image 5.1: The removable battery compartment, designed for 4x AA batteries, allowing for flexible power options.
5.2. AC Power Adapter
For continuous operation, use the included AC power adapter.
- Connect the DC plug of the power adapter to the power input port on the main unit.
- Plug the AC adapter into a suitable wall outlet.

Image 5.2: Details of the direct power supply via the included AC adapter, showing Europlug (Type C, CEE 7/16) and DC plug specifications.
6. Operating Instructions
This section details how to use the various features of your Goobay 45241 Soldering Aid.

Image 6.1: Labeled diagram identifying key components: Magnifying glass, LED ring light, flexible goosenecks, On/Off switch, soldering iron holder, crocodile clips, cleaning wool, soldering resin holder, flux, and cleaning sponge.
6.1. Using the Magnifying Glass and LED Light
- Position the magnifying glass gooseneck to bring the lens over your workpiece.
- Flip the ON/OFF switch located on the main unit to activate the LED ring light.
- Adjust the angle and distance of the magnifying glass for optimal viewing and illumination of your work area. The 3x magnification and 16 LEDs provide clear visibility for fine details.

Image 6.2: Close-up view of the magnifying glass, detailing the LED ring light with 16 SMD LEDs, cold white light color (6500 K), 280 lm luminous flux, and the 90 mm diameter glass lens with 3x magnification (8 diopters).
6.2. Utilizing the Crocodile Clips
- Use the flexible gooseneck arms of the crocodile clips to securely hold small components or circuit boards in place.
- Adjust the angle and position of the clips to achieve the desired orientation for your workpiece. The strong clips prevent trembling or wobbling.

Image 6.3: The soldering aid in use, holding a circuit board, demonstrating its function as a practical helper for hands-free operation.

Image 6.4: The soldering aid providing a helping hand for intricate soldering and crafting tasks, shown with close-ups of fine component work and wire soldering.
6.3. Soldering Iron Holder and Cleaning
- Place your soldering iron in the integrated holder when not actively soldering to keep it secure and prevent accidental burns.
- Use the cleaning wool (brass wire) to effectively remove solder residue from the soldering tip.
- Dampen the cleaning sponge with water and use it to wipe the soldering tip clean.
- Apply a small amount of soldering resin (flux) to the soldering tip or workpiece to improve solder flow and joint quality.
7. Maintenance
Regular maintenance ensures the longevity and optimal performance of your soldering aid.
- Cleaning the Lens: Gently wipe the magnifying glass lens with a soft, lint-free cloth. For stubborn smudges, use a lens cleaning solution. Avoid abrasive cleaners.
- Cleaning the Base: Wipe the base and plastic components with a damp cloth. Do not immerse the unit in water.
- Sponge Care: Keep the cleaning sponge damp during use. Replace it when it becomes worn or heavily soiled.
- Battery Replacement: If using batteries, replace all four AA batteries simultaneously when the LED light dims.
- Storage: Store the soldering aid in a clean, dry environment when not in use.
8. Troubleshooting
If you encounter issues with your Goobay 45241 Soldering Aid, refer to the following common problems and solutions:
| Problem | Possible Cause | Solution |
|---|---|---|
| LED light does not turn on. | No power, batteries drained, or AC adapter not connected. | Check if the AC adapter is properly connected or replace batteries. Ensure the ON/OFF switch is in the 'ON' position. |
| LED light is dim. | Low battery power. | Replace batteries or use the AC power adapter. |
| Unit is unstable. | Not on a flat surface, or components not properly seated. | Ensure the unit is on a flat, stable surface. Check that all goosenecks and accessories are securely tightened. |
| Magnifying glass view is blurry. | Lens is dirty or not properly focused. | Clean the lens with a soft cloth. Adjust the distance of the lens from your workpiece. |
9. Specifications
| Model | Goobay 45241 |
| Item Weight | 1.2 Kilograms |
| Magnification Strength | 3 Diopters (3x) |
| Lens Diameter | 90 mm |
| Lens Material | Plastic, Acrylic |
| LEDs | 16 SMD LEDs |
| Light Color | Cold White |
| Color Temperature | 6500 K |
| Luminous Flux | 280 lm |
| Gooseneck Lamp Length | 265 mm |
| Gooseneck Crocodile Clamp Length | 250 mm |
| Base Dimensions (L x W) | 190 mm x 170 mm |
| Total Height | 525 mm |
| Power Supply | 4x AA Batteries (not included) or AC Adapter |
| AC Adapter Output | 5.9 V, 0.5 A, 2.95 W |
| Manufacturer | Wentronic |
10. Warranty and Support
The Goobay 45241 Soldering Aid comes with a 2-year guarantee from the date of purchase. This warranty covers manufacturing defects under normal use.
For technical support, warranty claims, or further assistance, please contact your retailer or the manufacturer directly. Keep your proof of purchase for warranty validation.
Related documents45241


Ask a question about this manual
Ask about setup, troubleshooting, compatibility, parts, safety, or missing instructions. Manuals+ will review the question and use this page’s manual context to help answer it.