Introduction
Thank you for choosing the Olde Midway SPIN-2000 Commercial-Grade Cotton Candy Machine with Cart. This manual provides essential information for the safe and efficient operation, maintenance, and troubleshooting of your new cotton candy maker. Please read all instructions carefully before use and retain this manual for future reference.
Important Safety Instructions
WARNING: To reduce the risk of fire, electric shock, or injury, always follow basic safety precautions.
- Read all instructions before operating the machine.
- Keep hands and arms clear of the floss bowl while in operation.
- Do not remove the floss head for cleaning while the machine is in operation. Refer to the cleaning instructions in this manual.
- Ensure the machine is placed on a stable, level surface.
- Do not immerse the electrical components in water or other liquids.
- Unplug the machine from the outlet when not in use and before cleaning.
- Supervise children closely when the machine is in use.
- Use only recommended accessories and attachments.
- Do not operate the machine with a damaged cord or plug.
- Avoid contact with moving parts.
- This product contains chemicals known to the State of California to cause cancer and birth defects or other reproductive harm. (Proposition 65 Warning)
Parts and Components
Familiarize yourself with the components of your Olde Midway Cotton Candy Machine:
- Main Unit: Houses the motor, heating element, and control panel.
- Stainless Steel Bowl (20-inch): Collects the cotton candy floss.
- Floss Head: The central spinning component where sugar is melted and spun into floss.
- Control Panel: Includes Power switch, Heat switch, Fuse, and Voltmeter.
- Cart (if applicable): Provides portability and additional storage.
- 3-Bin Storage Drawer: For storing accessories or sugar.
- Sugar Scoop: For measuring and adding floss sugar.
- Extra Motor Drive Belts (2): Replacement parts for maintenance.

Figure 1: Olde Midway SPIN-2000 Cotton Candy Machine with Cart. This image shows the complete cotton candy machine assembly, including the pink base, stainless steel bowl, and the cart with wheels.
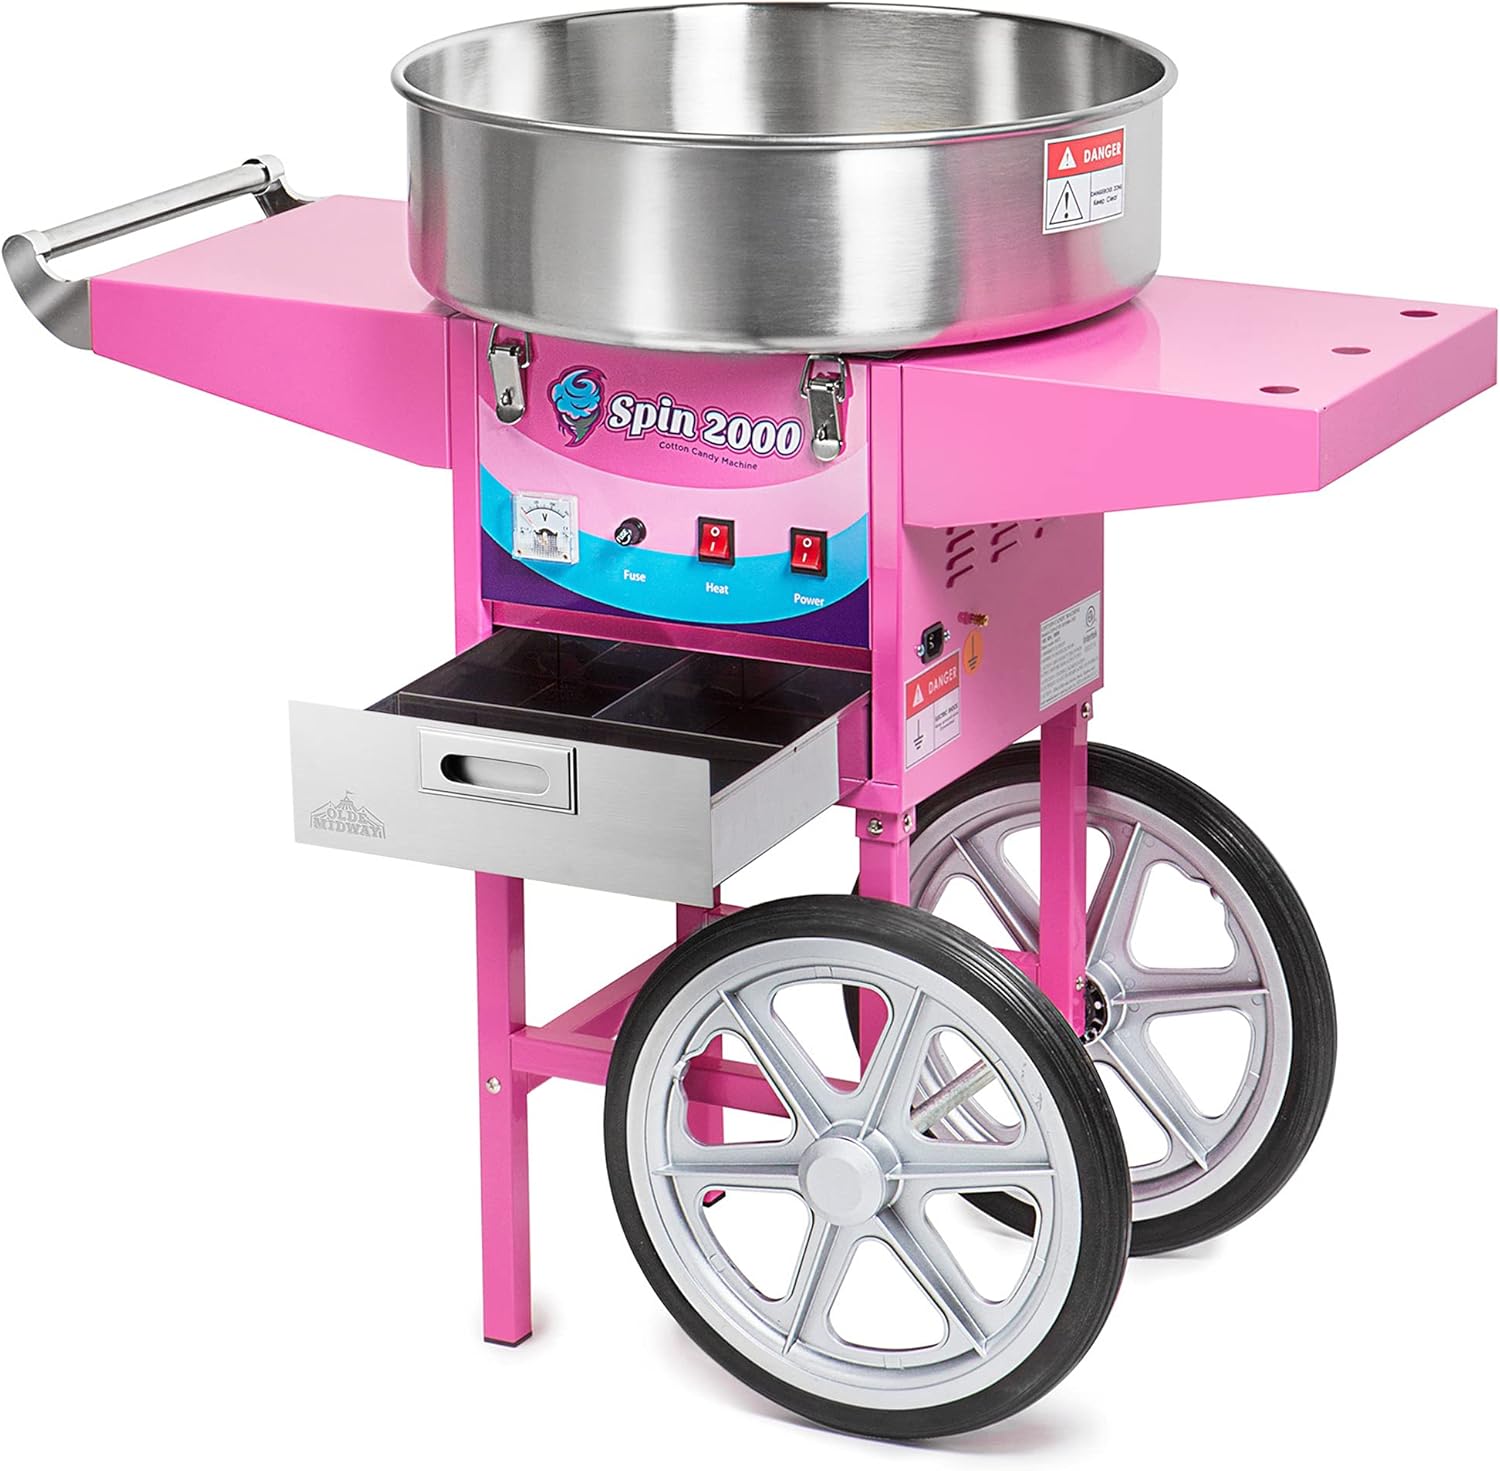
Figure 2: The cotton candy machine with its 3-bin storage drawer pulled out, revealing compartments for accessories.

Figure 3: A close-up view of the stainless steel floss head and the included sugar scoop, demonstrating where the sugar is added.

Figure 4: All included accessories: the instruction manual, power cord, sugar scoop, and two extra motor drive belts.
Setup
- Unpacking: Carefully remove all components from the packaging. Retain packaging for storage or future transport.
- Assembly:
- Place the main unit on a stable, level, and heat-resistant surface.
- If using the cart, securely attach the main unit to the cart according to the cart's assembly instructions (not detailed here).
- Position the large stainless steel bowl onto the main unit, ensuring it is seated correctly and latched securely.
- Ensure the floss head is properly installed in the center of the bowl.
- Power Connection: Plug the machine into a standard electrical outlet. Ensure the outlet meets the machine's power requirements (110/120V).
Operating Instructions
- Pre-heating:
- Turn on the Power switch.
- Turn on the Heat switch.
- Allow the machine to pre-heat for 2-4 minutes. The floss head will glow red when sufficiently hot.
- Adding Sugar:
- Once pre-heated, carefully pour one scoop of cotton candy floss sugar directly into the center of the spinning floss head.
- Do not overfill the floss head.
- Collecting Cotton Candy:
- As the sugar melts, floss will begin to emerge from the floss head.
- Take a paper cone or a reusable stick and hold it horizontally above the floss head, just above the emerging floss.
- Gently twirl the cone/stick, collecting the floss as it forms. Rotate the cone/stick to build a larger cotton candy cloud.
- Continue adding small amounts of sugar to the floss head as needed to produce more cotton candy.
- Finishing: When finished, turn off the Heat switch first, then the Power switch. Allow the machine to cool completely before cleaning.
Video 1: Demonstration of the Olde Midway Cotton Candy Machine in operation. This video shows the process of adding floss sugar to the heated spinning head and collecting the resulting cotton candy floss onto a stick. It highlights the ease of use and the rapid production of cotton candy.
Maintenance and Cleaning
- Cool Down: Always ensure the machine is unplugged and completely cool before attempting any cleaning or maintenance.
- Disassembly:
- Remove the stainless steel bowl by unlatching it from the main unit.
- Carefully remove the floss head from the center of the bowl.
- Cleaning Bowl and Floss Head:
- Wipe the stainless steel bowl and floss head with a damp cloth. For stubborn sugar residue, use warm water and a mild detergent.
- Ensure all parts are thoroughly dried before reassembly or storage.
- Cleaning Main Unit: Wipe the exterior of the main unit with a damp cloth. Do not use abrasive cleaners or immerse the unit in water.
- Drive Belts: Periodically inspect the motor drive belts for wear and tear. Replace with the included extra belts if necessary.
Troubleshooting
| Problem | Possible Cause | Solution |
|---|---|---|
| Machine does not turn on. | No power, blown fuse. | Check power connection. Replace fuse if blown (refer to fuse replacement instructions). |
| No cotton candy floss is produced. | Not pre-heated sufficiently, incorrect sugar type, floss head clogged. | Allow longer pre-heating time (4-5 minutes). Use only floss sugar or crushed hard candy. Clean floss head thoroughly. |
| Cotton candy is not fluffy or burns. | Overheating, incorrect sugar type, too much sugar added at once. | Adjust heat setting if available (some models have a temperature dial). Use appropriate sugar. Add sugar in small, measured amounts. |
| Excess sugar flying out of the bowl. | Too much sugar added, improper collection technique. | Add sugar in smaller amounts. Ensure proper twirling technique to catch floss. Consider using a bubble shield (sold separately) for indoor use. |
Specifications
- Model: SPIN-2000 (CON-COT-SP2000+CART)
- Brand: Olde Midway
- Power: 950-watt heating element
- Bowl Size: 20-inch stainless steel
- Dimensions: 36 x 36 x 37 inches (with cart)
- Item Weight: 36 pounds
- Production Rate: Approximately 1 cotton candy cone every 30 seconds.
Warranty and Support
For warranty information or technical support, please refer to the contact details provided with your purchase or visit the official Olde Midway website. Keep your purchase receipt as proof of purchase for any warranty claims.


