1. Introduction
This manual provides essential instructions for the safe and effective use of your Olympus OM-D E-M1 Mark II Micro Four Thirds System Camera. The E-M1 Mark II is engineered for high performance, featuring a 20.4 Megapixel Live MOS sensor, 5-axis image stabilization, and an advanced autofocus system. Please read this manual thoroughly before using the camera and keep it in a safe place for future reference.
2. Safety Information
To prevent injury to yourself or others, or damage to your equipment, observe the following safety precautions:
- Do not disassemble, repair, or modify the camera or lens.
- Keep the camera away from water and moisture. This camera is weather-sealed, but not submersible.
- Avoid exposing the camera to extreme temperatures, direct sunlight for prolonged periods, or high humidity.
- Use only Olympus-approved batteries and chargers.
- Do not look at the sun or bright light sources through the viewfinder or lens, as this can cause permanent vision damage.
- Keep out of reach of children.
3. Package Contents
Verify that all items are present in your package:
- Olympus OM-D E-M1 Mark II Camera Body
- M.Zuiko Digital ED 12-40mm F2.8 PRO Lens
- BLH-1 Li-ion Battery
- BCH-1 Li-ion Battery Charger
- USB Cable
- Cable Clip
- Shoulder Strap
- FL-LM3 Flash
- Instruction Manual (basic guide)
- Warranty Card
4. Camera Components
Familiarize yourself with the various parts of your camera.
4.1 Front View with Lens

This image displays the Olympus OM-D E-M1 Mark II camera body with the M.Zuiko 12-40mm PRO lens mounted. Key features visible include the lens barrel, focus ring, zoom ring, and the Olympus branding on the camera body.
4.2 Front View (Body Only)
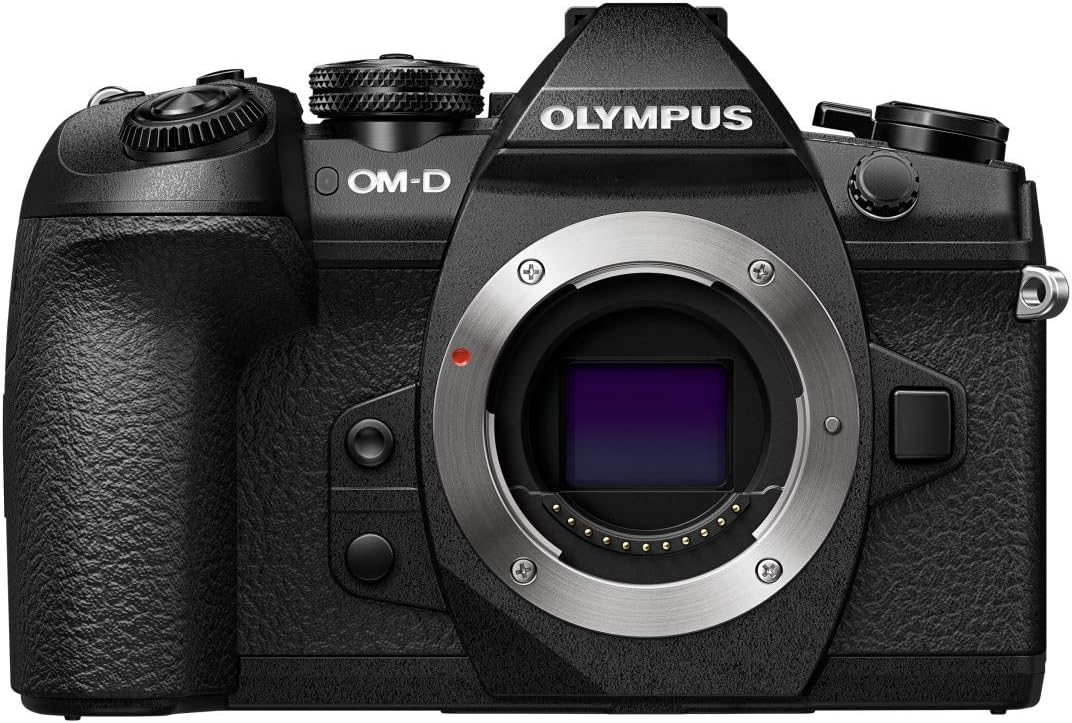
This image shows the front of the Olympus OM-D E-M1 Mark II camera body without a lens attached, revealing the Micro Four Thirds lens mount, the red lens release button, and the textured grip.
4.3 Top View
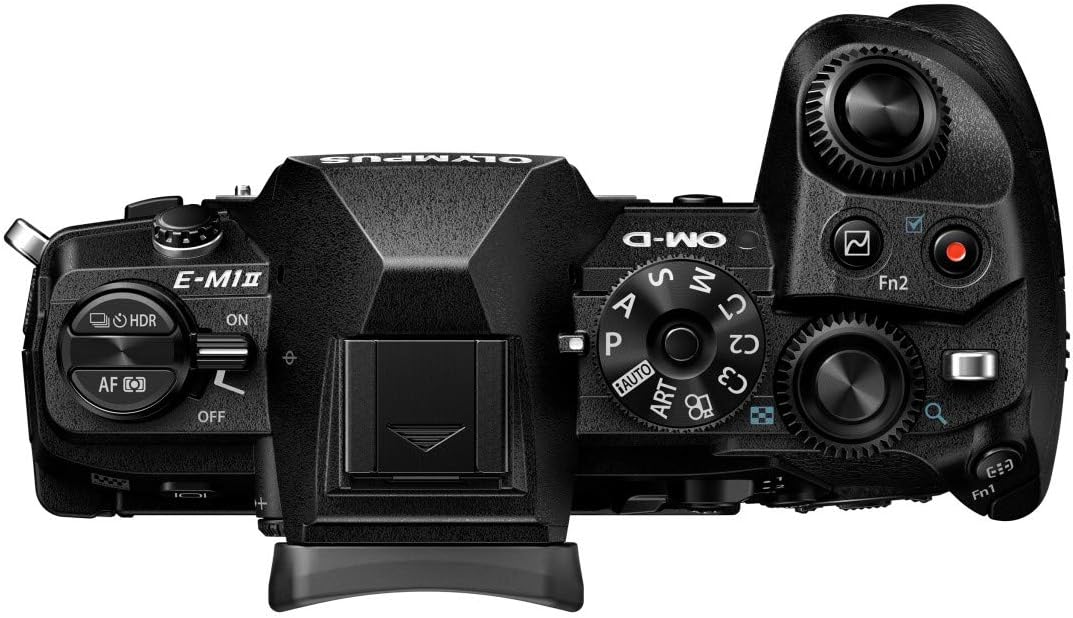
The top view of the camera highlights the mode dial (P, A, S, M, ART, C1-C4), power switch, shutter button, front and rear control dials, and the hot shoe for external flash.
4.4 Rear View

This image presents the rear of the camera with the LCD screen in its closed position. Visible elements include the electronic viewfinder, various function buttons, the directional pad, and the 'OK' button.
4.5 Articulated Screen

The camera's rear view with the LCD screen articulated, demonstrating its flexibility for shooting from various angles. The screen is a 3-inch capacitive touch display.
4.6 Side View

A side view of the Olympus OM-D E-M1 Mark II, highlighting the deep ergonomic grip and the covered ports for connectivity (USB, video out).
4.7 Dimensions and Weight

This diagram illustrates the physical dimensions and weights of the camera body (574g with battery and memory card), the M.Zuiko 12-40mm lens (382g), and an SD card, emphasizing the compact and lightweight design.
5. Setup
5.1 Charging the Battery
- Insert the BLH-1 Li-ion battery into the BCH-1 Li-ion battery charger.
- Plug the charger into a power outlet. The charging indicator light will illuminate.
- Charging is complete when the indicator light turns off.
5.2 Inserting the Battery and Memory Card
- Open the battery/card compartment cover located on the bottom of the camera.
- Insert the charged BLH-1 battery with the correct orientation until it clicks into place.
- Insert an SDHC or SDXC memory card into one of the two available memory card slots until it clicks. Ensure the card is facing the correct direction.
- Close the compartment cover securely.
5.3 Attaching the Lens
- Remove the body cap from the camera and the rear lens cap from the M.Zuiko 12-40mm PRO lens.
- Align the white index mark on the lens with the white index mark on the camera body.
- Mount the lens by turning it clockwise until it clicks into place.
5.4 Initial Settings
Upon first power-on, you will be prompted to set the date, time, and language. Follow the on-screen instructions using the directional pad and 'OK' button.
6. Operating the Camera
6.1 Power On/Off
Slide the power switch located on the top of the camera to the 'ON' or 'OFF' position.
6.2 Shooting Modes
Rotate the mode dial to select your desired shooting mode:
- P (Program Auto): Camera sets aperture and shutter speed for optimal exposure.
- A (Aperture Priority): You set the aperture, camera sets shutter speed.
- S (Shutter Priority): You set the shutter speed, camera sets aperture.
- M (Manual): You set both aperture and shutter speed.
- ART (Art Filter): Apply various creative filters to your photos.
- C1-C4 (Custom Modes): Save and recall your preferred camera settings.
6.3 Taking Photos
- Turn the camera on and select a shooting mode.
- Frame your shot using the electronic viewfinder or the LCD monitor.
- Press the shutter button halfway down to activate autofocus and exposure metering.
- Press the shutter button fully to capture the image.
6.4 Autofocus System
The OM-D E-M1 Mark II features a high-speed autofocus system with 121 cross-type phase detection AF points. You can select various AF modes and areas through the camera's menu to suit your subject and shooting conditions.
6.5 Image Stabilization
The camera incorporates a powerful 5-axis in-body image stabilization system, providing up to 5.5 EV steps of correction. This allows for sharp handheld shots even in low light or with longer shutter speeds.
6.6 Video Recording
The E-M1 Mark II supports 4K (2160p) and Cinema 4K video recording. To start recording, rotate the mode dial to the movie mode or press the dedicated video record button (if assigned).
6.7 Playback
Press the playback button to review your captured images and videos. Use the directional pad or control dials to navigate through your media.
6.8 Menu Navigation
Press the MENU button to access the camera's settings. Use the directional pad or the touch screen to navigate through menus and adjust parameters. The camera's extensive menu system allows for fine-tuning of various functions.
7. Maintenance
7.1 Cleaning the Camera
- Use a blower brush to remove dust from the lens and camera body.
- For stubborn smudges on the lens, use a specialized lens cleaning cloth and solution.
- Wipe the camera body with a soft, dry cloth. Do not use organic solvents.
7.2 Storage
- When not in use for extended periods, remove the battery.
- Store the camera in a cool, dry, well-ventilated area, away from direct sunlight and high humidity.
- Consider using a desiccant to prevent mold growth, especially in humid environments.
8. Troubleshooting
If you encounter issues with your camera, refer to the following common problems and solutions:
| Problem | Possible Cause | Solution |
|---|---|---|
| Camera does not power on. | Battery is depleted or incorrectly inserted. | Charge the battery fully and ensure it is inserted correctly. |
| Images are blurry. | Incorrect focus, slow shutter speed, or camera shake. | Check focus mode, increase shutter speed, or utilize the 5-axis image stabilization. |
| Memory card error. | Card is full, corrupted, or incompatible. | Delete unnecessary files, format the card (this will erase all data), or try a different compatible card. |
| Flash does not fire. | Flash mode is off, or battery is low. | Check flash settings in the menu; ensure battery is charged. |
For more detailed troubleshooting, refer to the comprehensive digital manual available on the Olympus support website.
9. Specifications
Key technical specifications for the Olympus OM-D E-M1 Mark II:
| Feature | Detail |
|---|---|
| Model Name | Olympus OM-D E-M1 Mark II |
| Sensor Type | MOS |
| Effective Still Resolution | 20.4 MP |
| Image Stabilization | 5-Axis Electronic |
| Compatible Mountings | Micro Four Thirds |
| Autofocus Points | 121 (Phase Detection) |
| Video Resolution | 2160p (4K) |
| Screen Size | 3 Inches |
| Display Type | Articulating LCD, Capacitive Touch Screen |
| Memory Slots Available | 2 (SDHC, SDXC) |
| Connectivity Technology | USB, Wi-Fi |
| Processor | Olympus TruePic VIII |
| Weight (Body) | 1 Kilogram (approx. 574g with battery/card) |
| Water Resistance Level | Water Resistant (Splashproof) |
10. Warranty and Support
Your Olympus OM-D E-M1 Mark II camera comes with a limited warranty. Please refer to the warranty card included in your package for specific terms and conditions. For technical support, service, or to download the full digital instruction manual, please visit the official Olympus support website or contact your local Olympus service center.
Online Support: www.olympus-imaging.com/support/


