1. Introduction
This manual provides detailed instructions for the installation, operation, and maintenance of your MTX 12 Inch 1200 Watt Dual Loaded Car Audio Subwoofer Package. This comprehensive system is designed to significantly upgrade your vehicle's audio experience, delivering powerful and clear bass.
The package includes a dual 12-inch subwoofer enclosure, a high-performance monoblock amplifier, a power capacitor, and a complete wiring kit, ensuring a robust and immersive sound experience on the road.

Image 1.1: Complete MTX Car Audio Subwoofer Package including subwoofers, amplifier, capacitor, and wiring kit.
2. Package Contents
Please verify that all components listed below are present in your package:
- Dual MTX 12-inch Subwoofers (pre-installed in enclosure)
- MTX Subwoofer Box (enclosure for dual 12-inch subwoofers)
- MTX Terminator TNA251 Amp / 1100-watt Monoblock A/B Amplifier
- 8 Gauge Wiring Kit
- 2-Farad Power Capacitor
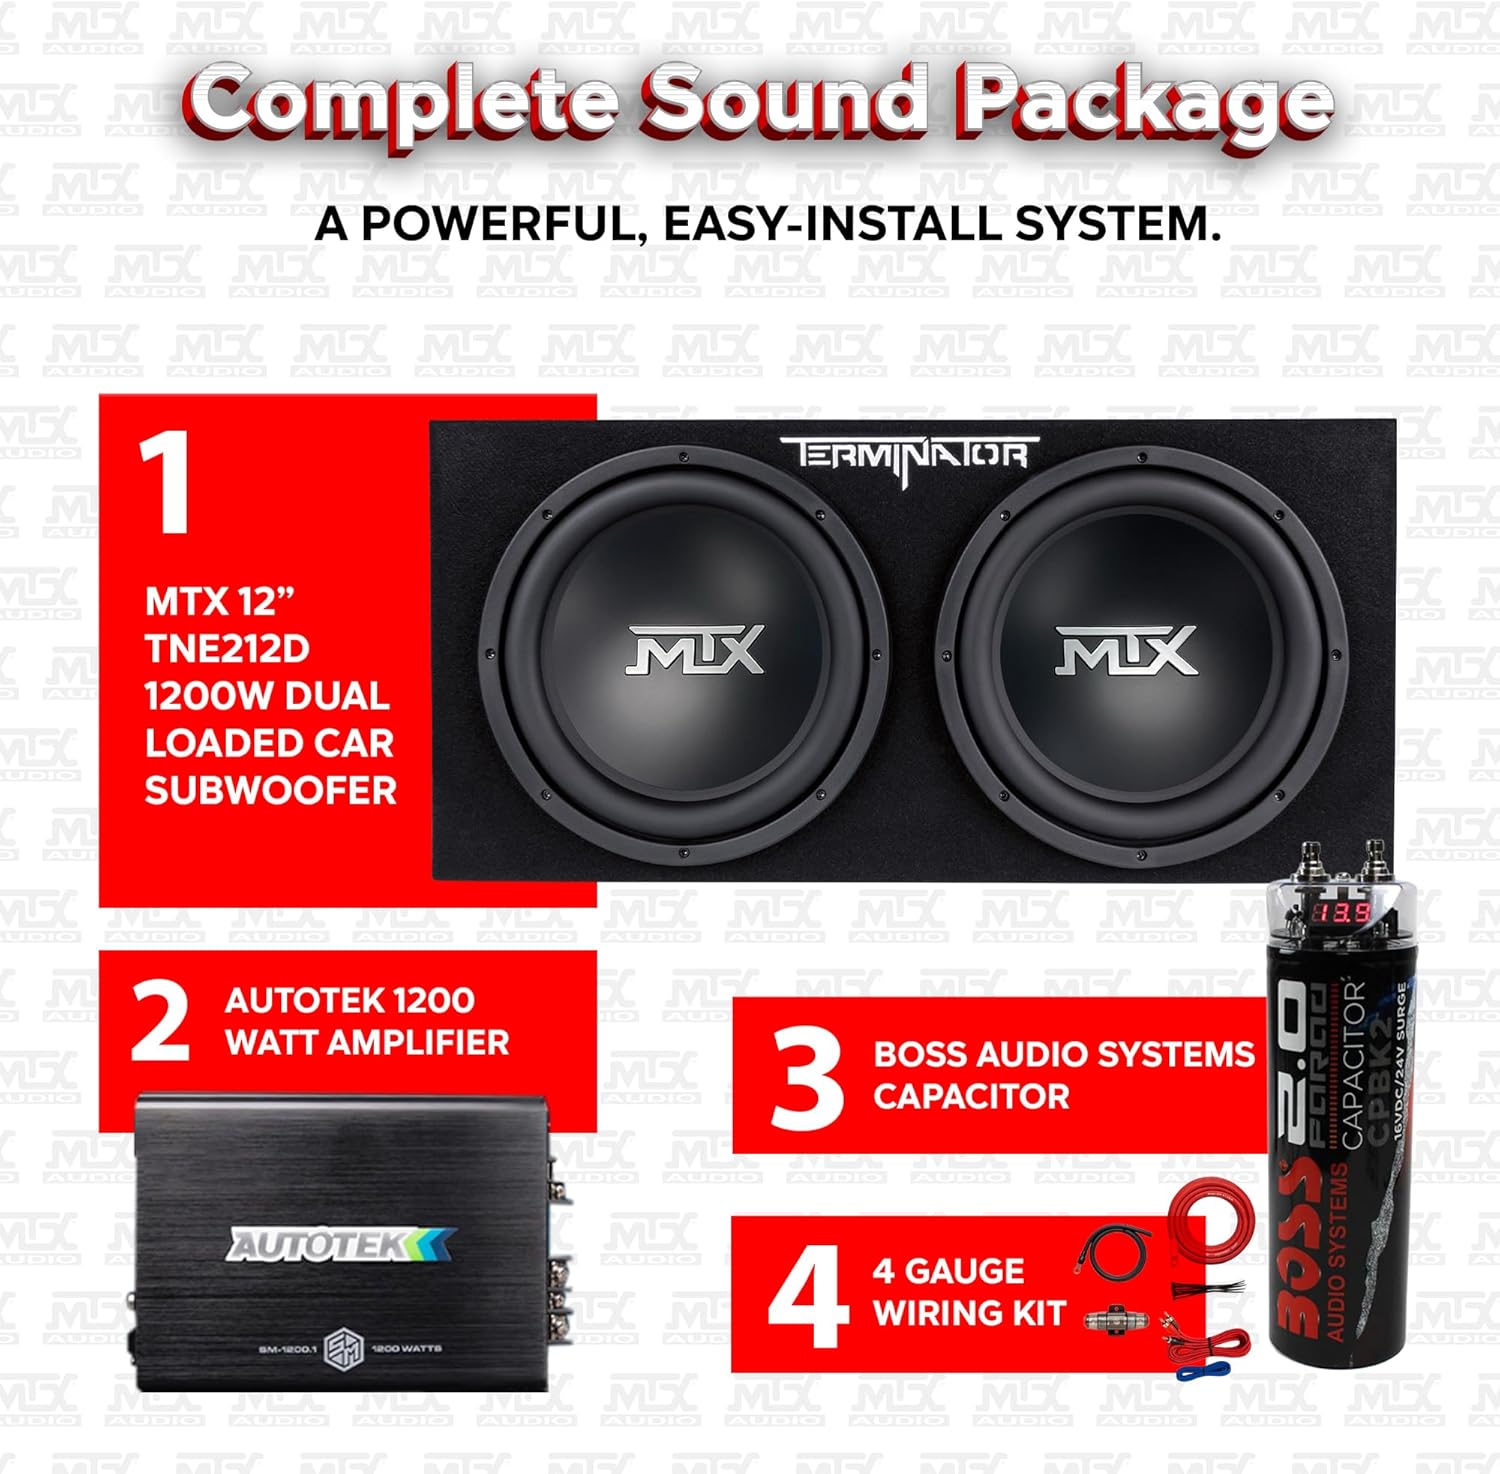
Image 2.1: Visual breakdown of the complete sound package components.
3. Product Specifications
Detailed technical specifications for the MTX TNE212D Subwoofer Package:
| Feature | Specification |
|---|---|
| Model Name | TNE212D |
| Speaker Type | Subwoofer |
| Subwoofer Diameter | 12 Inches (each) |
| Speaker Maximum Output Power | 1200 Watts (Peak) |
| RMS Power (Enclosure) | 400 Watts |
| Frequency Response | 150 Hz |
| Product Dimensions (D x W x H) | 13.5" x 29.69" x 14" |
| Color | Black |
| Connectivity Technology | RCA (Wired) |
| Signal-to-Noise Ratio | 100 dB |
| Capacitor | 2 Farad 20V LED Digital Voltage |
| UPC | 842372120692 |

Image 3.1: Detailed dimensions of the subwoofer enclosure and amplifier.
4. Installation Guide
Proper installation is crucial for optimal performance and safety. It is recommended that installation be performed by a qualified professional. If you choose to install it yourself, proceed with caution and ensure your vehicle's battery is disconnected before starting.
4.1. Pre-Installation Considerations
- Vehicle Compatibility: Ensure adequate space in your vehicle's trunk or cargo area for the subwoofer enclosure (13.5"D x 29.69"W x 14"H).
- Head Unit Compatibility: If your car's stock stereo does not have RCA jack outputs, you will need a line-output converter (not included) to connect the amplifier.
- Wiring Kit: The included 8-gauge wiring kit is designed for this system. Ensure all wires are properly routed and secured to prevent damage or interference.
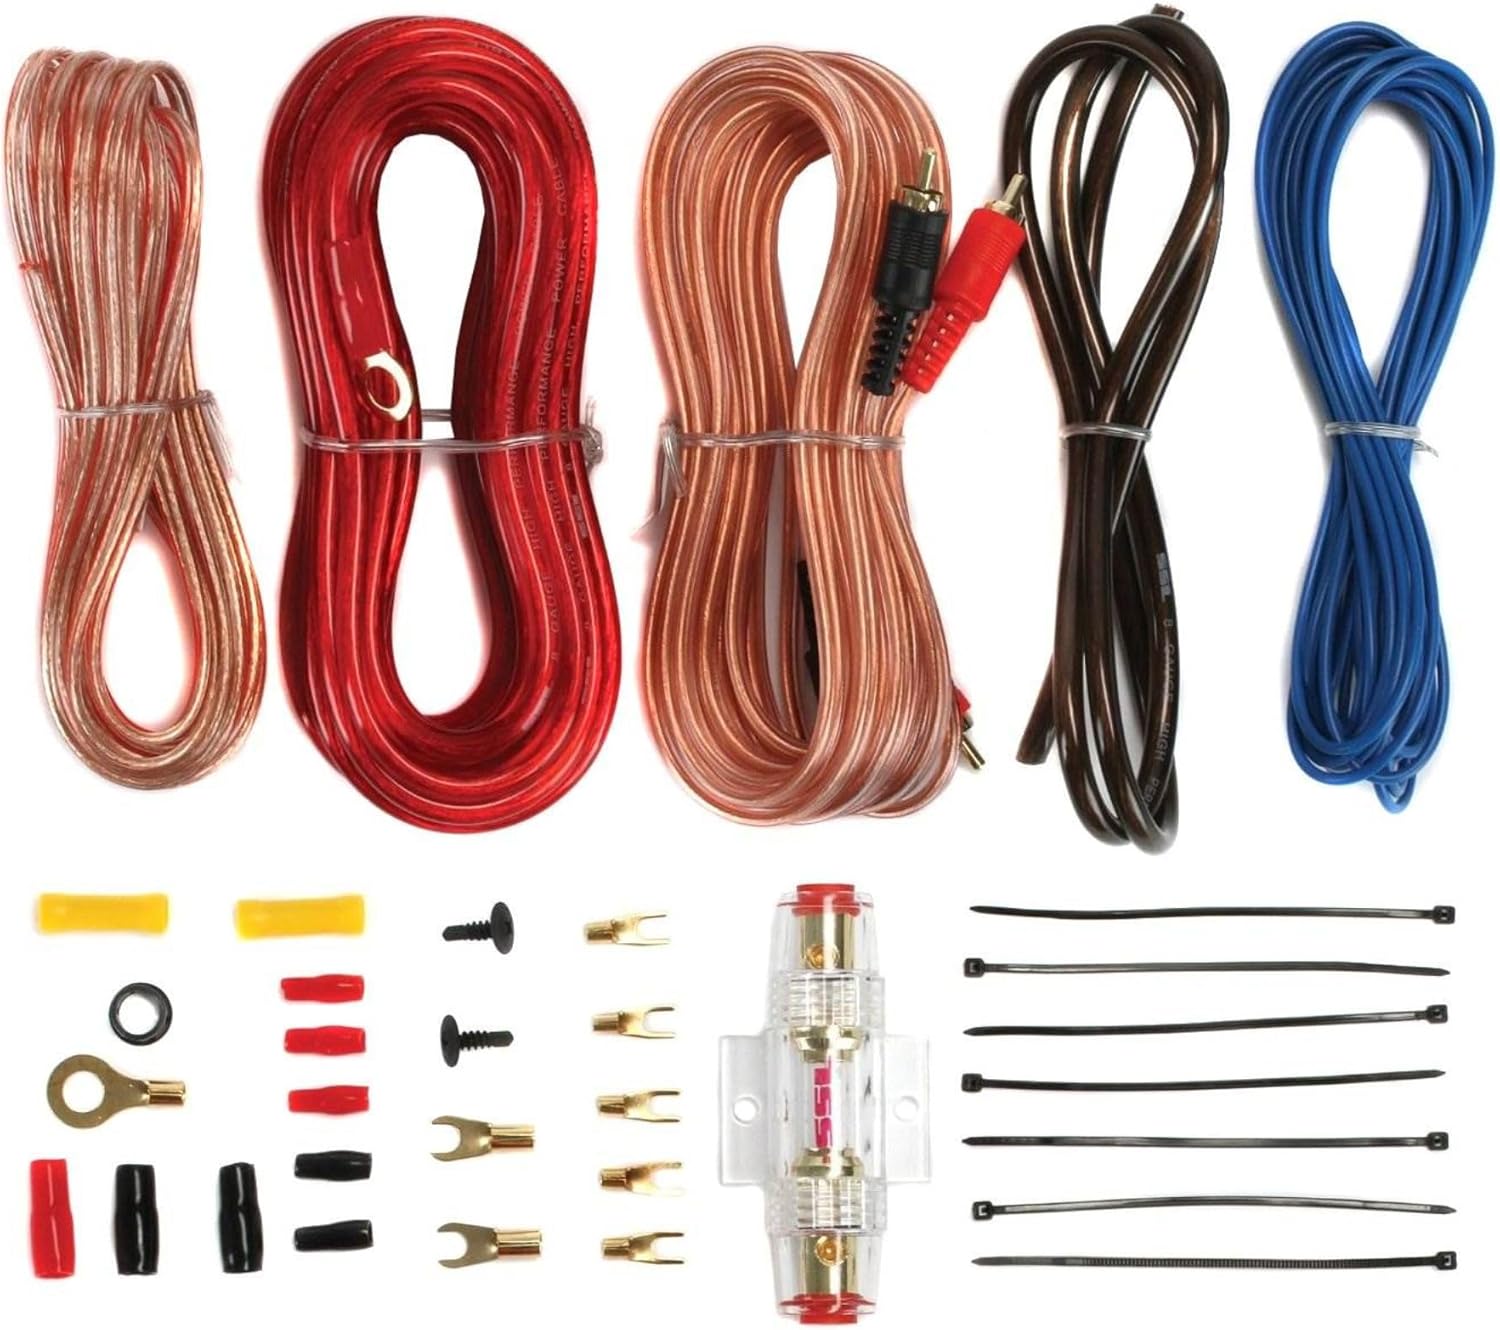
Image 4.1: The included 8-gauge wiring kit components.
4.2. Wiring Steps
- Power Cable: Run the main power cable from your car's battery to the amplifier location. Install an in-line fuse holder near the battery.
- Ground Cable: Connect the ground cable from the amplifier to a clean, unpainted metal surface on the vehicle's chassis. Ensure a solid connection.
- Remote Turn-On Wire: Connect the remote turn-on wire from your head unit to the amplifier's remote input. This signals the amplifier to turn on/off with your stereo.
- RCA Cables: Connect the RCA cables from your head unit (or line-output converter) to the amplifier's input.
- Speaker Wires: Connect the speaker wires from the amplifier's output to the subwoofer enclosure. Ensure correct polarity (+ to + and - to -).
- Capacitor Installation: Install the 2-Farad capacitor in line with the amplifier's power input. The capacitor helps stabilize voltage and provide burst power for deep bass. Follow the capacitor's specific wiring diagram for proper connection and charging.

Image 4.2: The 2-Farad power capacitor with LED digital voltage display.

Image 4.3: The Autotek 1200 Watt Monoblock Amplifier.
4.3. Final Placement
Securely place the subwoofer enclosure in your desired location within the vehicle. Ensure it does not obstruct any safety features or moving parts. The enclosure is designed to withstand typical trunk environments.

Image 4.4: Example of the subwoofer enclosure installed in a vehicle's trunk.
5. Operating Instructions
Once installed, you can begin operating your MTX subwoofer system. Proper adjustment of amplifier settings is key to achieving optimal sound quality and preventing damage.
5.1. Initial Power-Up
After all connections are secure and verified, reconnect your vehicle's battery. Turn on your car's ignition and stereo. The amplifier should power on, indicated by its status light.
5.2. Amplifier Settings Adjustment
Your monoblock amplifier features adjustable crossovers and gain controls. These settings allow you to fine-tune the bass output to match your vehicle's acoustics and personal preference.
- Gain Control: Start with the gain control at its minimum setting. Gradually increase it until the bass output blends well with your main speakers without distortion. Avoid setting the gain too high, as this can lead to clipping and damage.
- Low-Pass Filter (LPF): Adjust the LPF to filter out high frequencies, ensuring only bass frequencies are sent to the subwoofers. A common starting point is between 80Hz and 120Hz.
- Bass Boost: Use the bass boost sparingly. Excessive bass boost can cause distortion and potentially damage the subwoofers.
Experiment with these settings while listening to various types of music to find the ideal balance for your system. The goal is clear, powerful bass that complements your existing audio, not overwhelms it.
6. Care and Maintenance
To ensure the longevity and performance of your MTX subwoofer package, follow these care and maintenance guidelines:
- Regular Inspection: Periodically check all wiring connections for tightness and corrosion. Loose connections can lead to poor performance or damage.
- Cleanliness: Keep the subwoofer enclosure and amplifier clean and free of dust and debris. Use a soft, dry cloth for cleaning. Avoid using harsh chemicals or abrasive cleaners.
- Dust Caps: The polypropylene dust caps are durable, but avoid direct physical impact to prevent damage to the subwoofer cones.
- Ventilation: Ensure the amplifier has adequate ventilation to prevent overheating. Do not cover the amplifier or place it in an enclosed space without airflow.
- Environmental Factors: Protect the system from extreme temperatures and moisture. While designed for car environments, excessive exposure can degrade components.
7. Troubleshooting
If you encounter issues with your MTX subwoofer package, refer to the following common problems and solutions:
| Problem | Possible Cause | Solution |
|---|---|---|
| No Sound from Subwoofers |
|
|
| Distorted or Weak Bass |
|
|
| Amplifier Overheating |
|
|
| System Not Turning On |
|
|
Note: Some users have reported that the included amplifier and wiring kit may not meet their performance expectations. If you experience persistent issues with sound quality or power delivery after troubleshooting, consider consulting a professional installer or upgrading specific components.
8. Warranty and Support
Your MTX 12 Inch 1200 Watt Dual Loaded Car Audio Subwoofer Package comes with a Full Warranty. For specific details regarding warranty coverage, duration, and terms, please refer to the warranty card included in your product packaging or visit the official MTX website.
If you require technical assistance, have questions about installation, or need to report a defect, please contact MTX customer support through their official channels. Be prepared to provide your product model number (TNE212D) and proof of purchase.
For additional resources and product information, you may visit the MTX Brand Store on Amazon.


