1. Introduction
This instruction manual provides detailed guidance for the proper installation, operation, and maintenance of the TE CONNECTIVITY DT04-12PA-C015 DT Series 12-Way Receptacle Housing. Adhering to these instructions will ensure optimal performance and longevity of the connector.
The DT Series connectors are designed for cable-to-cable applications in harsh environments, offering reliability and durability. This specific model is a 12-way gray receptacle housing, compatible with Size 16 contacts.
2. Product Overview
The DT04-12PA-C015 is a robust electrical connector housing designed for demanding applications. It features a gray thermoplastic housing with 12 cavities for Size 16 contacts. Its design ensures secure mating and environmental sealing when used with appropriate pin or socket contacts and a compatible plug housing.

Figure 2.1: Front view of the TE CONNECTIVITY DT04-12PA-C015 DT Series 12-Way Receptacle Housing, showing the 12 contact cavities.
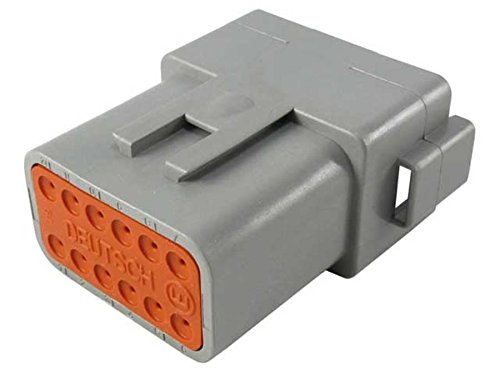
Figure 2.2: Rear view of the TE CONNECTIVITY DT04-12PA-C015 DT Series 12-Way Receptacle Housing, illustrating the orange secondary lock and wire entry points.
Key Features:
- 12-way configuration for multiple electrical connections.
- Compatible with Size 16 contacts (sold separately).
- Gray thermoplastic housing for durability.
- Integrated secondary lock for contact retention.
- Designed for harsh environment applications.
3. Specifications
| Attribute | Detail |
|---|---|
| Model Number | DT04-12PA-C015 |
| Brand | TE CONNECTIVITY |
| Series | DT Series |
| Contact Size | 16 |
| Number of Ways/Cavities | 12 |
| Housing Color | Gray |
| Type | Receptacle Housing |
| Manufacturer | TE CONNECTIVITY |
| Package Dimensions | 12.6 x 5.51 x 5.51 inches |
| Item Weight | 0.35 ounces |
4. Setup and Installation
Proper installation is crucial for the reliable performance of your DT Series connector. This section outlines the general steps for preparing wires, crimping contacts, and assembling the housing. Always refer to TE CONNECTIVITY's official documentation for specific wire gauges and crimping tool recommendations.
Required Tools and Materials (Not Included):
- Appropriate Size 16 contacts (pins or sockets, depending on application).
- Wire of suitable gauge for Size 16 contacts.
- Wire strippers.
- Crimping tool compatible with Size 16 contacts.
- Contact insertion/removal tool (optional, but recommended).
- Compatible plug housing (if forming a complete connection).
Installation Steps:
- Wire Preparation: Strip approximately 4-6mm (0.16-0.24 inches) of insulation from the end of each wire. Ensure the stripped wire strands are clean and untwisted.
- Contact Crimping: Insert the stripped wire into the crimp barrel of the appropriate Size 16 contact. Using a compatible crimping tool, crimp the contact securely onto the wire. Verify the crimp for mechanical strength and electrical conductivity.
- Contact Insertion: Ensure the secondary lock (often an orange or green wedge) is in the open or pre-positioned state. Align the crimped contact with the desired cavity in the receptacle housing. Push the contact straight into the cavity until a distinct click is heard or felt, indicating it is fully seated. Gently tug on the wire to confirm it is locked in place.
- Secondary Lock Engagement: Once all contacts are inserted, push the secondary lock wedge fully into the housing. This provides additional contact retention and helps seal the connector.
- Mating (if applicable): If connecting to a compatible plug housing, align the receptacle housing with the plug housing and push them together until they fully mate and latch.
Note: Incorrect crimping or contact insertion can lead to poor electrical connections or damage to the housing. Always follow manufacturer guidelines for specific contact types and tools.
5. Operation
Once properly installed, the DT04-12PA-C015 receptacle housing, when mated with a compatible plug, forms a secure and environmentally sealed electrical connection. Operation primarily involves proper mating and unmating procedures.
Mating the Connector:
- Ensure both the receptacle and plug housings are clean and free of debris.
- Align the keyways and polarization features of the receptacle and plug.
- Push the two halves together firmly and evenly until the internal latches engage. A distinct click or positive resistance will indicate full engagement.
- Visually inspect the mated connection to ensure there are no gaps and the latches are fully engaged.
Unmating the Connector:
- Locate the latching mechanism on the connector (typically a tab or lever).
- Depress or disengage the latching mechanism.
- While holding the latch disengaged, pull the two connector halves apart smoothly and directly. Avoid twisting or prying, as this can damage the contacts or housing.
Caution: Never pull on the wires to disconnect the connector. Always use the housing to apply force during mating and unmating.
6. Maintenance
The TE CONNECTIVITY DT Series connectors are designed for low maintenance. However, periodic inspection and cleaning can help ensure long-term reliability, especially in harsh environments.
Inspection:
- Regularly inspect the connector housings for any signs of physical damage, such as cracks, chips, or deformation.
- Check for corrosion or excessive dirt accumulation on the mating surfaces and contacts.
- Ensure that the wires are securely retained and that there is no visible insulation damage near the connector.
- Verify that the secondary lock is fully engaged.
Cleaning:
- If cleaning is necessary, disconnect the connector first.
- Use a clean, lint-free cloth to wipe away any surface dirt or dust.
- For more stubborn contaminants, a mild, non-abrasive electrical contact cleaner can be applied sparingly. Ensure the cleaner is compatible with plastics and allowed to fully evaporate before re-mating.
- Avoid using harsh solvents or abrasive materials, as these can damage the housing or contacts.
Important: Do not attempt to lubricate the contacts unless specifically recommended by TE CONNECTIVITY for your application, as this can attract dirt and degrade performance.
7. Troubleshooting
This section addresses common issues that may arise with DT Series connectors and provides potential solutions.
| Problem | Possible Cause | Solution |
|---|---|---|
| Difficulty mating connectors | Misalignment, debris in cavities, damaged keyways, secondary lock not fully open. | Ensure proper alignment. Inspect and clean cavities. Check for physical damage. Ensure secondary lock is in the pre-position. |
| Intermittent electrical connection | Poorly crimped contact, contact not fully seated, corrosion, damaged wire. | Verify contact crimp quality. Re-seat contacts. Clean contacts if corroded. Inspect and repair/replace damaged wires. |
| Contact pulls out of housing | Contact not fully seated, secondary lock not engaged, damaged retention finger. | Ensure contact is fully inserted with a click. Fully engage secondary lock. If retention finger is damaged, replace the housing. |
| Water or dust ingress | Damaged seals, improper mating, missing wire seals (if applicable). | Inspect seals for damage and replace if necessary. Ensure connectors are fully mated. Verify correct wire seals are used and installed. |
8. Warranty and Support
For specific warranty information regarding the TE CONNECTIVITY DT04-12PA-C015 DT Series Receptacle Housing, please refer to the official TE CONNECTIVITY website or contact their customer support directly. Warranty terms typically cover manufacturing defects under normal use conditions.
For technical assistance, product inquiries, or to report issues, please contact TE CONNECTIVITY customer service through their official channels. Provide your product model number (DT04-12PA-C015) and any relevant details when seeking support.
TE CONNECTIVITY Official Website: www.te.com