
Introduction
This manual provides comprehensive instructions for the safe and effective use of your Sperry Instruments DSA600TRMS 12 Function True RMS Digital Clamp Meter. This advanced electrical meter offers precise True RMS circuitry, integrated non-contact voltage detection, data hold capability, and an audible beeper for continuity checks. Designed for professional use, it is compact, lightweight, and durable, featuring a 250 lbs crush rating and a 10-foot drop rating. Please read this manual thoroughly before operation to ensure proper functionality and safety.
Important Safety Information
WARNING: Electrical testing can be hazardous. Always exercise extreme caution when working with electrical systems. Failure to follow safety precautions can result in serious injury or death.
- Always consult all technical literature before operating any electrical testing tools.
- Always reference the National Electric Code (NEC) and local electrical codes before performing any type of electrical work.
- Ensure the meter is in good working condition and test leads are not damaged before each use.
- Do not use the meter if it appears damaged or if the test leads are compromised.
- Wear appropriate personal protective equipment (PPE), including safety glasses and insulated gloves, when working with electrical circuits.
- Verify the meter's range and function settings are appropriate for the measurement being taken.
- Avoid contact with live circuits. Use non-contact voltage detection where applicable to confirm de-energization.
- Do not exceed the maximum voltage or current ratings specified for the meter.
Remember: Safety first.
Product Overview
The Sperry Instruments DSA600TRMS is a versatile digital clamp meter designed for accurate electrical measurements. It combines the functionalities of a multimeter with the added benefit of a jaw clamp for contactless current measurement.
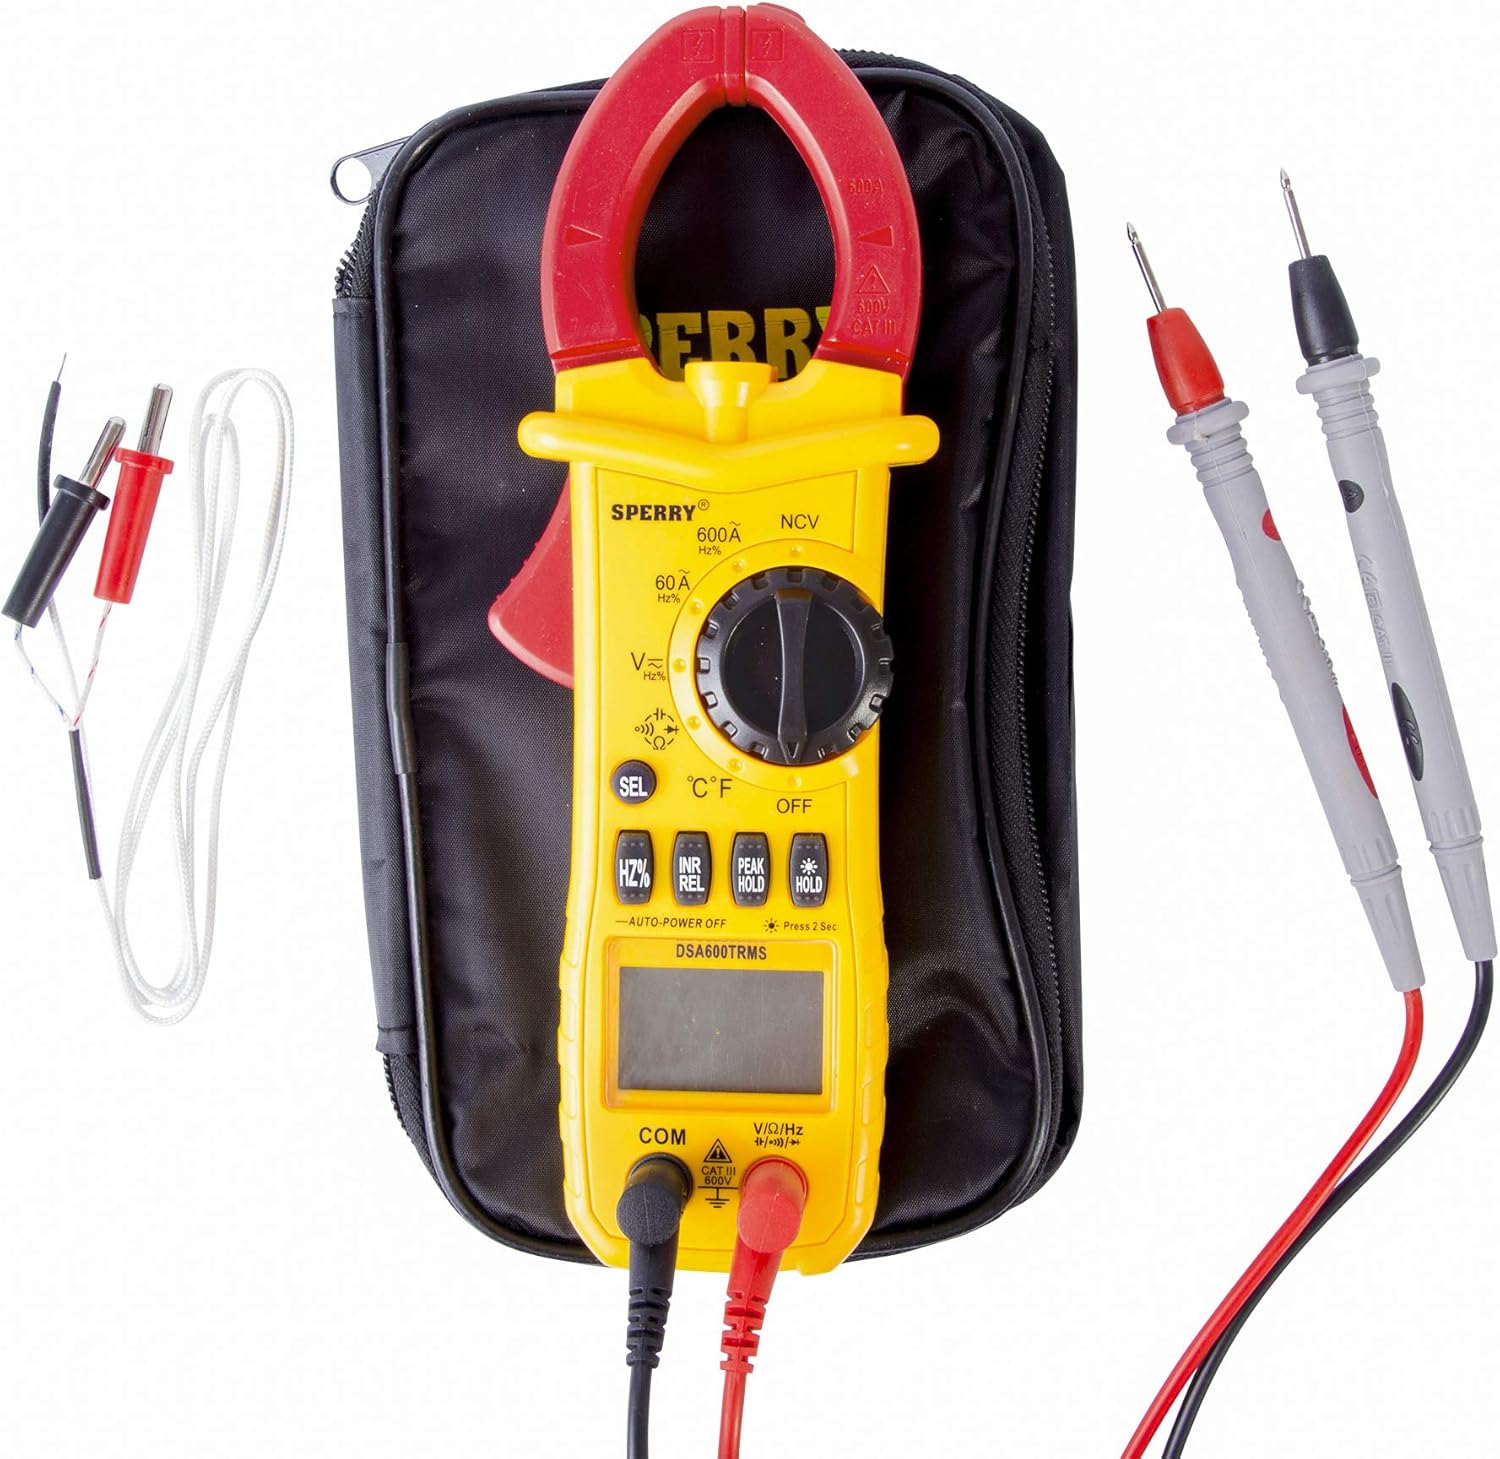
Figure 1: The Sperry Instruments DSA600TRMS Digital Clamp Meter, shown with its included test leads and protective carrying case. This image highlights the complete kit for electrical testing.
Key Features:
- True RMS Circuitry: Provides accurate readings for both sinusoidal and non-sinusoidal waveforms.
- 12 Functions, 28 Ranges: Comprehensive measurement capabilities including AC/DC voltage, AC current, resistance, continuity, diode test, frequency, capacitance, and temperature.
- Non-Contact Voltage (NCV) Detection: For quick and safe identification of live wires without direct contact.
- Data Hold: Freezes the displayed reading for convenient recording.
- Peak Hold: Captures the maximum value of a transient signal.
- Backlit 5999-Count Display: Clear and easy-to-read display in various lighting conditions.
- Auto-Off Function: Conserves battery life.
- Low Battery Indicator: Alerts when batteries need replacement.
- Durable Design: Crush rating of 250 lbs and 10-foot drop rating for robust performance.
Setup
Battery Installation
The DSA600TRMS requires three (3) AAA batteries for operation, which are included with the meter. To install or replace batteries:
- Ensure the meter is turned OFF.
- Locate the battery compartment cover on the back of the meter.
- Use a screwdriver to open the battery compartment.
- Insert the three AAA batteries, observing the correct polarity (+/-) as indicated inside the compartment.
- Replace the battery compartment cover and secure it with the screw.
Connecting Test Leads
For voltage, resistance, continuity, diode, frequency, capacitance, and temperature measurements, connect the test leads:
- Insert the red test lead into the VΩHzCAP°C input jack.
- Insert the black test lead into the COM (common) input jack.
Ensure connections are firm before taking any measurements.
Operating Instructions
Familiarize yourself with the rotary dial and function buttons before operation.
Measuring AC Current (Clamp Jaw)
The jaw clamp allows for contactless measurement of AC current in a single conductor.
- Turn the rotary dial to the desired AC current range (e.g., 60A or 600A).
- Open the clamp jaw by pressing the trigger.
- Enclose a single conductor (not a bundle of wires) within the clamp jaw. Ensure the jaw is fully closed.
- Read the AC current value on the display.

Figure 2: The clamp meter's jaw is used to measure AC current on a single conductor within an electrical panel, providing a contactless measurement.
Measuring AC/DC Voltage
Use the test leads for voltage measurements.
- Connect the test leads as described in the Setup section.
- Turn the rotary dial to the 'V~' for AC voltage or 'V=' for DC voltage. Use the 'SEL' button to toggle between AC and DC if on a combined setting.
- Carefully touch the red probe to the positive or live point and the black probe to the negative or neutral/ground point of the circuit.
- Read the voltage value on the display.

Figure 3: The clamp meter's test leads are used to measure voltage within an electrical panel, demonstrating direct contact measurement.

Figure 4: Measuring voltage from a standard wall outlet using the test leads, illustrating a common application for voltage measurement.
Continuity Check
To check for continuity (a complete circuit):
- Turn the rotary dial to the continuity/resistance setting (often indicated by a diode symbol or Ohm symbol). Use the 'SEL' button to select continuity if necessary.
- Touch the test probes together to verify the meter beeps and displays a low resistance reading (e.g., 0 Ohms).
- Apply the probes across the component or circuit you wish to test. An audible beep and a low resistance reading indicate continuity.
Non-Contact Voltage (NCV) Detection
To use the NCV feature:
- Turn the rotary dial to the NCV position.
- Hold the meter near a conductor or outlet. The meter will beep and an LED will illuminate if AC voltage is detected.
Data Hold and Peak Hold
- Press the HOLD button to freeze the current reading on the display. Press again to release.
- Press and hold the HOLD button for 2 seconds to activate Peak Hold, which captures the highest transient value. Press again to release.
Using a Line Splitter
For precise current measurements on appliances, a line splitter can be used. This accessory allows you to separate the neutral and hot wires, enabling independent current testing.
- Plug the line splitter into a standard wall outlet.
- Plug the appliance into the line splitter.
- For 1x current measurement, clamp the meter jaw around the single wire loop on the splitter.
- For 10x current measurement (for lower currents), clamp the meter jaw around the 10x wire loop on the splitter and divide the reading by 10.
Video 1: An overview of clamp testers, demonstrating the use of the jaw clamp for contactless current measurement and the application of a line splitter for independent neutral and hot wire testing. This video also highlights the benefit of True RMS for accurate readings.
Maintenance
Cleaning
To maintain the meter's performance and appearance:
- Wipe the meter's exterior with a damp cloth. Do not use abrasive cleaners or solvents.
- Ensure the meter is completely dry before storage or next use.
Battery Care
The meter features an auto-off function to conserve battery life. A low battery indicator will appear on the display when batteries need replacement. Replace batteries promptly to ensure accurate readings.
- Remove batteries if the meter will not be used for an extended period to prevent leakage.
- Dispose of used batteries according to local regulations.
Troubleshooting
If you encounter issues with your DSA600TRMS meter, refer to the following common problems and solutions:
| Problem | Possible Cause | Solution |
|---|---|---|
| Meter does not power on | Dead or incorrectly installed batteries | Check battery polarity; replace batteries. |
| Inaccurate or erratic readings | Damaged test leads; incorrect function/range; electromagnetic interference; stray voltage | Inspect test leads for damage; ensure correct function/range; move away from strong electromagnetic fields; understand that some meters may show small mV readings when not connected to a circuit. |
| No continuity beep | Open circuit; low battery; meter setting | Verify circuit is complete; replace batteries; ensure meter is set to continuity mode. |
| NCV not detecting voltage | Voltage too low; NCV sensor not close enough; meter malfunction | Ensure voltage is within detectable range; position sensor closer to conductor; if problem persists, contact support. |
If troubleshooting steps do not resolve the issue, please contact customer support.
Specifications
| Specification | Value |
|---|---|
| Brand | SPERRY |
| Model Number | DSA600TRMS |
| Functions | 12 Functions, 28 Ranges |
| Voltage Rating | 600V AC/DC |
| Current Rating | 600A AC |
| Circuitry | True RMS |
| Display | 5999-count backlit screen |
| Power Source | 3 AAA batteries (included) |
| Item Weight | 3.2 ounces |
| Product Dimensions | 20.8 x 9.5 x 2.75 inches |
| Drop Rating | 10-foot |
| Crush Rating | 250 lbs |
| Safety Rating | CAT III 600V, Cetus |
| Upper Temperature Rating | 40 Degrees Celsius |
Warranty
The Sperry Instruments DSA600TRMS Digital Clamp Meter comes with a Limited Lifetime Warranty. This warranty covers defects in material and workmanship under normal use and service. For specific terms and conditions, please refer to the warranty documentation included with your product or visit the official Sperry Instruments website.
Support
For technical assistance, troubleshooting, or warranty claims, please contact Sperry Instruments customer support:
- Website: Visit the official Sperry Instruments website for FAQs and support resources.
- Phone: Refer to the contact information provided on the product packaging or official website.
- Email: Use the contact form or email address available on the Sperry Instruments support page.
When contacting support, please have your product model number (DSA600TRMS) and purchase information readily available.


