1. Introduction
Thank you for choosing the Hibbent Round Bidet Toilet Seat. This non-electric bidet attachment is designed to provide enhanced personal hygiene with dual nozzles for rear and feminine wash, adjustable water pressure, and a slow-close feature. This manual provides essential information for safe installation, operation, and maintenance of your new bidet toilet seat.
2. Safety Information
- Read all instructions carefully before installation and use.
- Ensure the water supply is turned off before beginning installation.
- Do not use abrasive cleaners or harsh chemicals on the bidet seat.
- This product is not compatible with RV toilets.
- Ensure the bracket is locked in place before use to prevent movement.
- Avoid excessive force when adjusting controls or cleaning.
3. Package Contents
Verify that all components are present before beginning installation:
- Bidet Toilet Seat (Round) x 1
- 32-inch Stainless Steel Braided Hose x 1
- 9/16'' (3/8'') Metal T-adapter x 1
- 15/16'' (7/8'') Metal T-adapter x 1
- Rubber Washers
- Additional Replacement Nozzle x 2
- Installation Instruction Manual x 1
- Expansive Nuts
- Butterfly Nuts
- Adaptable Panel
- Connecting Bolts

Figure 3.1: All included components for the Hibbent Bidet Toilet Seat.
4. Specifications
| Feature | Detail |
|---|---|
| Brand | Hibbent |
| Model Number | SC208 |
| Style | Round |
| Color | White |
| Material | Polypropylene (PP) |
| Product Dimensions | 20"L x 15"W |
| Item Weight | 6.17 pounds |
| Bidet Function | Dual Nozzle (Rear & Feminine Wash) |
| Nozzle Feature | Adjustable, Self-Cleaning, Retractable |
| Seat Feature | Slow Close, Quick Release for Cleaning |
| Power Source | Non-Electric |
5. Installation
Follow these steps for a simple, non-electric installation:
5.1. Pre-Installation Checks
- Toilet Compatibility: Ensure your toilet is a round shape. Measure from the bolt holes to the toilet bowl front (16"-17.75" for round) and the distance between bolt holes (5.2"-7.2"). The distance from the bolt hole center to the toilet tank should be at least 1.5".
- Water Supply: Locate your toilet's water supply valve.

Figure 5.1: Toilet measurement guide for bidet seat compatibility.

Figure 5.2: Examples of compatible and incompatible toilet types.
5.2. Removing the Old Toilet Seat
- Lift the hinge covers on your existing toilet seat.
- Use a screwdriver to loosen the bolts holding the seat in place.
- Remove the old toilet seat and bolts.
5.3. Installing the Fixing Plate
- Place the provided template onto the toilet bowl, aligning it with the bolt holes.
- Insert the expansive nuts into the toilet bolt holes.
- Place the fixing plate over the expansive nuts.
- Insert the connecting bolts through the fixing plate and into the expansive nuts. Tighten the bolts firmly with a screwdriver to secure the fixing plate.

Figure 5.3: Steps for securing the fixing plate and attaching the bidet seat.
5.4. Connecting the Water Supply
- Turn off the water supply to the toilet at the shut-off valve.
- Flush the toilet to drain the tank.
- Disconnect the existing water supply hose from the toilet tank.
- Install the appropriate T-adapter (9/16" or 15/16") between the toilet tank fill valve and the water supply hose. Ensure rubber washers are correctly seated to prevent leaks.
- Connect the provided 32-inch stainless steel braided hose from the T-adapter to the water inlet on the bidet toilet seat. Hand-tighten all connections, then use a wrench for a slight additional turn if necessary, being careful not to overtighten.
- Slowly turn the water supply back on and check for leaks.
Video 5.1: Installation guide for the Hibbent Bidet Toilet Attachment, demonstrating water connection steps.
5.5. Attaching the Bidet Toilet Seat
- Align the bidet toilet seat with the installed fixing plate.
- Slide the seat onto the plate until it clicks securely into place.
6. Operation
Your Hibbent Bidet Toilet Seat offers simple, intuitive controls for a personalized cleaning experience.
6.1. Water Pressure Control
The bidet features an adjustable lever on the side to control water pressure. Rotate the lever to increase or decrease the water flow to your desired comfort level.
6.2. Dual Nozzle Functions
The bidet is equipped with two nozzles for specific cleaning needs:
- Rear Wash: Use this function for posterior cleaning.
- Feminine Wash: This nozzle provides a gentler spray for feminine hygiene.

Figure 6.1: Illustration of the bidet's three operational modes.

Figure 6.2: Detailed view of feminine and rear wash spray patterns.
Video 6.1: Overview of the Hibbent Bidet Toilet Seat features and operation.
Video 6.2: Demonstration of the dual function and self-cleaning nozzles.
7. Maintenance
7.1. Nozzle Self-Cleaning
The bidet features a self-cleaning function for its nozzles. To activate, rotate the control knob to the 'Self Cleaning' position. Water will spray to clean the nozzles before they retract behind the protective guard gate.
7.2. General Cleaning
- To clean the bidet seat, press the quick-release button on the side to detach the seat from the toilet.
- Use a soft cloth and mild, non-abrasive soap to clean the surfaces.
- Rinse thoroughly with water and dry with a soft cloth.
- Do not use harsh detergents, abrasive cleaners, or chemical sprays as they may damage the finish.
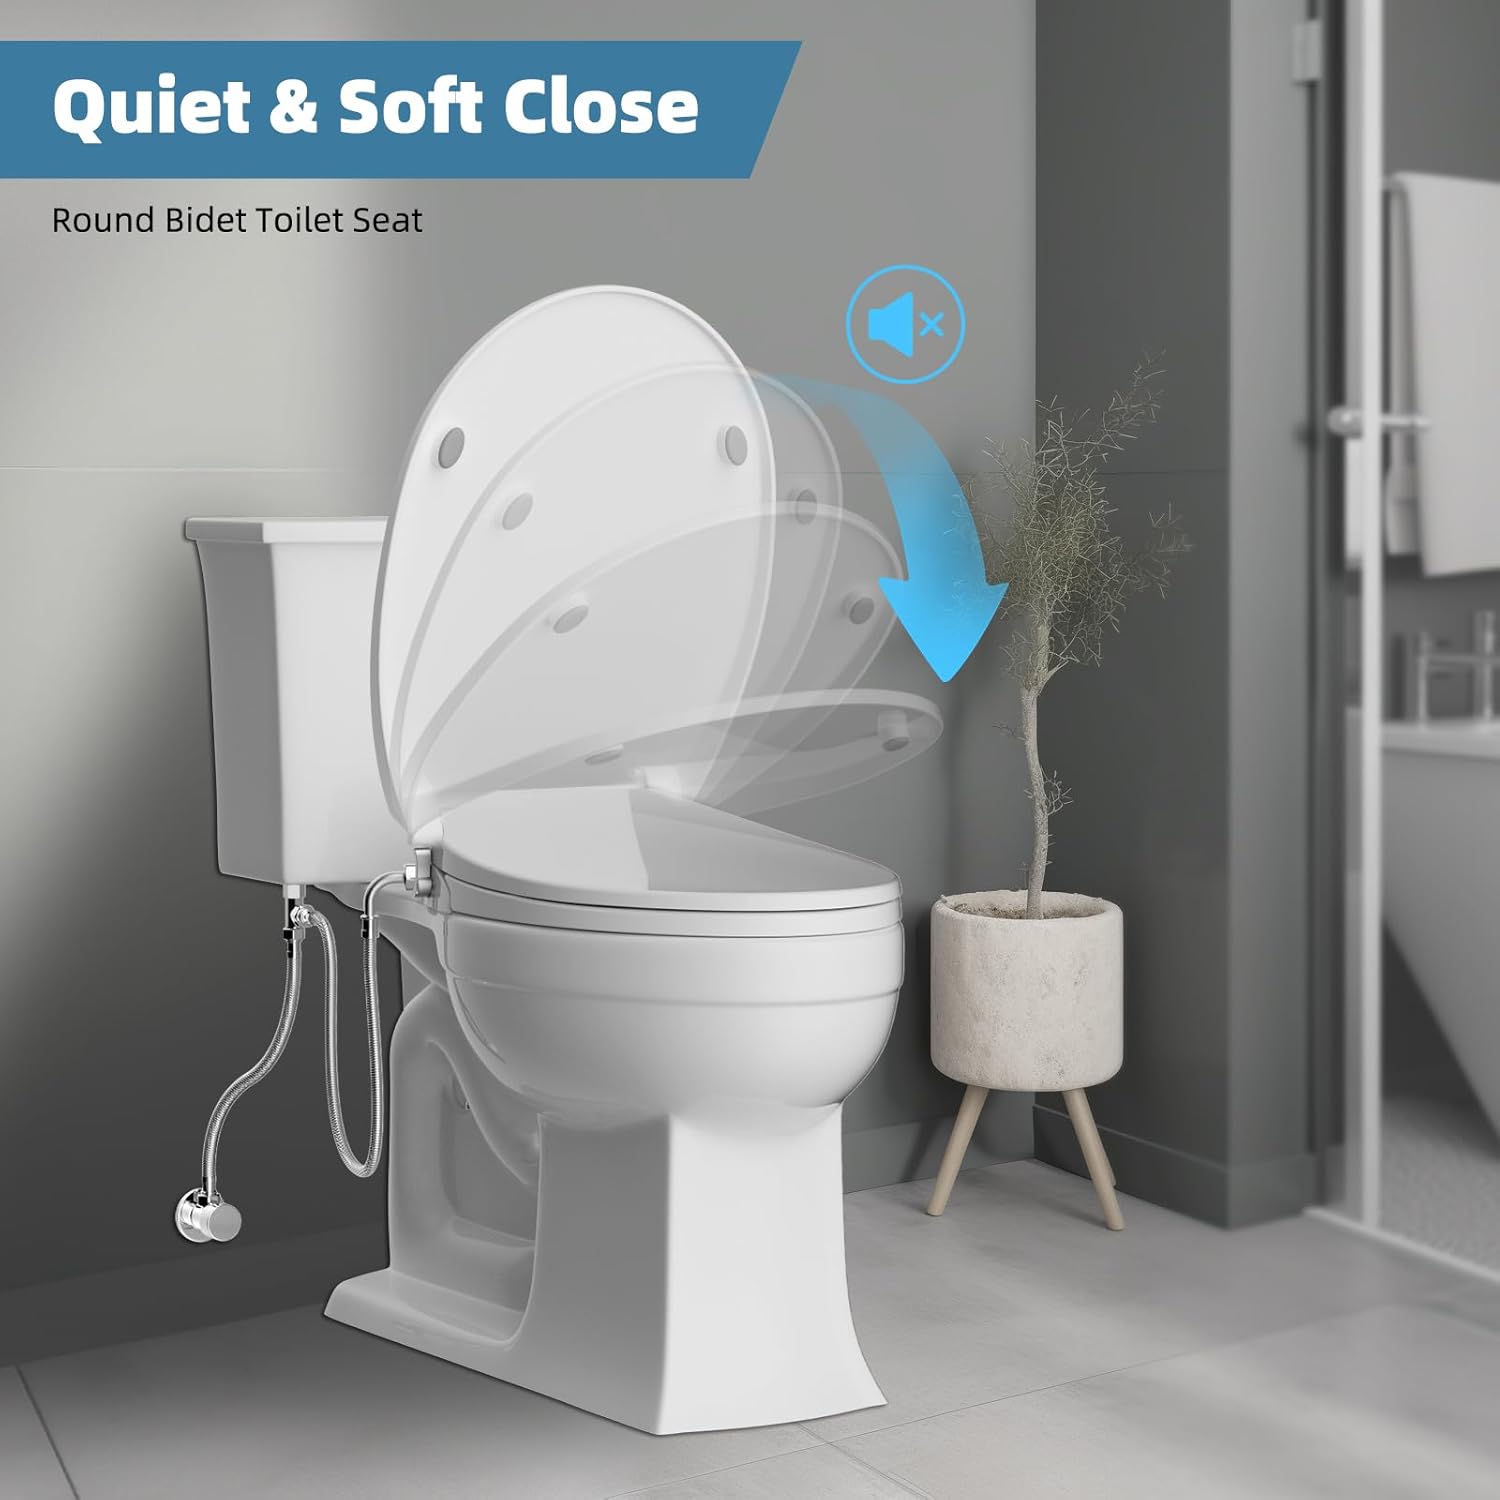
Figure 7.1: The slow-close feature helps prevent damage and simplifies cleaning.
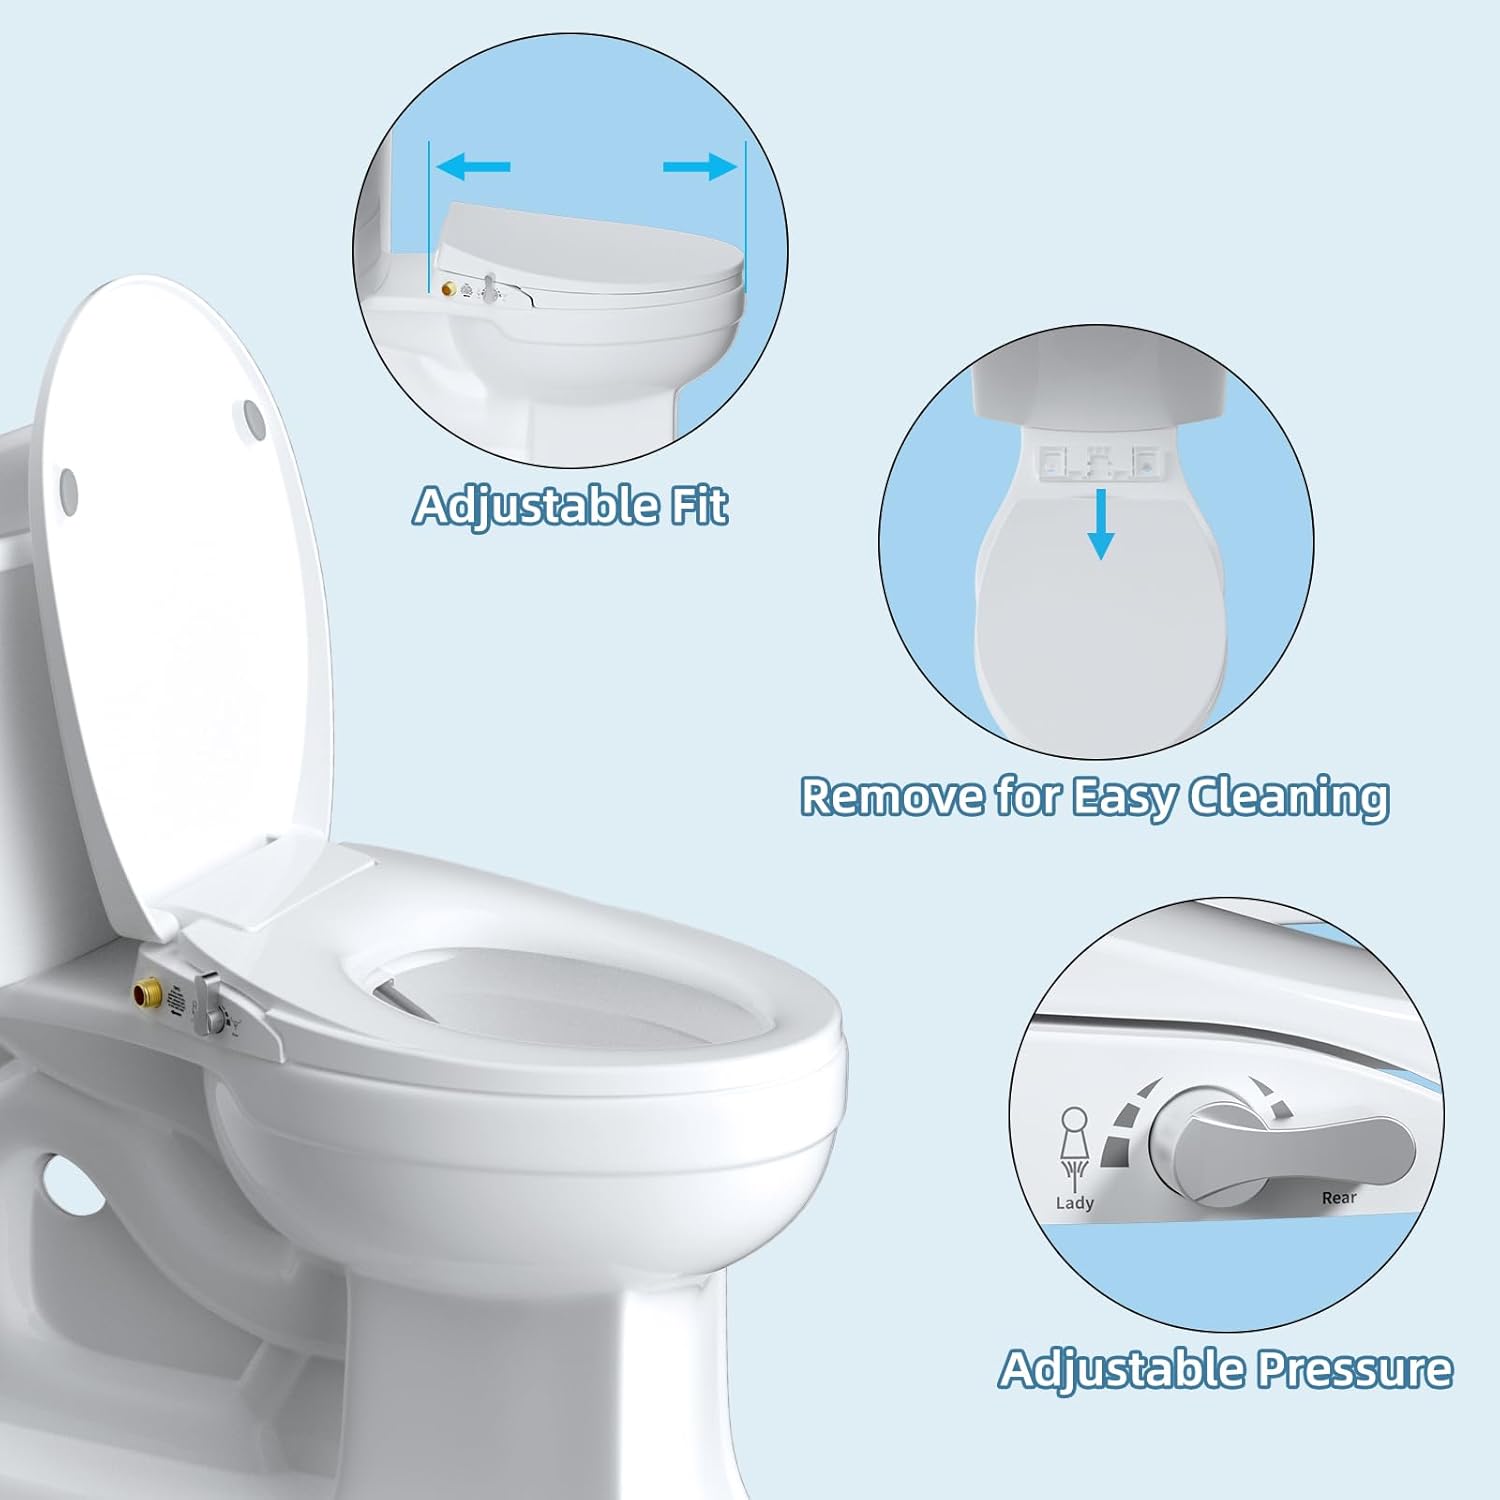
Figure 7.2: Quick release button for easy removal and thorough cleaning.
8. Troubleshooting
| Problem | Possible Cause | Solution |
|---|---|---|
| Weak or no water stream | Water supply valve closed; pressure regulator installed; clogged nozzle. | Ensure water supply valve is fully open. If pressure is still weak, remove the pressure regulator from the bidet's water supply connection (if present). Clean nozzles using the self-cleaning function or manually if necessary. |
| Water leakage from connections | Loose connections; improperly seated rubber washers. | Turn off water supply. Check all connections and tighten them securely. Ensure rubber washers are flat and properly seated. Do not overtighten. |
| Bidet seat moves or is unstable | Fixing plate not securely tightened; seat not properly clicked into place. | Ensure the connecting bolts for the fixing plate are tightened firmly. Verify the bidet seat is fully slid onto the fixing plate until it clicks. |
| Nozzles do not extend/retract properly | Debris obstructing nozzle movement. | Perform a self-cleaning cycle. If the issue persists, detach the seat and inspect the nozzle area for any obstructions. |
9. Warranty and Support
For warranty information and customer support, please refer to the documentation included with your product or contact Hibbent customer service directly. Keep your purchase receipt for warranty claims.


