Introduction
Thank you for purchasing the allen + roth Merington 1-Light Wall Sconce. This hardwired fixture features a brushed nickel finish and a hand-painted glass shade, designed to provide soft, ambient lighting. This manual provides detailed instructions for safe installation, operation, and maintenance of your new wall sconce. Please read all instructions carefully before beginning installation and retain this manual for future reference.
Safety Information
WARNING: Risk of electric shock. Disconnect power at the fuse box or circuit breaker before installation or servicing.
- All electrical connections must be in accordance with local codes, ordinances, or the National Electric Code (NEC). Contact a qualified electrician if you are unfamiliar with proper electrical wiring connections.
- This fixture is intended for indoor use only and is damp rated. Do not expose to direct water spray.
- Ensure the mounting surface is structurally sound and can support the weight of the fixture.
- Never connect the fixture to a power source while it is still in the packaging.
- Do not exceed the maximum wattage specified for the light bulb.
- Wear safety glasses and appropriate protective gear during installation.
Package Contents
Verify that all parts listed below are included in your package. If any part is missing or damaged, do not attempt to assemble or install the product. Contact customer service for assistance.
- Wall Sconce Fixture (1)
- Mounting Hardware Kit (1) - Includes mounting bracket, screws, wire nuts
- Glass Shade (1)
Note: Light bulb is not included and must be purchased separately.
Tools Required (Not Included)
- Phillips Head Screwdriver
- Flathead Screwdriver
- Wire Strippers
- Electrical Tape
- Safety Glasses
- Ladder (if necessary)
Setup and Installation
Follow these steps carefully to install your wall sconce. If you are unsure about any step, consult a qualified electrician.
- Turn Off Power: Locate the circuit breaker or fuse box that controls the power to the wall switch or outlet where you intend to install the fixture. Turn off the power completely. Verify the power is off using a voltage tester.
- Prepare Mounting Surface: If replacing an existing fixture, carefully remove it. Ensure the junction box is securely mounted in the wall.
- Attach Mounting Bracket: Secure the mounting bracket (from the hardware kit) to the junction box using the provided screws. Ensure the bracket is firm and stable.
- Make Electrical Connections:
- Connect the black wire from the fixture to the black (hot) wire from the junction box using a wire nut.
- Connect the white wire from the fixture to the white (neutral) wire from the junction box using a wire nut.
- Connect the ground wire (bare copper or green) from the fixture to the ground wire from the junction box (or to the green ground screw on the mounting bracket) using a wire nut.
- Carefully tuck all wires into the junction box.
- Secure Fixture: Align the fixture with the mounting bracket and secure it in place using the provided screws. Ensure the fixture is flush against the wall and stable.
- Install Light Bulb: Insert one A19 type light bulb (E26 medium base, 60-watt maximum, sold separately) into the socket. Do not overtighten.
- Install Glass Shade: Carefully place the glass shade onto the fixture according to the design. Ensure it is seated properly and securely.
- Restore Power: Once installation is complete, turn the power back on at the circuit breaker or fuse box. Test the fixture.
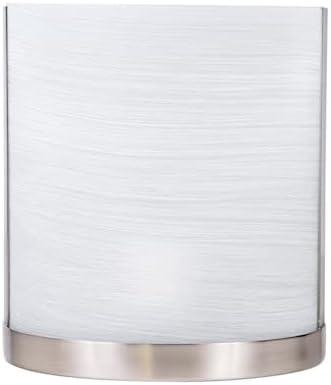
Image: Front view of the allen + roth Merington wall sconce. This image shows the brushed nickel base and the curved, textured glass shade.

Image: Dimensional diagram of the wall sconce, indicating a width of 6.5 inches and a height of 7.5 inches.
Operating Instructions
This wall sconce is designed for simple operation. Once properly installed and powered, it can be controlled by a standard wall switch. The fixture is dimmable, allowing you to adjust the brightness level when connected to a compatible dimmer switch (sold separately).
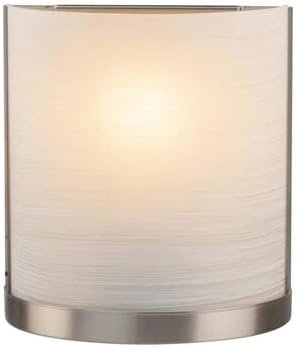
Image: The wall sconce illuminated, demonstrating the soft light emitted through the glass shade.
Maintenance
Regular maintenance will help preserve the appearance and functionality of your wall sconce.
- Cleaning: Always disconnect power before cleaning. Wipe the fixture with a soft, dry cloth. Do not use abrasive cleaners, solvents, or polishes as they may damage the finish. For the glass shade, a slightly damp cloth can be used, followed by a dry cloth.
- Bulb Replacement: Ensure power is off before replacing the bulb. Allow the bulb to cool completely before touching. Unscrew the old bulb and screw in a new A19 type, E26 medium base, 60-watt maximum incandescent bulb.
Troubleshooting
If you experience issues with your wall sconce, refer to the following common problems and solutions:
| Problem | Possible Cause | Solution |
|---|---|---|
| Light does not turn on. | 1. Power is off. 2. Bulb is faulty or loose. 3. Wiring connections are incorrect. | 1. Check circuit breaker/fuse. Ensure wall switch is ON. 2. Replace bulb or tighten it securely. 3. Disconnect power and recheck wiring connections. Consult an electrician if needed. |
| Light flickers. | 1. Loose bulb. 2. Incorrect dimmer switch. 3. Loose wiring connection. | 1. Tighten bulb. 2. Ensure dimmer switch is compatible with incandescent bulbs. 3. Disconnect power and recheck wiring connections. |
If these steps do not resolve the issue, please contact customer support.
Specifications
| Feature | Detail |
|---|---|
| Model Number | WS145BNK |
| Brand | allen + roth |
| Dimensions (Product) | 11.3 x 8.3 x 5.1 inches (L x W x H) |
| Item Weight | 2.38 pounds |
| Finish Type | Brushed Nickel |
| Shade Material | Glass |
| Light Source Type | Incandescent |
| Bulb Base | E26 Medium |
| Max Wattage | 60 watts (A19 bulb) |
| Number of Light Sources | 1 |
| Special Feature | Dimmable (with compatible dimmer) |
| Indoor/Outdoor Usage | Indoor (Damp Rated) |
| Installation Type | Surface Mount, Hardwired |
| Certification | UL Listed |
Warranty
This allen + roth product is covered by the manufacturer's limited warranty. Please refer to the warranty information provided at the time of purchase or contact customer service for details regarding coverage and terms.
Customer Support
For technical assistance, missing parts, or any questions regarding the installation or operation of your allen + roth Merington Wall Sconce, please contact the manufacturer's customer service. Contact information can typically be found on the product packaging or the brand's official website.


