
1. Introduction
This manual provides instructions for the proper installation and use of your Ancable AM Antenna with a 2-pin mini connector. This antenna is designed to enhance AM radio reception for compatible Sony Compact Disc Receivers.
2. Product Overview
The Ancable AM Antenna features a compact design with a 2-pin mini connector for direct attachment to your receiver. It is engineered to provide clear AM signal reception.

Image 2.1: Front and side view of the 2-pin mini connector, showing dimensions of 5.75 mm width and 3.95 mm depth.
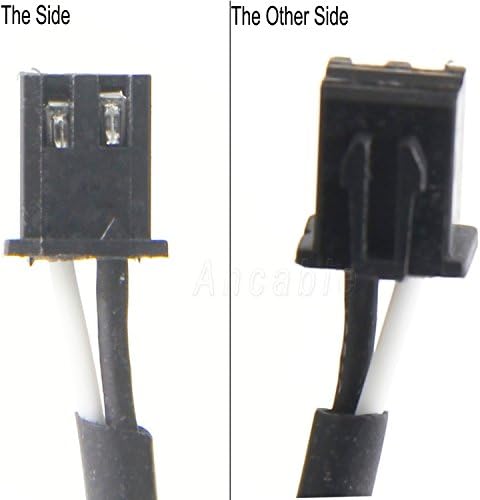
Image 2.2: Detailed views of the 2-pin mini connector from two different sides.
3. Compatibility
This AM antenna is specifically designed for use with the following Sony Compact Disc Receiver models:
- MHC-EC919iP
- HCD-EC919iP
- MHC-EC719iP
- HCD-EC719iP
Important: If your receiver model is not listed above, please contact Ancable customer support to confirm compatibility before attempting installation.
4. Setup Instructions
Follow these steps to properly connect your Ancable AM Antenna to your Sony receiver:
- Locate the AM Antenna Port: On the rear panel of your Sony Compact Disc Receiver, identify the dedicated 2-pin AM antenna input port. This port is typically labeled "AM ANT" or similar.
- Connect the Antenna: Carefully insert the 2-pin mini connector of the Ancable AM Antenna into the corresponding port on your receiver. Ensure a firm and secure connection. Do not force the connector.
- Position the Antenna: For optimal reception, extend the antenna wire fully and position it away from other electronic devices that may cause interference. Experiment with different orientations (horizontal or vertical) and locations to find the best signal strength. Placing it near a window often improves reception.

Image 4.1: Example rear panel of a Sony receiver, indicating the 2-pin AM antenna input port.
5. Operating Instructions
Once the antenna is connected and positioned, operate your receiver as usual to tune into AM radio stations. The antenna works passively to improve the signal received by your unit.
- Turn on your Sony Compact Disc Receiver.
- Select the AM radio function.
- Use your receiver's tuning controls to scan for and select AM radio stations.
- If reception is poor, try adjusting the antenna's position or orientation.
6. Maintenance
The Ancable AM Antenna requires minimal maintenance:
- Keep the antenna clean and free from dust. Use a soft, dry cloth for cleaning.
- Avoid bending or kinking the antenna wire excessively, as this can damage the internal conductors.
- Ensure the connector remains securely plugged into the receiver.
7. Troubleshooting
If you experience issues with AM reception, consider the following:
| Problem | Possible Cause | Solution |
|---|---|---|
| Poor or no AM reception | Antenna not properly connected | Ensure the 2-pin connector is fully inserted into the receiver's AM antenna port. |
| Static or weak signal | Antenna position is not optimal | Adjust the antenna's position and orientation. Try moving it closer to a window or away from other electronics. |
| Interference from other devices | Nearby electronic devices (computers, TVs, etc.) | Move the antenna further away from potential sources of electromagnetic interference. |
| Receiver not set to AM mode | Incorrect input selection | Verify that your Sony receiver is set to the AM radio function. |
8. Specifications
- Brand: Ancable
- Model Number: AN-UK-261
- Antenna Type: AM Radio
- Connector Type: 2-Pin Mini Connector
- Impedance: 50 Ohm
- Color: Dark Gray
- UPC: 714973981098
9. Warranty and Support
Ancable is committed to providing high-quality products and customer satisfaction.
- Warranty: This product comes with a 365-day long warranty. Any quality problems will be refunded or replaced for free.
- Customer Service: Ancable offers 7x24 online customer service. If you have any questions or require assistance, please feel free to contact us.