
Makita XDT13Z
Makita XDT13Z 18V LXT Lithium-Ion Brushless Cordless Impact Driver User Manual
Model: XDT13Z
Brand: Makita
Product Overview
The Makita XDT13Z 18V LXT Lithium-Ion Brushless Cordless Impact Driver is engineered for a wide range of fastening tasks, combining power and extended run-time. Its efficient Makita BL™ Brushless motor is electronically controlled for longer life, increased power, and speed. The compact design and ergonomic soft grip ensure user comfort during operation.
Key Features
- BL Brushless motor delivers 1,500 inch pounds Of max torque
- Variable speed (0 to 3,400 RPM & 0 to 3,600 IPM) for a wide range of fastening applications
- The BL Brushless motor eliminates carbon brushes, enabling the BL motor to run cooler and more efficiently for longer life
- Efficient BL Brushless motor is electronically controlled to optimize battery energy use for up to 50 percent longer run time per charge
- The electronically controlled BL Brushless motor efficiently uses energy to match torque and RPM to the changing demands of the application
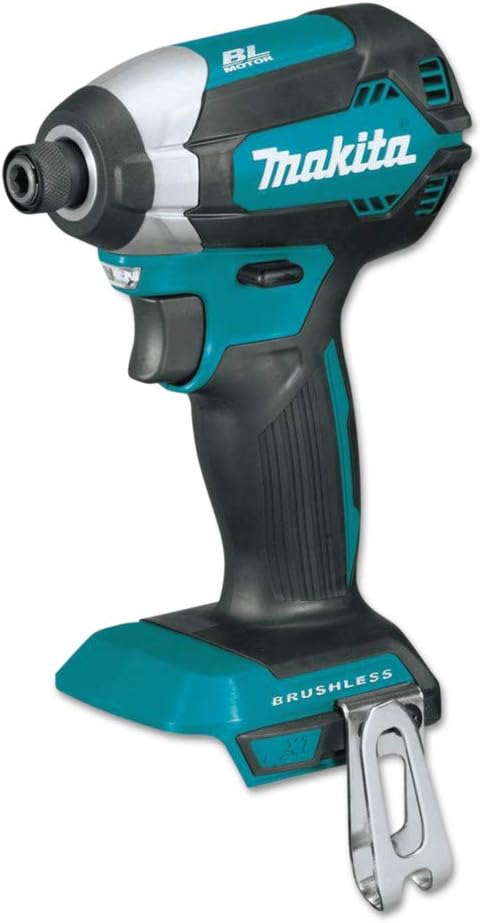
Figure 1: The Makita XDT13Z 18V LXT Lithium-Ion Brushless Cordless Impact Driver, tool only.
Safety Information
Always observe basic safety precautions when using power tools to reduce the risk of fire, electric shock, and personal injury.
- Read all instructions: Before operating the tool, read and understand all safety warnings, instructions, illustrations, and specifications provided with this power tool.
- Wear eye protection: Always wear appropriate eye protection that complies with current national standards.
- Keep work area clean and well lit: Cluttered or dark areas invite accidents.
- Use the correct tool for the job: Do not force the tool; it will do the job better and safer at the rate for which it was designed.
- Disconnect power: Always disconnect the battery pack from the tool before making any adjustments, changing accessories, or storing the tool.
- Secure workpiece: Always clamp or otherwise secure the workpiece to a stable platform. Holding the work by hand or against your body is unstable and may lead to loss of control.
- Maintain tools with care: Keep cutting tools sharp and clean for better and safer performance. Follow instructions for lubricating and changing accessories.
- Store idle tools: When not in use, tools should be stored in a dry, high, or locked-up place, out of reach of children.
- Check for damaged parts: Before further use of the tool, a guard or other part that is damaged should be carefully checked to determine that it will operate properly and perform its intended function.
- Do not operate power tools in explosive atmospheres: Do not use the tool in the presence of flammable liquids, gases, or dust.
Components and Parts
Familiarize yourself with the main components of your Makita XDT13Z Impact Driver.

Figure 2: Side view of the Makita XDT13Z Impact Driver, highlighting its compact design.

Figure 3: Close-up of the integrated LED light, illuminating the work area.
- Chuck (Hex Shank): For quick and secure bit changes.
- Trigger Switch: Variable speed control based on pressure applied.
- Forward/Reverse Switch: Controls the direction of rotation.
- LED Job Light: Illuminates the work area for improved visibility.
- Belt Clip: For convenient carrying and storage on a belt.
- Battery Terminal: Connection point for 18V LXT Lithium-Ion Battery (sold separately).
Setup
Battery Installation
- Ensure the tool is switched off before installing or removing the battery cartridge.
- Align the tongue on the battery cartridge with the groove in the tool housing.
- Slide the battery cartridge into place until it locks with a slight click. If you can see the red indicator on the upper side of the button, it is not locked completely.
- To remove the battery cartridge, slide it from the tool while pressing the button on the front of the cartridge.

Figure 4: Proper installation of the 18V LXT Lithium-Ion battery into the impact driver.
Bit Installation
- Pull the sleeve of the chuck forward.
- Insert the bit into the chuck as far as it will go.
- Release the sleeve to secure the bit. Pull on the bit to ensure it is locked in place.
Operating Instructions
Powering On/Off and Speed Control
The tool's speed is controlled by the trigger switch. Pressing the trigger further increases the speed. To turn off the tool, simply release the trigger.
Forward/Reverse Rotation
The forward/reverse switch allows for changing the direction of rotation. Push the lever from the left side for forward rotation and from the right side for reverse rotation. Ensure the switch is in the center position for locking the trigger and preventing accidental startup.
LED Job Light
The LED light automatically illuminates the work area when the trigger is pulled. It remains lit for a short period after the trigger is released, providing continued visibility.
Driving Screws
- Select the appropriate bit for the fastener you are using.
- Place the bit onto the fastener head, ensuring a secure fit.
- Apply firm, steady pressure to the tool, keeping it aligned with the fastener.
- Gradually squeeze the trigger to start driving the fastener. The impact mechanism will engage automatically as resistance increases, providing powerful fastening action.

Figure 5: Using the impact driver to fasten screws into wood.

Figure 6: The impact driver effectively driving fasteners into metal sheeting.

Figure 7: Demonstrating the tool's versatility in various fastening applications.
Maintenance
Cleaning
Regularly clean the tool's ventilation openings to prevent dust and debris buildup, which can lead to overheating. Use a soft, damp cloth for cleaning the exterior. Do not use solvents, as they may damage plastic parts.
Battery Care
Store batteries in a cool, dry place, away from direct sunlight and excessive heat. Do not store fully discharged batteries for extended periods, as this can reduce their lifespan. Always charge batteries before use.
Bit Maintenance
Inspect bits for wear, damage, or dullness before each use. Replace worn or damaged bits to ensure efficient fastening and prevent damage to fasteners or the tool.
Troubleshooting
| Problem | Possible Cause | Solution |
|---|---|---|
| Tool does not operate | Battery not charged | Charge battery fully. |
| Tool does not operate | Battery not properly installed | Re-install battery securely until it clicks into place. |
| Tool does not operate | Forward/Reverse switch locked in center position | Adjust switch to forward or reverse operating position. |
| Reduced power/performance | Worn or damaged bit | Replace the bit. |
| Reduced power/performance | Tool overheating | Allow tool to cool down; ensure ventilation openings are clear of obstructions. |
Specifications
| Feature | Detail |
|---|---|
| Brand | Makita |
| Model Number | XDT13Z |
| Voltage | 18 Volts |
| Maximum Rotational Speed | 3400 RPM |
| Maximum Torque | 1500 Inch Pounds |
| Impacts Per Minute (IPM) | 3600 IPM |
| Chuck Type | 1/4 inch Hex |
| Tool Weight (without battery) | 2.6 Pounds |
| Dimensions (L x W x H) | 8.3"L x 3.5"W x 6.5"H |
| Power Source | Battery Powered |
| Battery Type | Lithium Ion |
| Special Features | Variable Speed, Brushless Motor, LED Light |
Warranty and Support
Warranty Information
This Makita product is covered by a 3-year limited warranty. Please refer to the official Makita warranty policy for full details and terms regarding coverage, limitations, and how to make a claim.
Customer Support
For technical assistance, service, or parts, please contact Makita customer support. You can find up-to-date contact information on the official Makita website or by calling (800)-4-MAKITA.
An official User Guide is available for download: Download User Guide (PDF)
Related documentsXDT13Z


Ask a question about this manual
Ask about setup, troubleshooting, compatibility, parts, safety, or missing instructions. Manuals+ will review the question and use this page’s manual context to help answer it.