1. Introduction
This instruction manual provides comprehensive guidance for the safe and effective use of the OEMTOOLS 24534 Smoke Diagnostic Machine. This device is designed to assist technicians in identifying various system leaks in domestic and import cars and light trucks, including air intake, cooling, evaporation, fuel, exhaust, and vacuum systems. Please read this manual thoroughly before operating the machine to ensure proper function and longevity.
2. Safety Information
Always observe the following safety precautions when operating the OEMTOOLS 24534 Smoke Diagnostic Machine:
- Wear appropriate personal protective equipment, including safety glasses and gloves.
- Operate the machine in a well-ventilated area to prevent inhalation of smoke.
- Ensure the power supply matches the machine's requirements.
- Do not operate the machine near open flames or flammable materials.
- Keep the machine away from water and moisture.
- Do not attempt to modify or repair the machine yourself. Refer to qualified service personnel.
- CAUTION: Do not remove the cap when the unit is in use. Soak the fiberglass element (wick) in mineral oil or baby oil before initial use. Failure to do so can burn out the fiberglass element.
3. Product Overview
The OEMTOOLS 24534 Smoke Diagnostic Machine is a robust tool designed for efficient leak detection. Familiarize yourself with its main components:
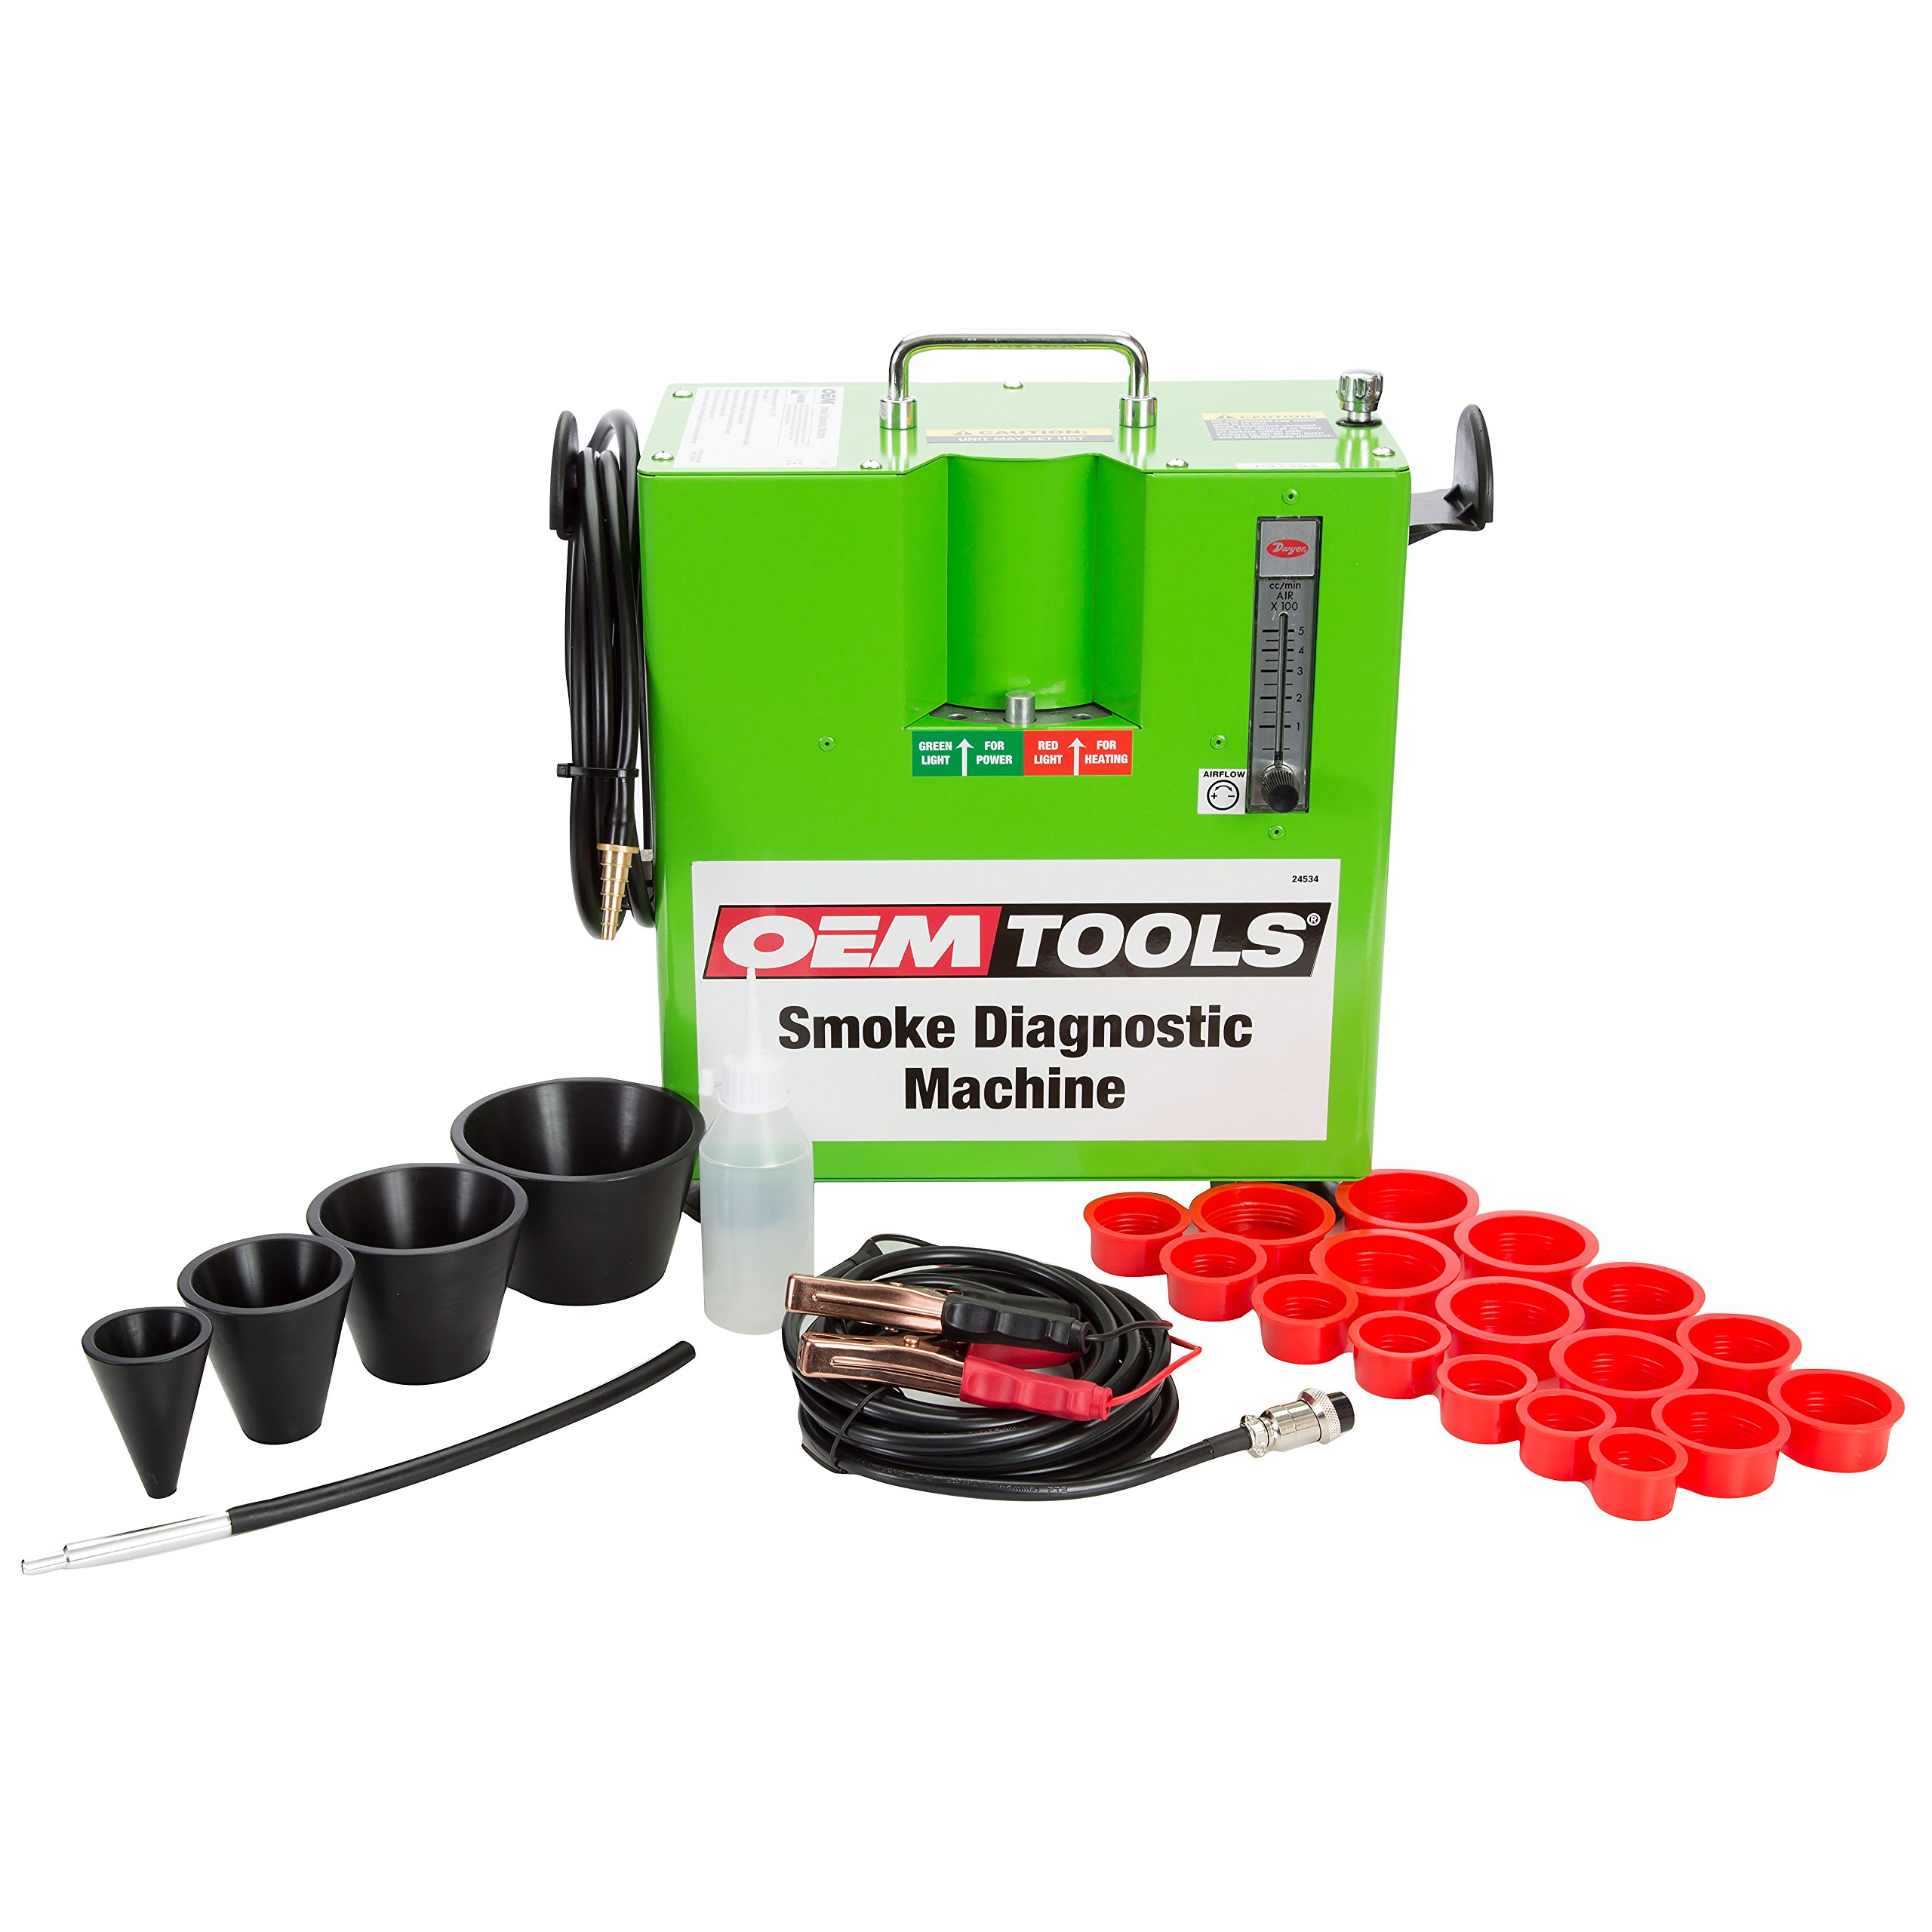
Figure 3.1: The OEMTOOLS 24534 Smoke Diagnostic Machine, showing its compact design and integrated handle for portability.

Figure 3.2: The smoke diagnostic machine alongside its protective carrying case, illustrating the complete kit.

Figure 3.3: Side view of the machine, highlighting the integrated hose storage for convenience and organization.
Key Components:
- Main Unit: Houses the smoke generator, heating element, and control circuitry.
- Smoke Output Hose: Connects to the system being tested.
- Power Cord: For connecting to an electrical outlet.
- Control Panel: Features power and heating indicator lights, and airflow adjustment.
- Fluid Reservoir: For smoke-generating fluid.
4. Setup
Before initial use, and whenever the fluid level is low, the machine requires filling with appropriate smoke-generating fluid (mineral oil or baby oil).
- Prepare the Fiberglass Element: For first-time use, ensure the fiberglass element (wick) is thoroughly soaked in mineral oil or baby oil. This prevents burnout.
- Fill the Reservoir: Locate the filling port on the top of the machine. Carefully pour the recommended smoke-generating fluid into the reservoir using the provided dispenser bottle. Do not overfill.
- Connect Power: Plug the power cord into a suitable electrical outlet.
- Connect Air Supply (if applicable): If your model requires an external air supply, connect it according to the instructions on the unit.

Figure 4.1: Illustrates the process of filling the smoke diagnostic machine's reservoir with fluid using the provided bottle.
5. Operating Instructions
Follow these steps to operate your OEMTOOLS 24534 Smoke Diagnostic Machine:
- Power On: Locate the power switch, typically indicated by a green light. Turn the machine on. The green light will illuminate, indicating power is supplied.
- Activate Heating: Engage the heating function, usually indicated by a red light. Allow the machine to warm up for a few minutes until it reaches operating temperature and begins producing smoke.
- Adjust Airflow: Use the integrated regulator and variable flow control to adjust the smoke output and pressure as needed for the specific diagnostic task.
- Connect to System: Attach the smoke output hose to the vehicle system you intend to test (e.g., air intake, exhaust, vacuum lines). Ensure a secure connection to prevent smoke leakage at the connection point.
- Perform Leak Test: Introduce smoke into the system. Visually inspect for smoke escaping from any cracks, loose connections, or damaged components. This indicates a leak.
- Turn Off: Once the diagnosis is complete, turn off the heating element first, then the main power. Disconnect the hose from the vehicle and store the machine properly.
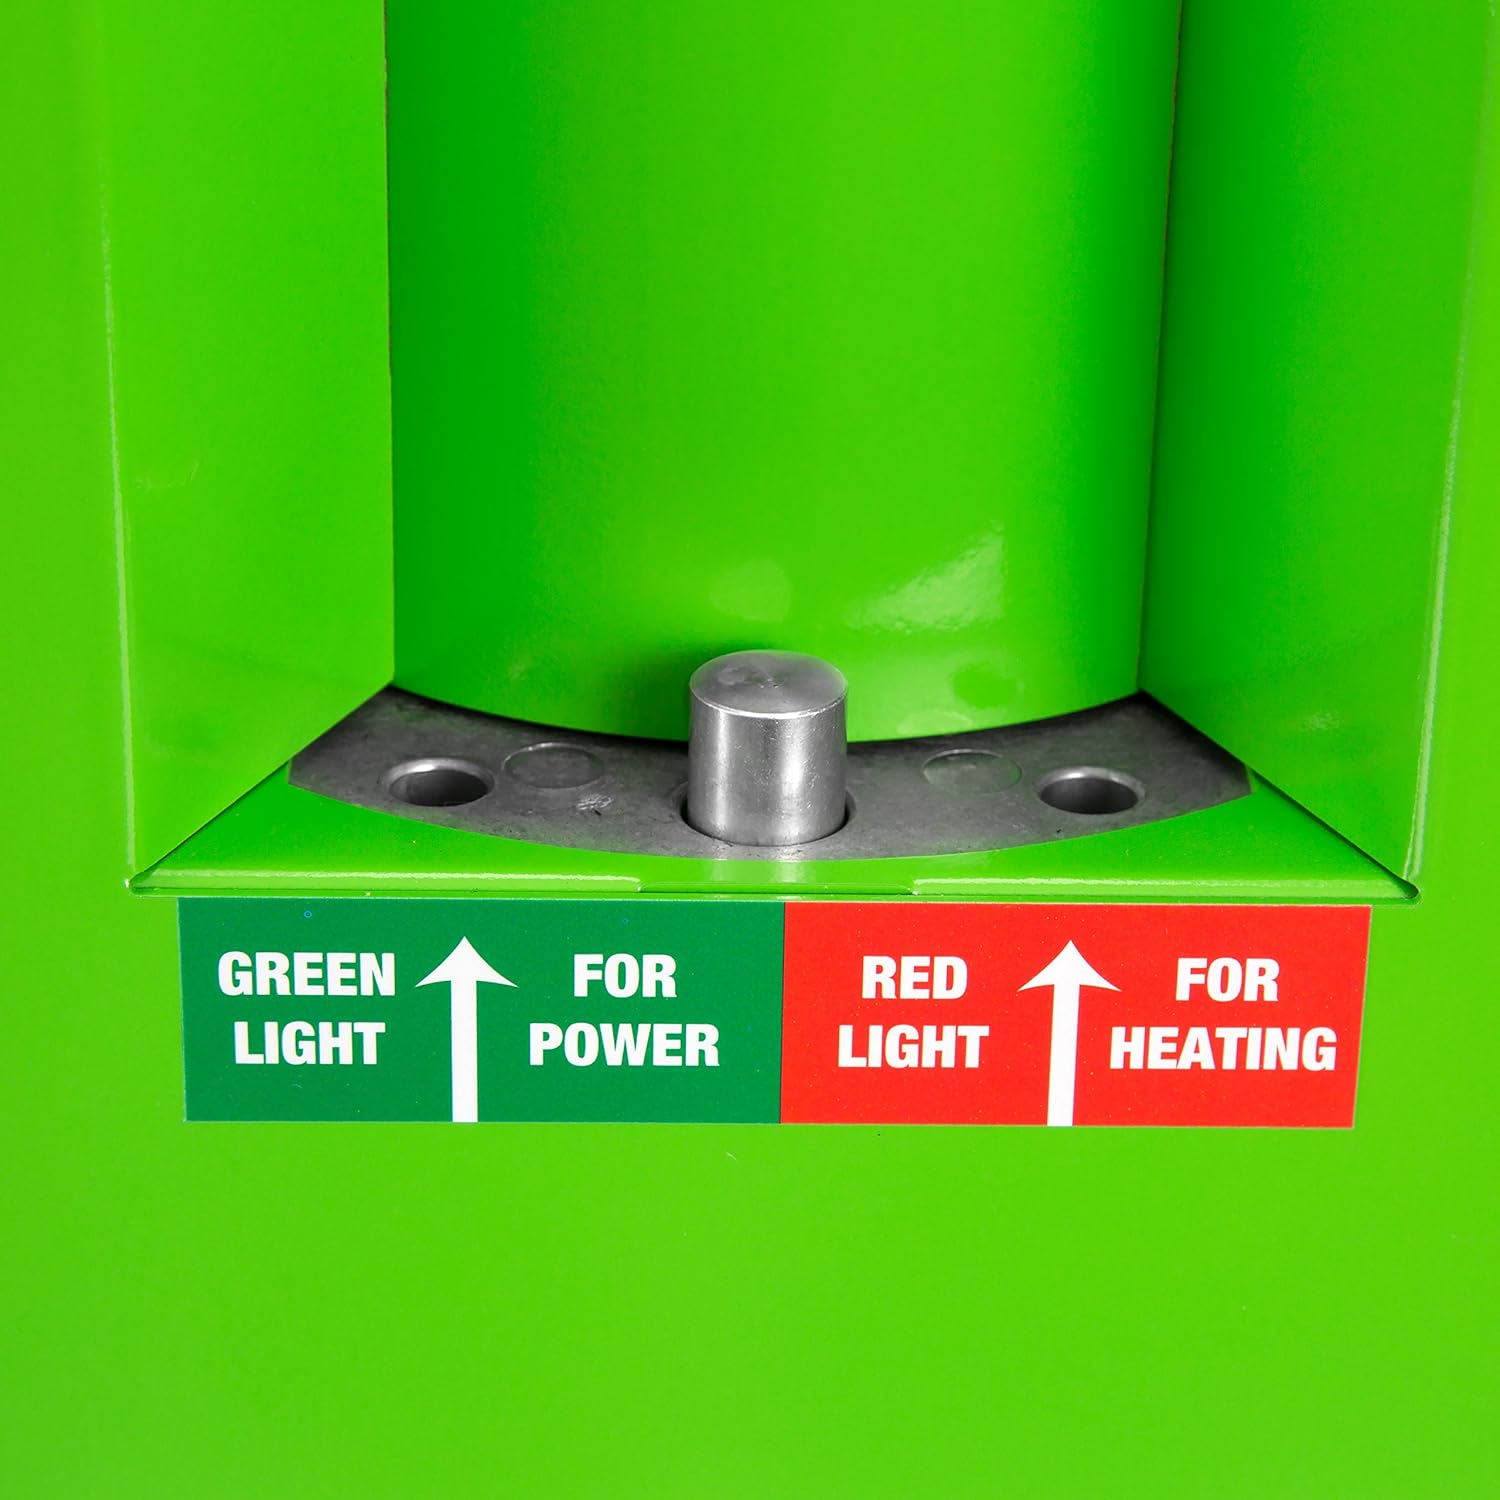
Figure 5.1: Close-up of the control panel, showing the green light for power and the red light for heating, along with their respective labels.
This machine is effective for testing various systems including turbo systems, engine blocks, fuel systems, and exhaust systems.
6. Maintenance
Regular maintenance ensures the longevity and optimal performance of your smoke diagnostic machine:
- Fluid Level: Regularly check the smoke-generating fluid level and refill as necessary. Never operate the machine dry.
- Fiberglass Element: Periodically inspect the fiberglass element (wick) for wear or damage. Replace if necessary, ensuring it is properly saturated with fluid before use.
- Cleaning: Keep the exterior of the machine clean and free of dust and debris. Use a soft, dry cloth. Do not use abrasive cleaners or solvents.
- Hose Inspection: Inspect the smoke output hose for cracks, kinks, or damage. Replace if compromised to ensure accurate testing.
- Storage: Store the machine in a cool, dry place, away from direct sunlight and extreme temperatures. Ensure the hose is neatly coiled and secured.
7. Troubleshooting
If you encounter issues with your OEMTOOLS 24534 Smoke Diagnostic Machine, refer to the following common problems and solutions:
| Problem | Possible Cause | Solution |
|---|---|---|
| No smoke production or very little smoke. |
|
|
| Little to no pressure. |
|
|
| Machine does not power on. |
|
|
8. Specifications
Technical specifications for the OEMTOOLS 24534 Smoke Diagnostic Machine:
- Model Number: 24534
- Brand: OEMTOOLS
- Product Dimensions: 32.92 x 17.02 x 33.02 cm (12.96 x 6.70 x 13.00 inches)
- Item Weight: 7.28 kg (16.05 lbs)
- Material: Blend
- Color: Multi
- Manufacturer: OEMTOOLS
- Applications: Air intake, cooling, evaporation, fuel, exhaust, vacuum systems, turbo systems, engine block.
9. Warranty and Support
For warranty information, technical support, or service inquiries regarding your OEMTOOLS 24534 Smoke Diagnostic Machine, please contact OEMTOOLS customer service directly. Refer to the product packaging or the official OEMTOOLS website for the most current contact details and warranty terms.