1. Introduction
This manual provides detailed instructions for the installation, programming, and operation of the Baomain Digital LCD Programmable Timer, Model CN101A. This device is designed for precise control of electrical equipment with up to 28 daily/weekly ON/OFF programs. It features a 12V AC/DC input and a 16A relay capacity, making it suitable for various lighting, pump, and equipment control applications.
2. Safety Information
- Always disconnect power before installation or maintenance to prevent electric shock.
- Ensure the input voltage (12V AC/DC) matches the product specifications. Incorrect voltage can damage the device.
- The output relay is rated for 16A. Do not exceed this current rating to avoid overheating and potential fire hazards.
- Installation should be performed by a qualified electrician or knowledgeable individual familiar with electrical wiring.
- This device is designed for indoor use or in an appropriate waterproof enclosure if used outdoors. The included cover provides basic splash protection but is not fully weatherproof.
3. Product Overview
The Baomain CN101A timer features an LCD display, control buttons, and terminal connections for power input and load output.

Figure 3.1: Front view of the Baomain CN101A Digital LCD Programmable Timer, showing the display and control buttons.

Figure 3.2: The timer unit with its transparent waterproof cover and mounting screws.
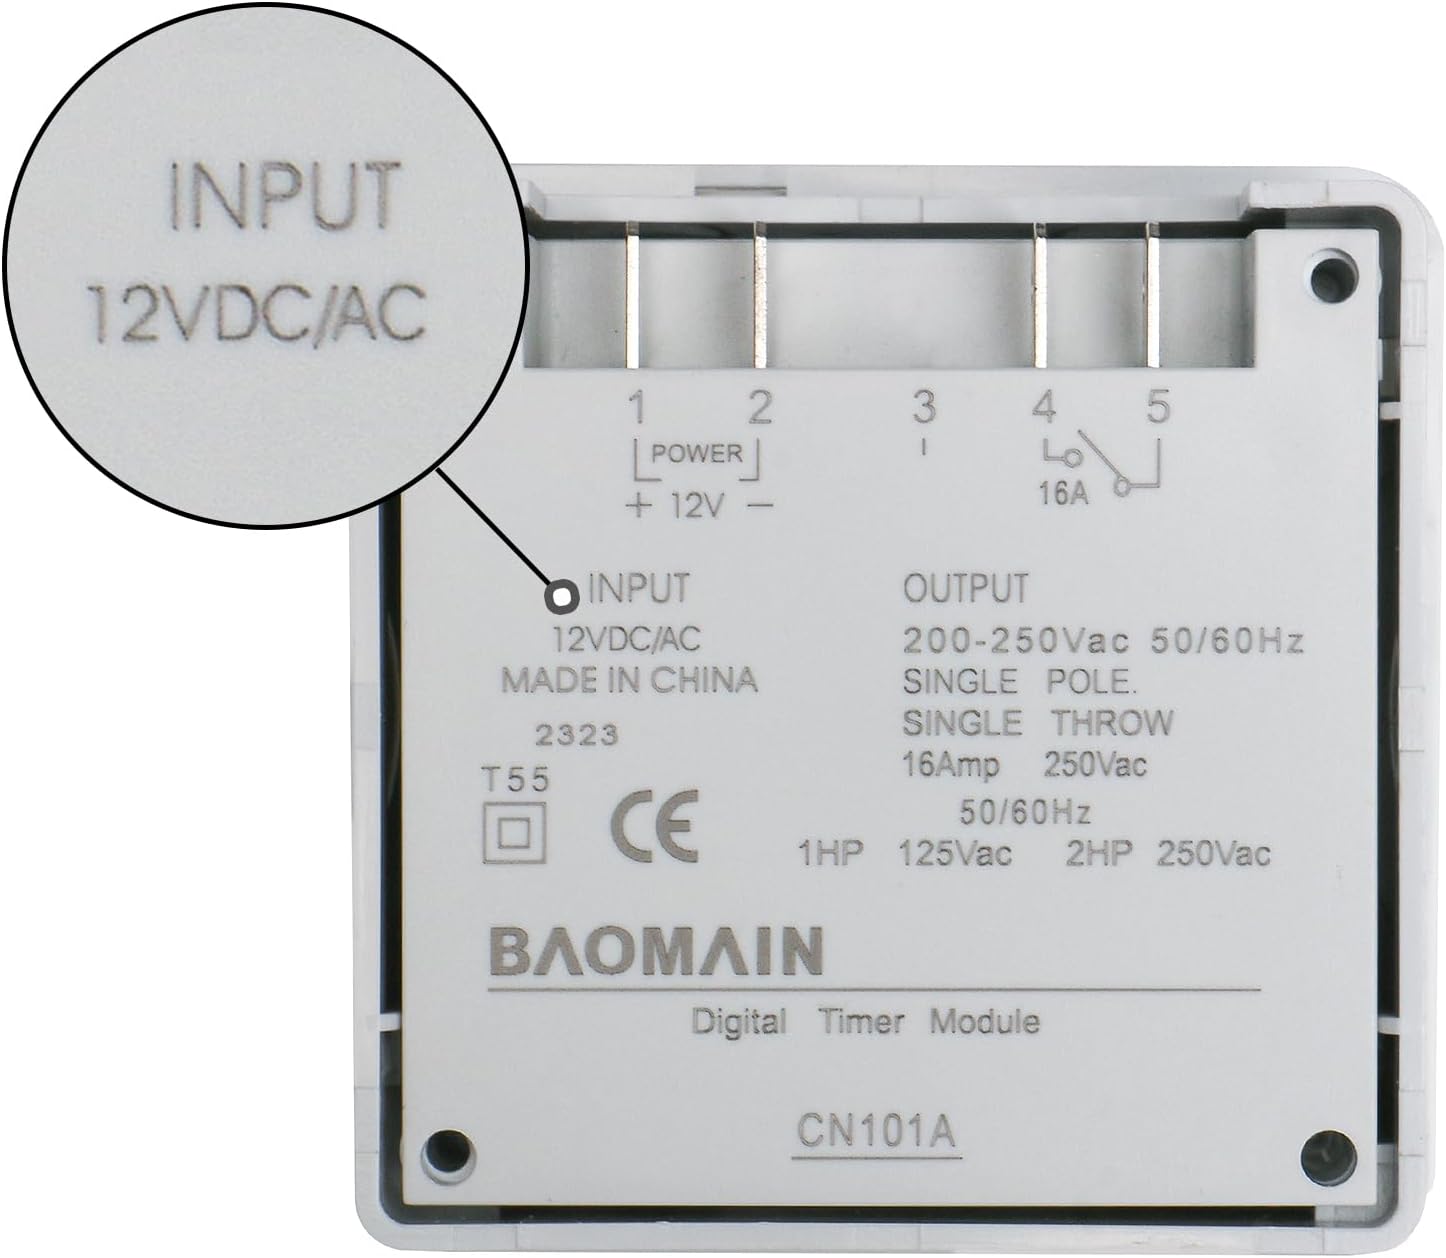
Figure 3.3: Rear view of the timer, detailing the input (12VDC/AC) and output (200-250Vac, 16A) specifications and terminal labels.
3.1 Control Buttons
- Clock Button (◷): Used to set the current time and day. Press and hold to enter time setting mode. Press four times to lock/unlock buttons.
- D+ Button: Adjusts the day of the week (Monday to Sunday) during time or program setting.
- H+ Button: Adjusts the hour (0-23) during time or program setting.
- M+ Button: Adjusts the minute (0-59) during time or program setting.
- P Button: Enters programming mode to set ON/OFF times.
- C Button: Reset button. Press with a pointed object to clear all settings and restore factory defaults.
- C/R Button: Cancel/Recovery. Press and hold for 5 seconds to restore factory settings (LCD display will flash).
- Manual Button: Toggles between ON, OFF, and AUTO modes. Press and hold for 5 seconds to turn the LCD screen off (timer off). Press and hold again for 5 seconds to turn it back on. Setting data is retained when the LCD is off.
4. Setup and Installation
4.1 Wiring Diagram
The Baomain CN101A timer requires a 12V AC/DC power input for its operation and provides a single-pole, single-throw relay output for controlling a separate load. Ensure all connections are secure and insulated.

Figure 4.1: Connection Diagram. Terminals 1 and 2 are for 12V power input. Terminals 3, 4, and 5 are for the relay output. Connect the load to terminals 4 and 5 (normally open contacts) for switched operation.
4.2 Initial Power-Up
Upon first use or after a power outage, the timer may require a reset and time setting. If the display is off, press and hold the 'Manual' key for 5 seconds to turn it on. If it remains off, ensure the 12V power input is correctly connected and functioning.
5. Operating Instructions
5.1 Setting Current Time and Day
- Press the Clock (◷) button once. The display will show the current time.
- While holding the Clock (◷) button, press D+ to set the current day of the week.
- While holding the Clock (◷) button, press H+ to set the current hour.
- While holding the Clock (◷) button, press M+ to set the current minute.
- Release the Clock (◷) button to save the settings.
5.2 Programming ON/OFF Cycles
The timer supports up to 28 ON/OFF programs. Follow these steps to set a program:
- Press the P button once. The display will show "1 ON" (Program 1 ON time).
- Press D+ to select the day(s) for this program. You can choose individual days, weekdays, weekends, or all days.
- Press H+ to set the desired ON hour.
- Press M+ to set the desired ON minute.
- Press the P button again. The display will show "1 OFF" (Program 1 OFF time).
- Repeat steps 2-4 to set the desired OFF day(s), hour, and minute for Program 1.
- To set additional programs (up to 28), press the P button repeatedly and follow steps 2-6 for each program.
- Once all programs are set, press the Clock (◷) button to exit programming mode and save all settings. The timer will return to the current time display.
Video 5.1: Official Baomain video demonstrating the basic setup and programming of the CN101A Digital LCD Programmable Timer.
5.3 Manual Override
Press the Manual button to cycle through the operating modes:
- ON: The output is continuously ON, overriding any programmed OFF times.
- OFF: The output is continuously OFF, overriding any programmed ON times.
- AUTO: The timer operates according to the programmed ON/OFF cycles. This is the standard operating mode.
6. Troubleshooting
- Display is blank or not turning on: Press and hold the 'Manual' button for 5 seconds. If the display remains off, ensure the 12V AC/DC input power is correctly connected and supplied. The internal CR2032 battery maintains settings but does not power the display or relay.
- Timer not energizing the load: Verify the wiring connections according to the diagram in Section 4.1. Confirm that the input voltage is 12V AC/DC. Check the operating mode (ensure it is in 'AUTO' or 'ON' mode).
- Incorrect ON/OFF times: Re-enter programming mode (Section 5.2) and carefully review your programmed ON/OFF times and selected days. Ensure the current time is set correctly (Section 5.1).
- Buttons are unresponsive: The buttons might be locked. Press the Clock (◷) button four times consecutively to unlock them.
- Error Codes (E1, E2): If the LCD shows E1, it indicates that a start time has not been set for a program. If it shows E2, an end time has not been set. Review and complete your program settings.
- Settings lost after power outage: The internal CR2032 battery may be depleted. This battery is for memory backup only. Replace the CR2032 battery if settings are consistently lost.
7. Specifications
| Feature | Specification |
|---|---|
| Model Number | CN101A |
| Input Voltage | 12V AC/DC |
| Output Relay Capacity | 16A, 200-250Vac (50/60Hz) |
| Programmable Events | 28 ON/OFF programs (daily/weekly) |
| Material | Plastic |
| Product Dimensions | 1.26"D x 2.36"W x 2.36"H (32mm D x 60mm W x 60mm H) |
| Item Weight | 68 Grams (2.4 ounces) |
| Battery Backup | CR2032 (for program memory) |
| Screen Size | 6 Centimeters |
8. Maintenance
- Cleaning: Wipe the timer's surface with a soft, dry cloth. Do not use abrasive cleaners or solvents.
- Battery Replacement: The internal CR2032 lithium button battery is not rechargeable. If the timer consistently loses its programmed settings during power interruptions, the battery may need replacement. To replace, carefully open the casing (usually by gently prying plastic tabs) and swap the old battery with a new CR2032. Ensure correct polarity.
9. Warranty and Support
For warranty information or technical support, please refer to the product packaging or contact Baomain customer service through their official channels. Keep your purchase receipt for warranty claims.