
Introduction
This manual provides detailed instructions for the proper application and care of the Eduard EDUD48026 1:48 Bf 109F Stencils Waterslide Decal Sheet. These decals are designed to enhance the realism of your 1:48 scale Messerschmitt Bf 109F model aircraft. Following these guidelines will help ensure a successful and durable finish.
Setup and Preparation
Required Tools and Materials:
- Sharp hobby knife or scissors
- Fine-tipped tweezers
- Small dish of clean, lukewarm water
- Soft, lint-free cloth or paper towel
- Decal setting solution (e.g., Micro Sol, Solvaset)
- Decal softener solution (e.g., Micro Set)
- Gloss clear coat (for surface preparation and sealing)
Model Surface Preparation:
- Ensure the model surface where decals will be applied is clean, dry, and free of dust or grease.
- Apply a thin, even coat of gloss clear varnish to the areas where decals will be placed. This creates a smooth surface, preventing 'silvering' (air trapped under the decal). Allow the clear coat to dry completely according to the manufacturer's instructions.
Operating (Decal Application)
Refer to the image below for a visual representation of the decal sheet and its various markings.
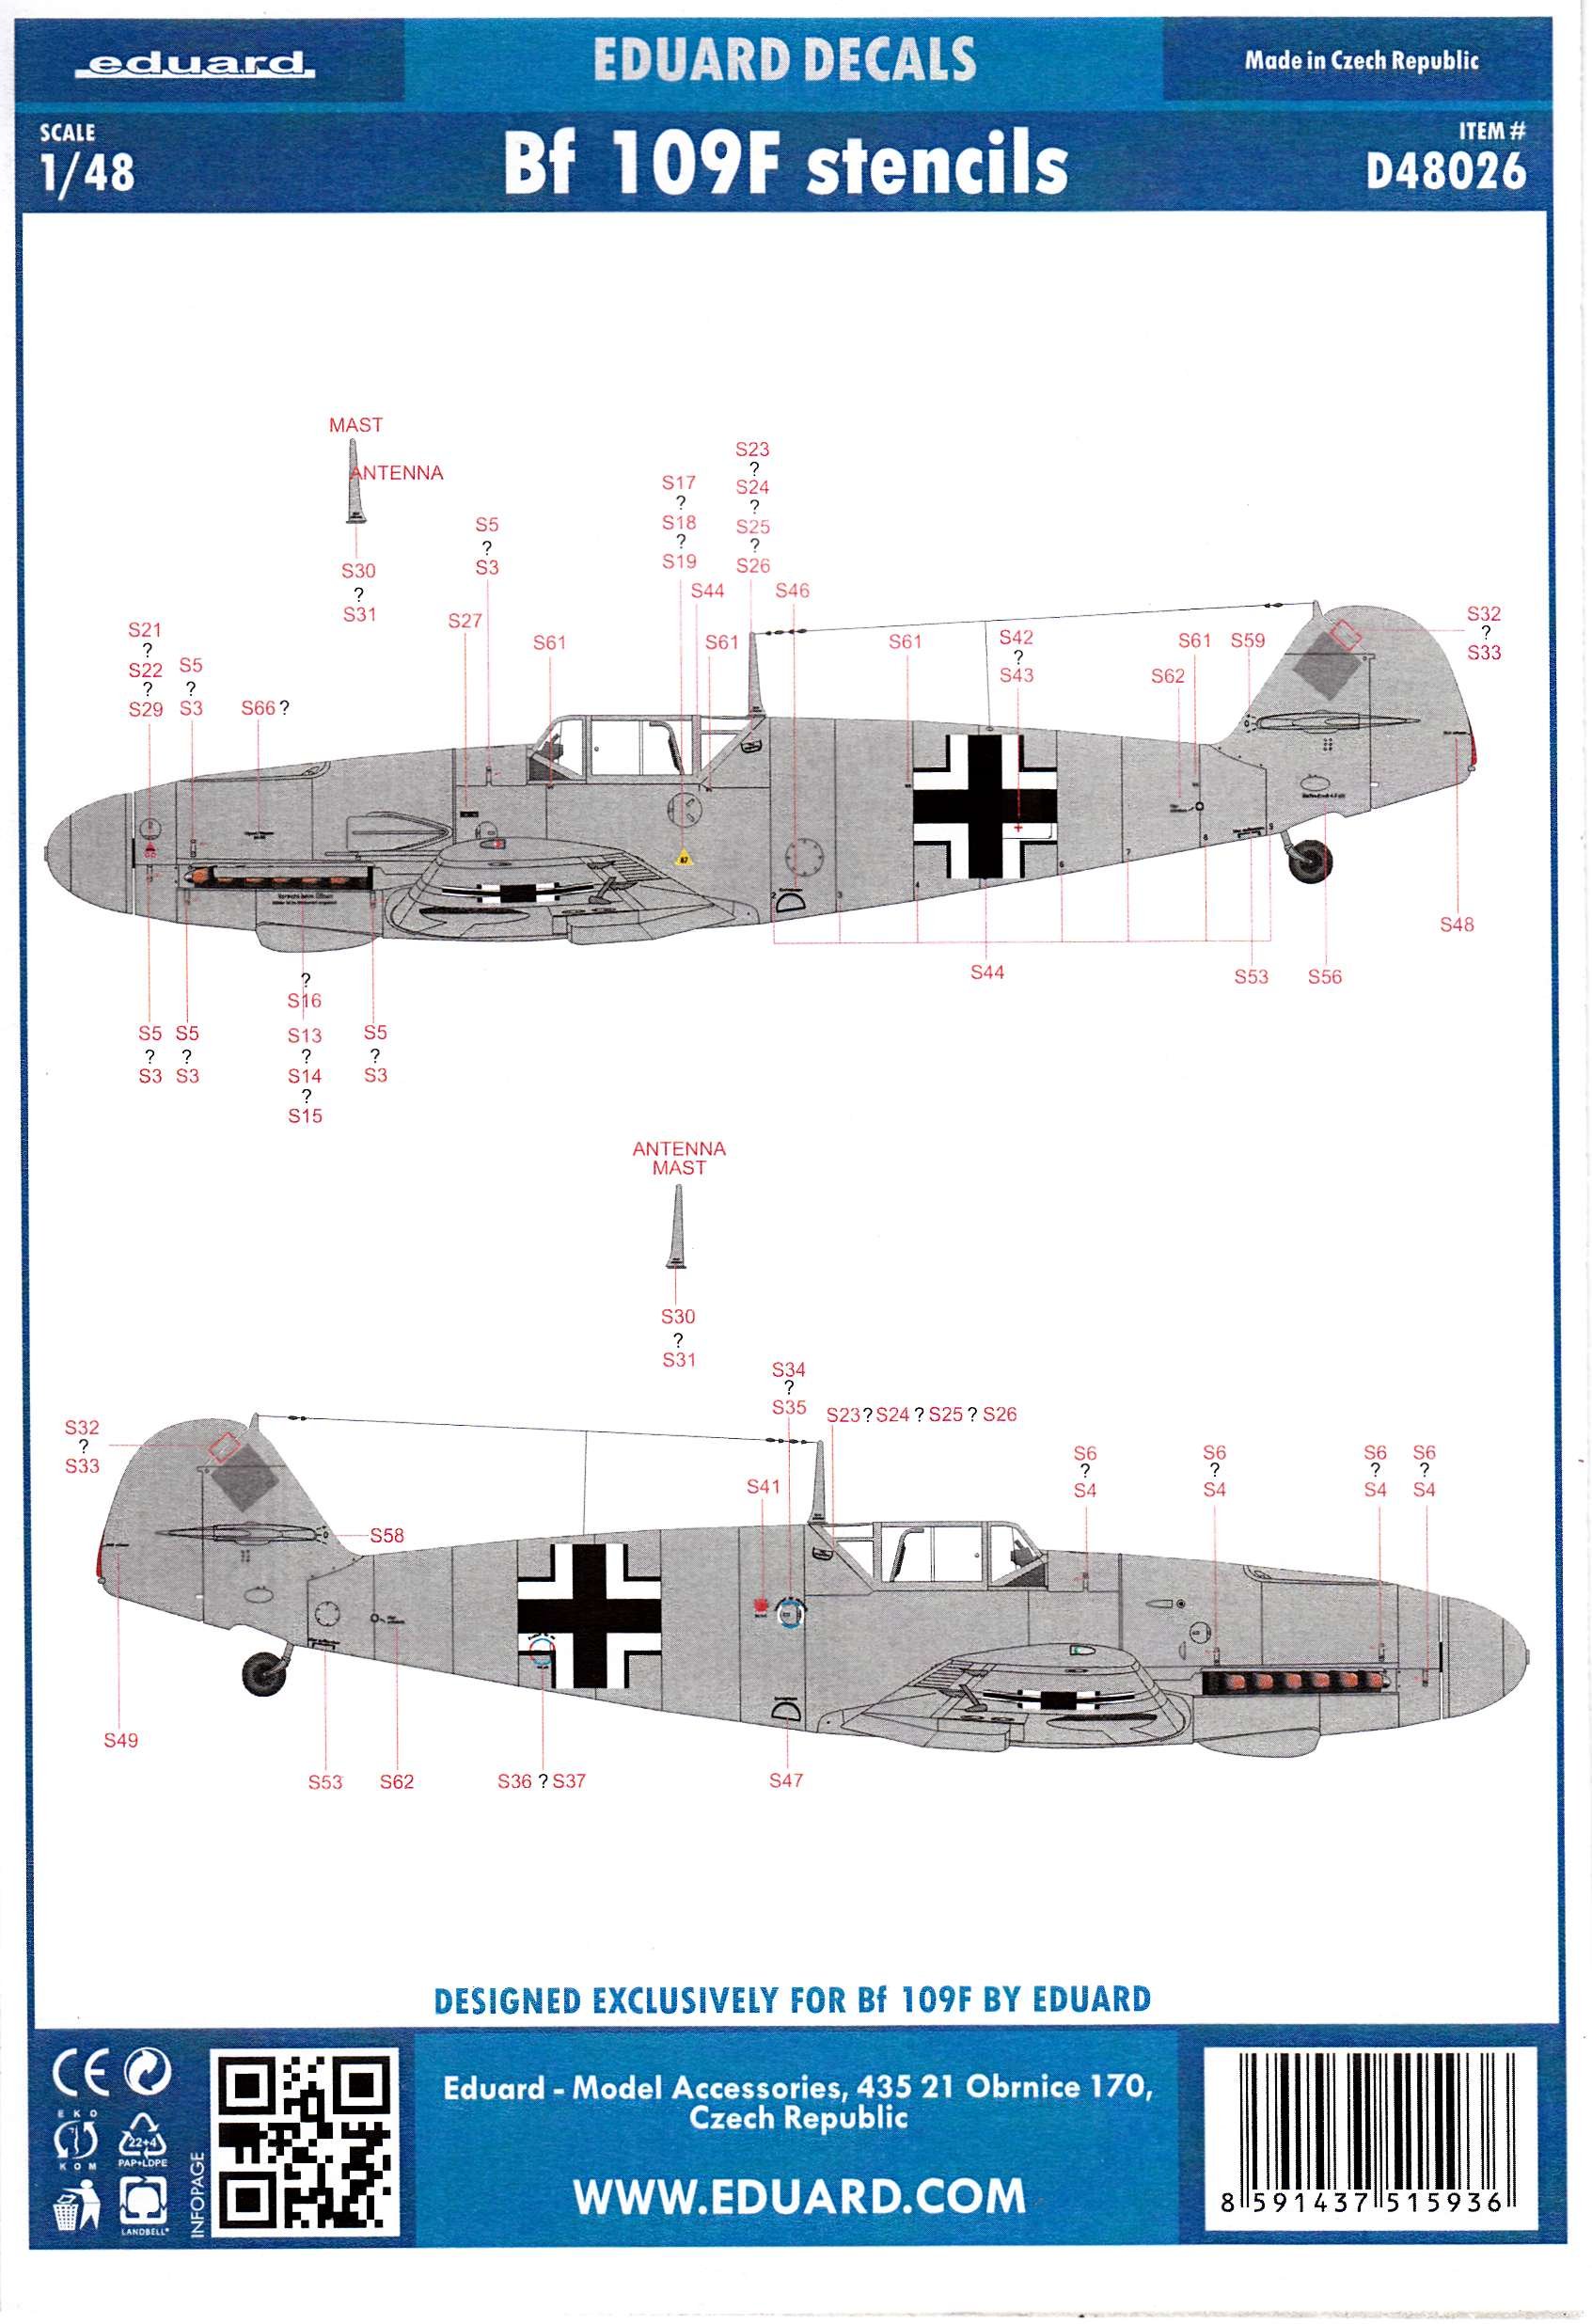
This image displays the complete Eduard EDUD48026 1:48 Bf 109F stencils waterslide decal sheet. It features a variety of markings, including numerical sequences (S1-S10, S44), dashed lines (S1-S8), rectangular outlines (S5, S6, S32, S33), circular and semi-circular markings (S23-S26, S34-S38, S41-S43, S46, S47), and German text warnings such as 'Achtung! Kraftstoffbehälter!' (Attention! Fuel Tank!), 'Keine Bombe!' (No Bomb!), and instructions regarding reporting to police or airfields. The sheet also includes smaller symbols and text (S11-S22, S27-S31, S45, S48-S51, S53, S55, S56, S58-S66). The bottom of the sheet indicates '8260-OBT3 Bf 109F stencils Made in Czech Republic © 2016 eduard'.
- Cut Decal: Carefully cut out the desired decal from the sheet using a sharp hobby knife or scissors. Cut as close to the edge of the decal image as possible to minimize clear film.
- Soak Decal: Dip the cut decal into the lukewarm water for approximately 10-20 seconds. The exact time may vary; watch for the decal to begin sliding freely on its backing paper. Do not over-soak.
- Apply Softener (Optional): For complex surfaces or to aid adhesion, apply a small amount of decal softener solution (e.g., Micro Set) to the gloss-coated area on the model where the decal will be placed.
- Position Decal: Gently slide the decal off its backing paper onto the prepared model surface using tweezers. Position it accurately.
- Remove Excess Water: Once positioned, carefully blot away any excess water from around the decal using a soft, lint-free cloth or the edge of a paper towel. Avoid disturbing the decal.
- Apply Setting Solution: For decals that need to conform to panel lines, rivets, or curved surfaces, apply a small drop of decal setting solution (e.g., Micro Sol) directly onto the decal. The solution will soften the decal, allowing it to settle into surface details. Do not touch the decal while the setting solution is working. Multiple applications may be necessary for stubborn areas.
- Drying: Allow the decals to dry completely, typically for several hours or overnight, before proceeding.
- Seal Decals: Once dry, apply a final clear coat (gloss, satin, or matte, depending on desired finish) over the decals and the entire model. This protects the decals and blends them into the model's surface, eliminating any visible decal film edges.
Maintenance
Care for Applied Decals:
- Avoid touching applied decals unnecessarily, especially before they are fully cured and sealed with a clear coat.
- Clean the model gently with a soft brush or cloth. Avoid harsh chemicals or abrasive cleaners that could damage the decals or clear coat.
- Store the finished model in a dust-free environment away from direct sunlight to prevent fading and degradation of the decals.
Storage of Unused Decals:
- Store the decal sheet flat in its original packaging or a protective sleeve.
- Keep decals in a cool, dry place, away from direct sunlight and extreme temperatures, to preserve their adhesive properties and prevent yellowing.
Troubleshooting
| Issue | Possible Cause | Solution |
|---|---|---|
| Silvering (air trapped under decal, appearing as a silvery sheen) | Rough or matte surface; insufficient clear coat; not enough setting solution. | Ensure a smooth, glossy surface before application. Apply more decal setting solution and gently prick the decal with a sharp needle to release trapped air, then reapply solution. |
| Decal Tearing | Decal not fully released from backing paper; excessive force during positioning; decal too thin. | Ensure decal slides freely before attempting to move it. Use fine-tipped tweezers and gentle movements. |
| Misalignment | Decal dried too quickly; improper initial placement. | Work quickly to position the decal while it is still wet. A small drop of water or softener can sometimes allow minor repositioning if done immediately. |
| Bubbles or Wrinkles | Trapped air or water; decal not conforming to surface. | Gently roll a cotton swab over the decal to push out bubbles and excess water. Apply setting solution to help conform to details. |
Specifications
- Model Number: EDUD48026
- Scale: 1:48
- Product Type: Waterslide Decal Sheet
- Aircraft Compatibility: Messerschmitt Bf 109F
- Product Dimensions: 5.91 x 3.94 x 0.04 inches (15 x 10 x 0.1 cm)
- Item Weight: 0.64 ounces (18.14 grams)
- Manufacturer: Eduard
- Recommended Age: 14 years and up
Warranty and Support
For specific warranty information regarding this product, please refer to the terms provided by your retailer or contact Eduard directly. For technical support or inquiries about the decal sheet, please reach out to the manufacturer's customer service department.
Manufacturer Contact: Please visit the official Eduard website for contact details and support resources.
