1. Introduction
Thank you for choosing the kwmobile Wood LED Digital Alarm Clock. This manual provides detailed instructions for the setup, operation, and maintenance of your new alarm clock. Please read this manual carefully before use to ensure proper functionality and to maximize your product experience.
2. Safety Information
- Keep the device away from water and high humidity.
- Avoid exposing the device to direct sunlight or extreme temperatures.
- Do not attempt to disassemble or repair the device yourself. Contact qualified personnel for service.
- Use only the provided USB cable for power.
- If using batteries, ensure they are inserted with correct polarity and replace them when depleted to prevent leakage.
3. Package Contents
Please check the package for the following items:
- 1 x kwmobile Wood LED Digital Alarm Clock (Model 38879)
- 1 x USB Power Cable (AC adapter not included)
- 1 x User Manual (English/German)

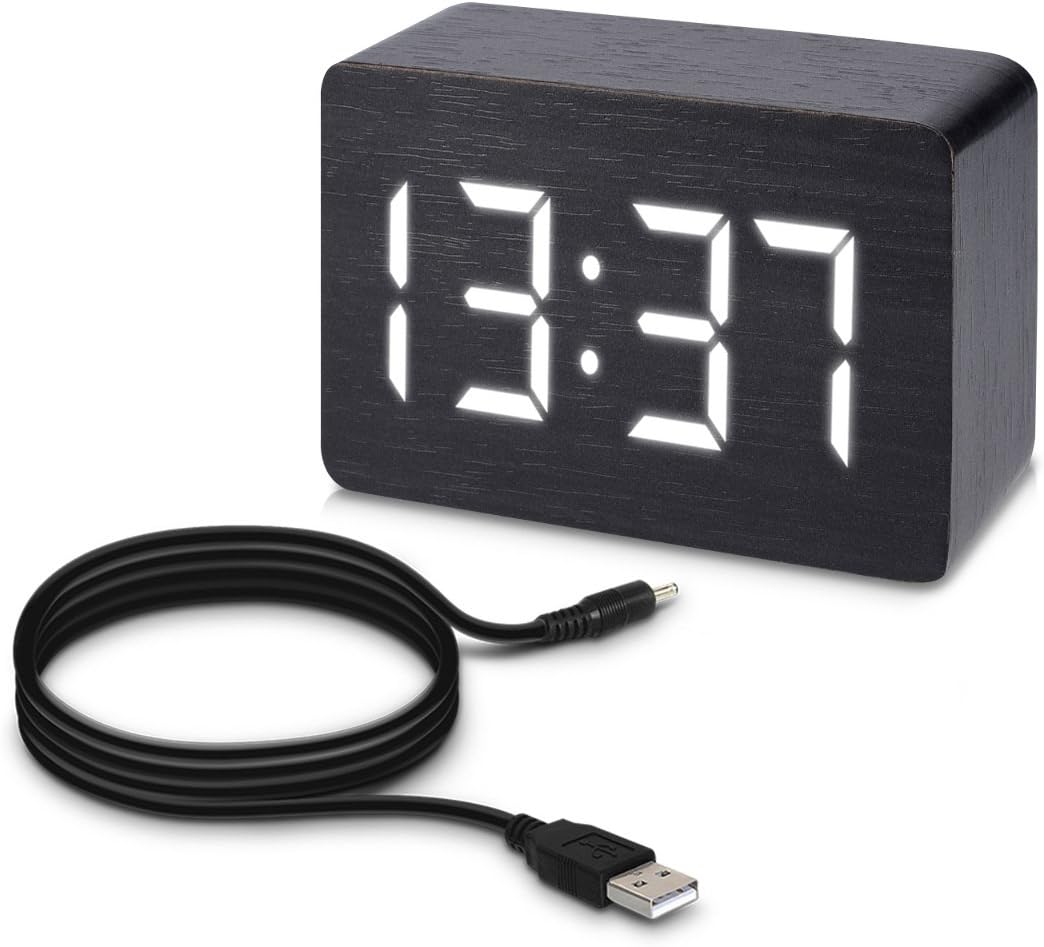
The image displays the kwmobile Wood LED Digital Alarm Clock, featuring a black wood-grain finish and a bright white LED display showing '13:37'. A black USB power cable is coiled next to the clock, indicating its power source.
4. Product Overview
Familiarize yourself with the main components of your alarm clock:
Front Display:
- LED Display: Shows time, date, and temperature.
Rear Panel:

This image provides a rear view of the kwmobile Digital Alarm Clock. Clearly visible are the 'SET', 'UP', and 'DOWN' control buttons, the DC 5V power input port, and the battery compartment cover. Product identification and certification marks are also present.
- SET Button: Used to enter setting modes (time, date, alarm) and confirm selections.
- UP Button: Used to increase values or navigate menu options.
- DOWN Button: Used to decrease values or navigate menu options.
- DC 5V Input: For connecting the USB power cable.
- Battery Compartment: Holds backup batteries (not included) for power during outages or for portable use.
5. Setup
5.1 Powering the Device
The alarm clock can be powered in two ways:
- USB Power (Recommended): Connect the provided USB cable to the DC 5V input port on the back of the clock and plug the other end into a USB power adapter (not included) or a powered USB port. This provides continuous power.
- Battery Power: For temporary use or backup, insert 3 AAA batteries (not included) into the battery compartment on the back. Note that battery operation is for a limited duration and the clock will enter energy-saving mode more frequently to conserve power.
5.2 Initial Power On
Once powered, the LED display will light up, typically showing the default time or cycling through display modes. You can now proceed to set the time and other functions.
6. Operating Instructions
6.1 Setting Time and Date
- Press and hold the SET button for 3 seconds to enter time setting mode. The year will flash.
- Use the UP and DOWN buttons to adjust the year. Press SET to confirm.
- Repeat this process for Month, Day, 12/24-hour format, Hour, and Minute.
- After setting minutes, press SET to exit time setting mode.
6.2 Setting Alarms (A1, A2, A3)
The clock supports up to three independent alarms.
- Press the SET button repeatedly until 'A1' appears on the display.
- Press and hold the SET button for 3 seconds. The alarm hour will flash.
- Use the UP and DOWN buttons to adjust the alarm hour. Press SET to confirm.
- Repeat for alarm minute.
- After setting minutes, the display will show 'ON:A1' or 'OFF:A1'. Use UP/DOWN to toggle the alarm ON or OFF. Press SET to confirm.
- Repeat steps for A2 and A3 if desired.
6.3 Temperature Display
The clock automatically displays the ambient temperature. You can switch between Celsius (°C) and Fahrenheit (°F) by pressing the DOWN button when the temperature is displayed.
6.4 Display Modes
Press the UP button to cycle through different display modes:
- dP-1: Time, Date, and Temperature display alternately.
- dP-2: Time display only.
6.5 Sound/Touch Activation (Energy Saving Mode)
To conserve power, especially when running on batteries, the display can be set to turn off automatically and reactivate with sound or touch.
- When the display is on, press the DOWN button until 'oN:Sd' (Sound On) or '--:Sd' (Sound Off) appears.
- Use the UP/DOWN buttons to toggle between 'oN:Sd' (display activates with sound or touch) and '--:Sd' (display remains continuously on).

A hand is shown gently touching the top surface of the kwmobile Digital Alarm Clock, demonstrating the touch activation feature. The clock's white LED display is illuminated, showing '13:37'.
This image illustrates the sound activation feature of the kwmobile Digital Alarm Clock. Two hands are shown clapping in front of the clock, which has its white LED display illuminated, showing '13:37'.
7. Maintenance
7.1 Cleaning
To clean the alarm clock, gently wipe the surface with a soft, dry cloth. Do not use abrasive cleaners, solvents, or spray directly onto the device.
7.2 Battery Replacement
If using batteries, replace them when the display dims or the clock functions become erratic. Ensure to use new batteries of the correct type (AAA) and dispose of old batteries responsibly.
8. Troubleshooting
| Problem | Possible Cause | Solution |
|---|---|---|
| Display is blank or dim. | No power, low batteries, or in energy-saving mode. | Check USB connection. Replace batteries. Clap hands or touch the clock to reactivate display if in energy-saving mode. |
| Clock not keeping accurate time. | Initial setup error or power interruption. | Re-set the time following the instructions in Section 6.1. Ensure stable power supply. |
| Alarm does not sound. | Alarm is not activated or set incorrectly. | Verify alarm settings (ON/OFF) and ensure the correct time is set for the alarm. |
| Display reacts to minor sounds. | Sound activation sensitivity. | This is normal behavior for the sound activation feature. If continuous display is preferred, disable sound activation (Section 6.5). |
9. Specifications
| Feature | Detail |
|---|---|
| Brand | kwmobile |
| Model Number | 38879 |
| Dimensions (L x W x H) | 10 x 7 x 4.2 cm |
| Weight | 160 g |
| Material | Synthetic materials (wood look) |
| Display Type | Digital LED |
| Power Source | USB (DC 5V) or 3x AAA Batteries (not included) |
| Special Features | Time, Date, Temperature display, 3 Alarms, Sound/Touch Activation, Energy Saving Mode, 12/24-hour format |
| Indoor/Outdoor Use | Indoor |
10. Warranty & Support
kwmobile products are covered by a standard manufacturer's warranty. For specific warranty details, please refer to the documentation provided with your purchase or visit the official kwmobile website. If you encounter any issues or require further assistance, please contact kwmobile customer support through their official channels or the retailer from whom you purchased the product.
For more information, visit: www.kwmobile.com
