
1. Introduction
Thank you for choosing the Hosim LED Message Writing Board. This illuminated, erasable board is designed for displaying dynamic messages with a neon effect. It is suitable for various environments, including restaurants, cafes, retail stores, and personal use. This manual provides detailed instructions for setup, operation, and maintenance to ensure optimal performance and longevity of your product.
2. Package Contents
Please verify that all items listed below are included in your package. If any items are missing or damaged, please contact customer support.
- Hosim LED Message Writing Board (24" x 16")
- 8 Colors Fluorescent Markers
- Remote Control
- USB Controller
- AC Power Adapter (110-220V)
- Battery Box (for 4x AAA batteries, batteries not included)
- Cleaning Cloth
- Hanging Chain

Figure 2.1: The Hosim LED Message Writing Board shown with all its included accessories, such as markers, remote control, power adapters, and cleaning cloth.

Figure 2.2: A visual representation of the components included in the Hosim LED Message Writing Board package, including the board, markers, remote, and power options.
3. Product Features
The Hosim LED Message Writing Board offers a range of features designed for versatility and ease of use:
- Illuminated Display: Features 7 lighting colors and 48 flashing modes for dynamic message presentation.
- Durable Construction: Anti-scratch and non-breakable design with tempered glass and double-layer aluminum frame.
- Easy to Use: Simple to write on, draw, and erase, providing a neon light effect for your messages.
- Multiple Power Options: Can be powered via AC adapter (110-220V) or 4x AAA batteries (not included) for portability.
- Remote Control: Adjust colors, flashing modes (Flash/Strobe/Fade/Smooth), and brightness levels from up to 10 meters away.
- Flexible Mounting: Supports both horizontal and vertical hanging orientations.
- Creative Potential: Large writing area for unlimited creative messages and designs.

Figure 3.1: Close-up details showcasing the anti-bump design, suspension chain, multiple light colors, and easy-to-erase surface of the board.
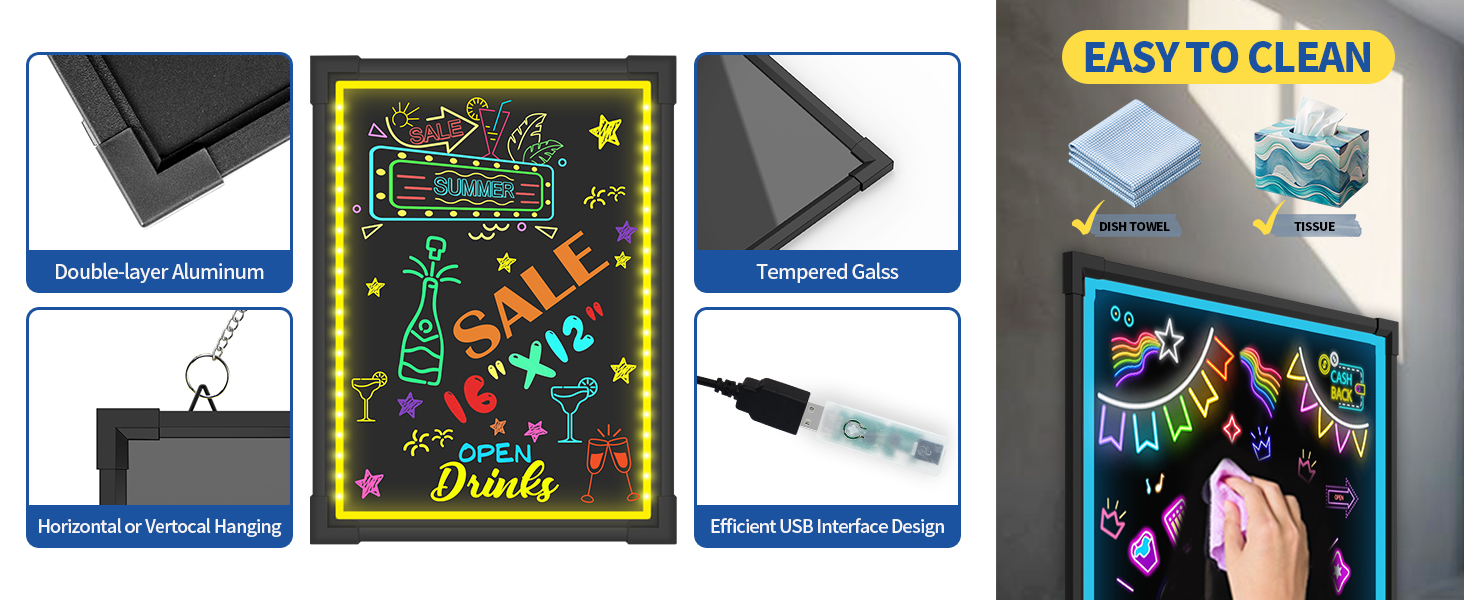
Figure 3.2: This image illustrates the double-layer aluminum frame, tempered glass surface, options for horizontal or vertical hanging, and the efficient USB interface design.
4. Setup Instructions
4.1. Mounting the Board
The LED writing board can be hung either horizontally or vertically. Use the provided hanging chain to secure the board in your desired location. Ensure the mounting surface is sturdy enough to support the board's weight.
4.2. Powering the Board
The board offers two power supply options:
- AC Adapter: Connect the provided AC power adapter to the USB controller, then plug the USB controller into the board's USB port. Plug the AC adapter into a standard wall outlet (110-220V).
- Battery Operated: Insert 4x AAA batteries (not included) into the battery box. Connect the battery box to the USB controller, then plug the USB controller into the board's USB port. This option provides portability for outdoor or temporary use.

Figure 4.1: This image illustrates the three methods for powering the board: using an AC adapter, a battery pack (AAA batteries not included), and controlling functions via the remote.
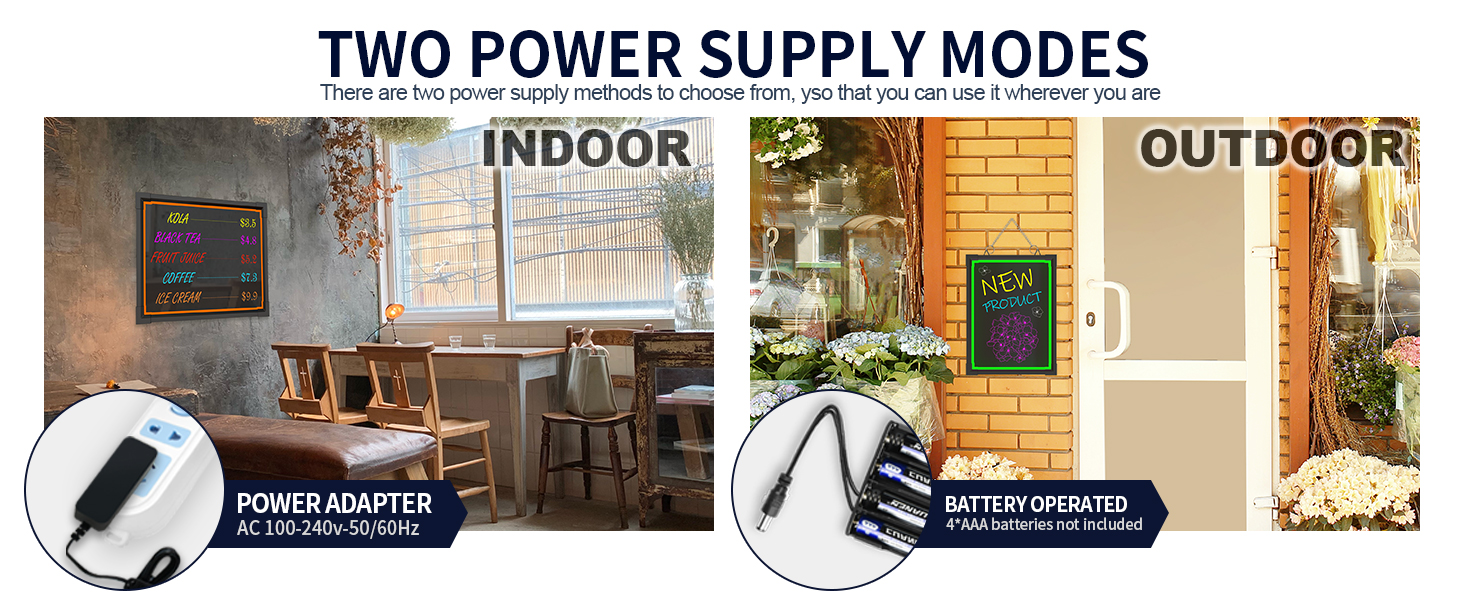
Figure 4.2: This image demonstrates the flexibility of the board's power options, showing it used indoors with an AC adapter and outdoors with battery power.
4.3. Preparing the Markers
Before first use, prepare the fluorescent markers:
- Shake the marker vigorously with the cap on.
- Press the nib down repeatedly on a scrap piece of paper until the ink flows and saturates the nib.
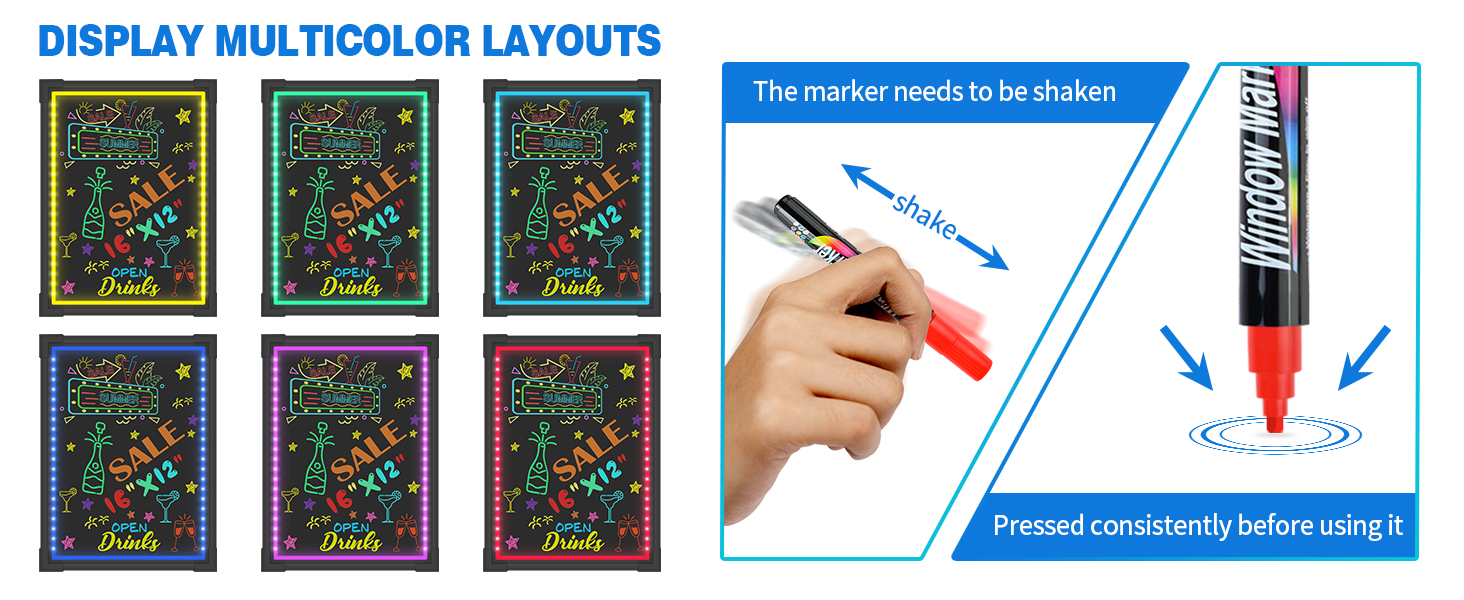
Figure 4.3: This image provides visual instructions on how to prepare the markers by shaking them and pressing the nib until the ink flows.
5. Operating Instructions
5.1. Writing and Drawing
Use the prepared fluorescent markers to write or draw directly onto the board's surface. The markers create vibrant, illuminated text and graphics when the board is lit.
5.2. Using the Remote Control
The remote control allows you to customize the board's lighting effects. Point the remote directly at the USB controller for optimal functionality.
- Power On/Off: Use the Light On and Light Off buttons to turn the illumination on or off.
- Color Selection: Choose from 12 distinct colors using the dedicated color buttons.
- Flashing Modes: Select from 4 flashing modes: FLASH, STROBE, FADE, and SMOOTH.
- Brightness Adjustment: Use the Increase Brightness and Decrease Brightness buttons to set the desired illumination level.
- Four Color Lights On/Blinking Switch: This button cycles through specific color combinations or blinking patterns.
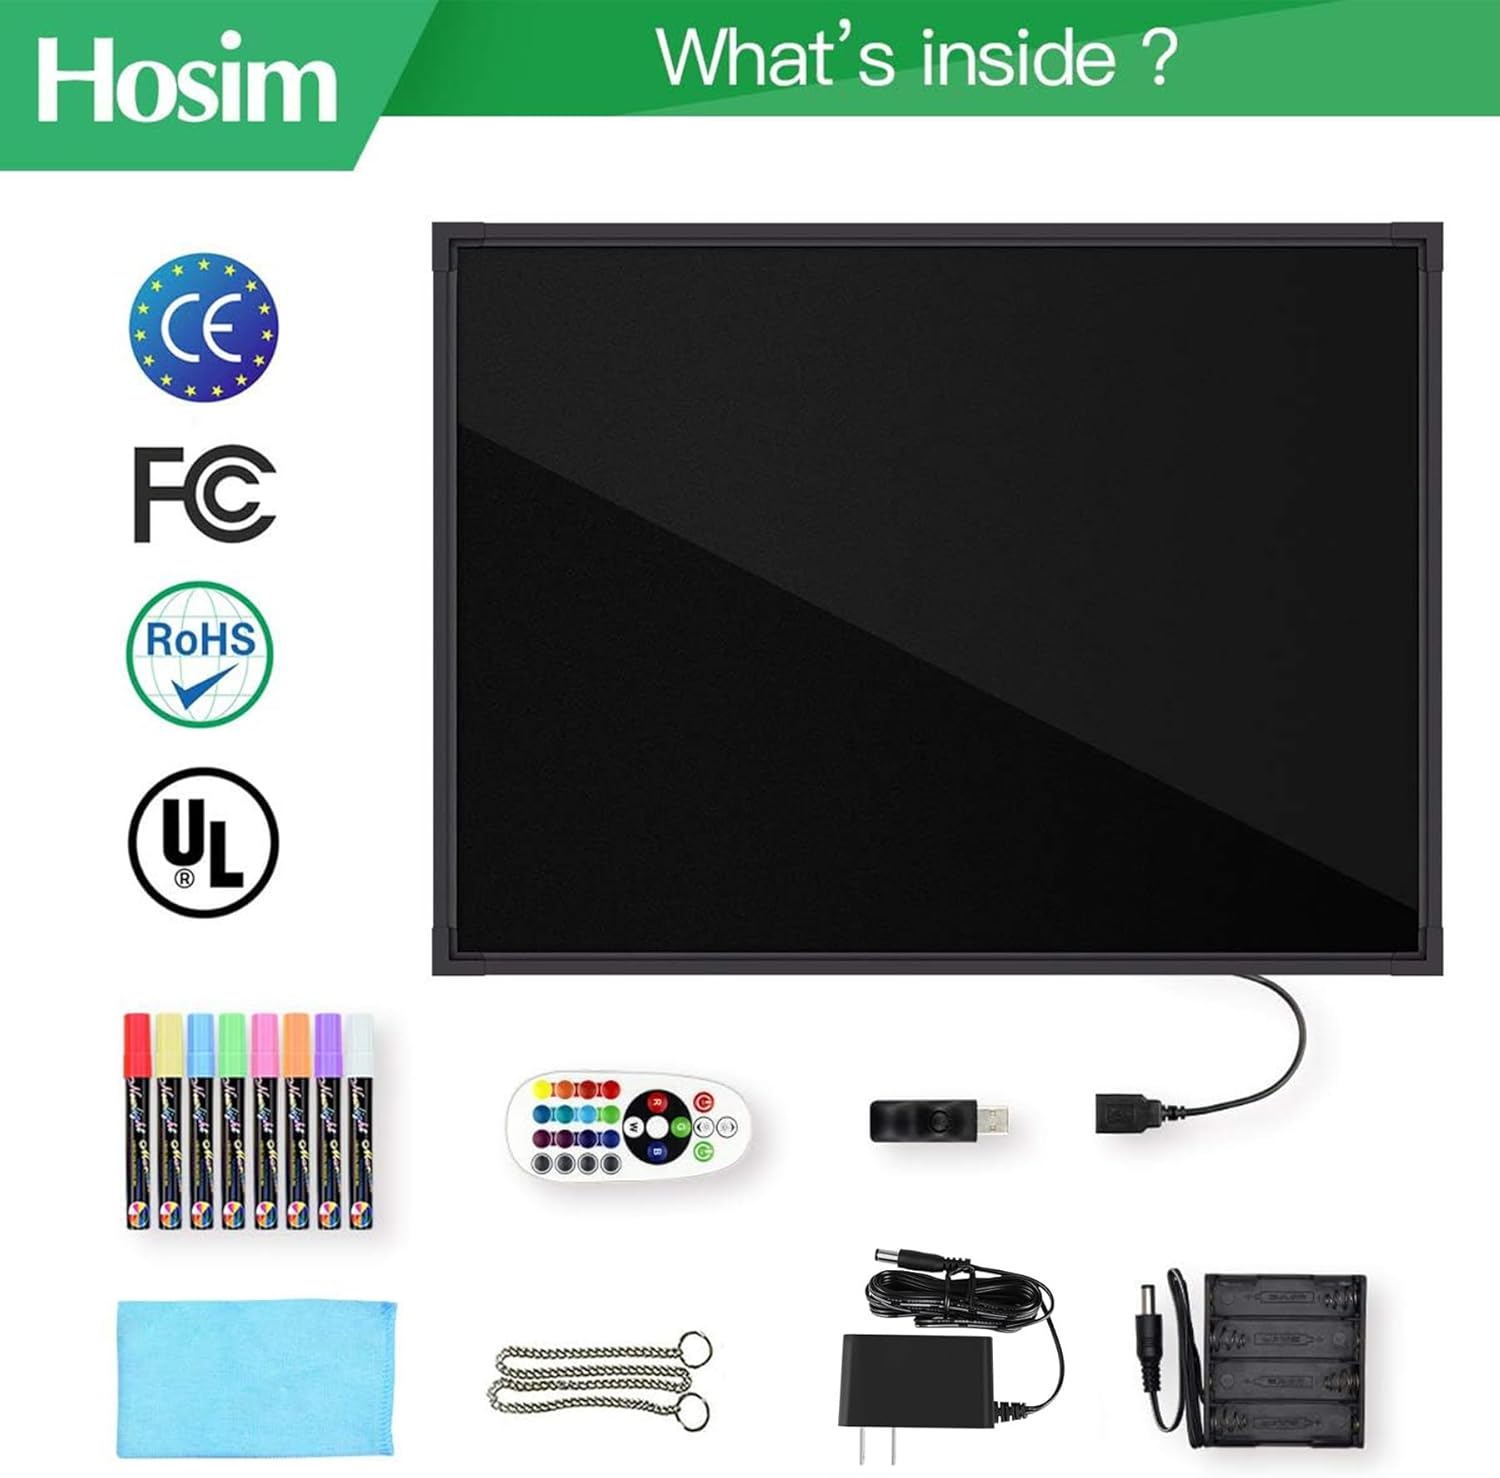
Figure 5.1: A detailed diagram illustrating the various buttons and their functions on the remote control, including power, color selection, flashing modes, and brightness adjustment.

Figure 5.2: This diagram shows the remote control's maximum effective range of 10 meters (393 inches) and how it connects to the USB controller, which then powers the board via AC adapter or battery.

Figure 5.3: Various examples of how messages and designs appear with different multicolor layouts and lighting effects on the LED writing board.

Figure 5.4: An image highlighting the board's capability to display 16 LED light colors, 4 changing modes, and 5 brightness levels, offering extensive customization for messages.
6. Maintenance
6.1. Cleaning the Board
To clean the writing surface:
- Use a damp cloth or paper towel to wipe off the marker ink.
- Follow with a dry cloth to remove any streaks or residue.
Note: While the board is designed for easy cleaning, some users find that a thorough cleaning may require a bit more effort to prevent smearing, especially with vibrant neon markers. Avoid abrasive cleaners that could damage the surface.
Figure 6.1: This image demonstrates the ease of cleaning the board using a dish towel or tissue, ensuring a clear surface for new messages.
6.2. Marker Care
Always recap markers tightly after use to prevent them from drying out. Store markers horizontally to ensure even ink distribution.
7. Troubleshooting
| Problem | Possible Cause | Solution |
|---|---|---|
| Board does not light up. | No power, loose connection, or dead batteries. | Ensure AC adapter is securely plugged in or replace AAA batteries in the battery box. Check all USB connections. |
| Remote control not working. | Remote batteries are dead, remote not pointed at USB controller, or obstruction. | Replace remote batteries. Ensure direct line of sight to the USB controller. Remove any obstructions. |
| Markers appear dry or faint. | Markers not primed or have dried out. | Shake marker and press nib repeatedly until ink flows. If still dry, markers may need replacement. |
| Board surface is streaky after cleaning. | Residue from markers or insufficient drying. | Wipe thoroughly with a damp cloth, then immediately follow with a clean, dry cloth. For stubborn residue, a mild glass cleaner can be used sparingly. |
8. Specifications
| Feature | Detail |
|---|---|
| Brand | Hosim |
| Model Number | FBA_DX4060-B |
| Product Dimensions | 24"W x 16"H (15.75 x 1.97 x 23.62 inches) |
| Item Weight | 6.54 pounds |
| Material | Acrylic, Aluminum |
| Mounting Type | Wall Mount (Horizontal or Vertical) |
| Power Source | AC Adapter (110-220V) or 4x AAA Batteries (not included) |
| LED Colors | 7 base colors, 16 total color choices via remote |
| Flashing Modes | 4 (Flash, Strobe, Fade, Smooth) |
| Remote Control Range | Up to 10 meters (393 inches) |
9. Warranty and Support
For warranty information or technical support, please refer to the product packaging or contact Hosim customer service directly. Contact details are typically available on the manufacturer's website or through your point of purchase.