
Introduction and Safety Information
Thank you for choosing the TOOLPORT Sunset Deluxe Aluminum Gazebo. This manual provides essential information for the safe assembly, operation, and maintenance of your gazebo. Please read all instructions carefully before beginning assembly and retain this manual for future reference.
General Safety Guidelines
- Always assemble the gazebo with at least two people.
- Ensure the assembly area is clear of obstructions and hazards.
- Wear appropriate safety gear, such as gloves, during assembly.
- Securely anchor the gazebo to the ground using the provided metal pegs or other suitable anchoring methods to prevent wind damage.
- Do not use the gazebo during extreme weather conditions, such as heavy winds, snow, or thunderstorms. Disassemble or secure it appropriately.
- Regularly inspect all components for wear, damage, or loose connections.
- Keep children and pets away from the assembly area.
Package Contents
Before starting assembly, verify that all parts listed below are present and undamaged. If any parts are missing or damaged, please contact TOOLPORT customer service.
- Aluminum profiles for frame structure
- Polycarbonate roof panels (approx. 8 mm thick)
- 4 side walls with fixing rings
- 8 metal pegs for ground fixing
- Assembly tools
- Assembly instructions (this manual)

Image: Illustration of various components included in the gazebo package.
Product Specifications
| Model Number | 300049 (Sunset) |
| Dimensions (L x W x H) | 300 x 400 x 270 cm (9.84 x 13.12 x 8.86 ft) |
| Passage Height | 190 cm (6.23 ft) |
| Weight | 91 kg (200.6 lbs) |
| Frame Material | Aluminum |
| Roof Material | Polycarbonate (approx. 8 mm) |
| Water Resistance | Waterproof |
| UV Protection | UV 50+ |
| Assembly Required | Yes (Approx. 3 hours with 2 people) |

Image: Detailed dimensions of the TOOLPORT Sunset Deluxe 3x4m Gazebo.
Assembly Instructions
Assembly typically requires two people and takes approximately 3 hours. Follow the steps carefully to ensure proper and safe installation.
Step 1: Prepare the Site
- Choose a flat, level surface for your gazebo.
- Clear the area of any debris, rocks, or sharp objects.
- Ensure sufficient space around the gazebo for assembly and future use.
Step 2: Assemble the Frame Structure
- Unpack all aluminum profiles and sort them according to the assembly diagram.
- Connect the horizontal beams to the vertical posts using the provided connectors and tools. Ensure all connections are secure.
- Gradually build the base frame, then attach the upper frame components.

Image: View of the aluminum frame structure from below, showing connections.
Step 3: Install the Polycarbonate Roof Panels
- Carefully place the polycarbonate panels onto the roof frame.
- Ensure the panels are correctly oriented and fit snugly into the designated grooves or channels.
- Secure the panels using the provided fasteners. Avoid overtightening to prevent damage to the panels.

Image: Close-up view of the corrugated polycarbonate roof panels.
Step 4: Attach Side Walls and Anchor the Gazebo
- Hang the four side walls onto the integrated curtain rails using the fixing rings.
- Ensure the zippers on the side walls align for easy closure.
- Position the gazebo in its final location.
- Use the provided metal pegs to securely anchor each leg of the gazebo to the ground. For additional stability, especially on hard surfaces, consider using concrete anchors (not included).

Image: Detail of the curtain rail system with rings for attaching side walls.
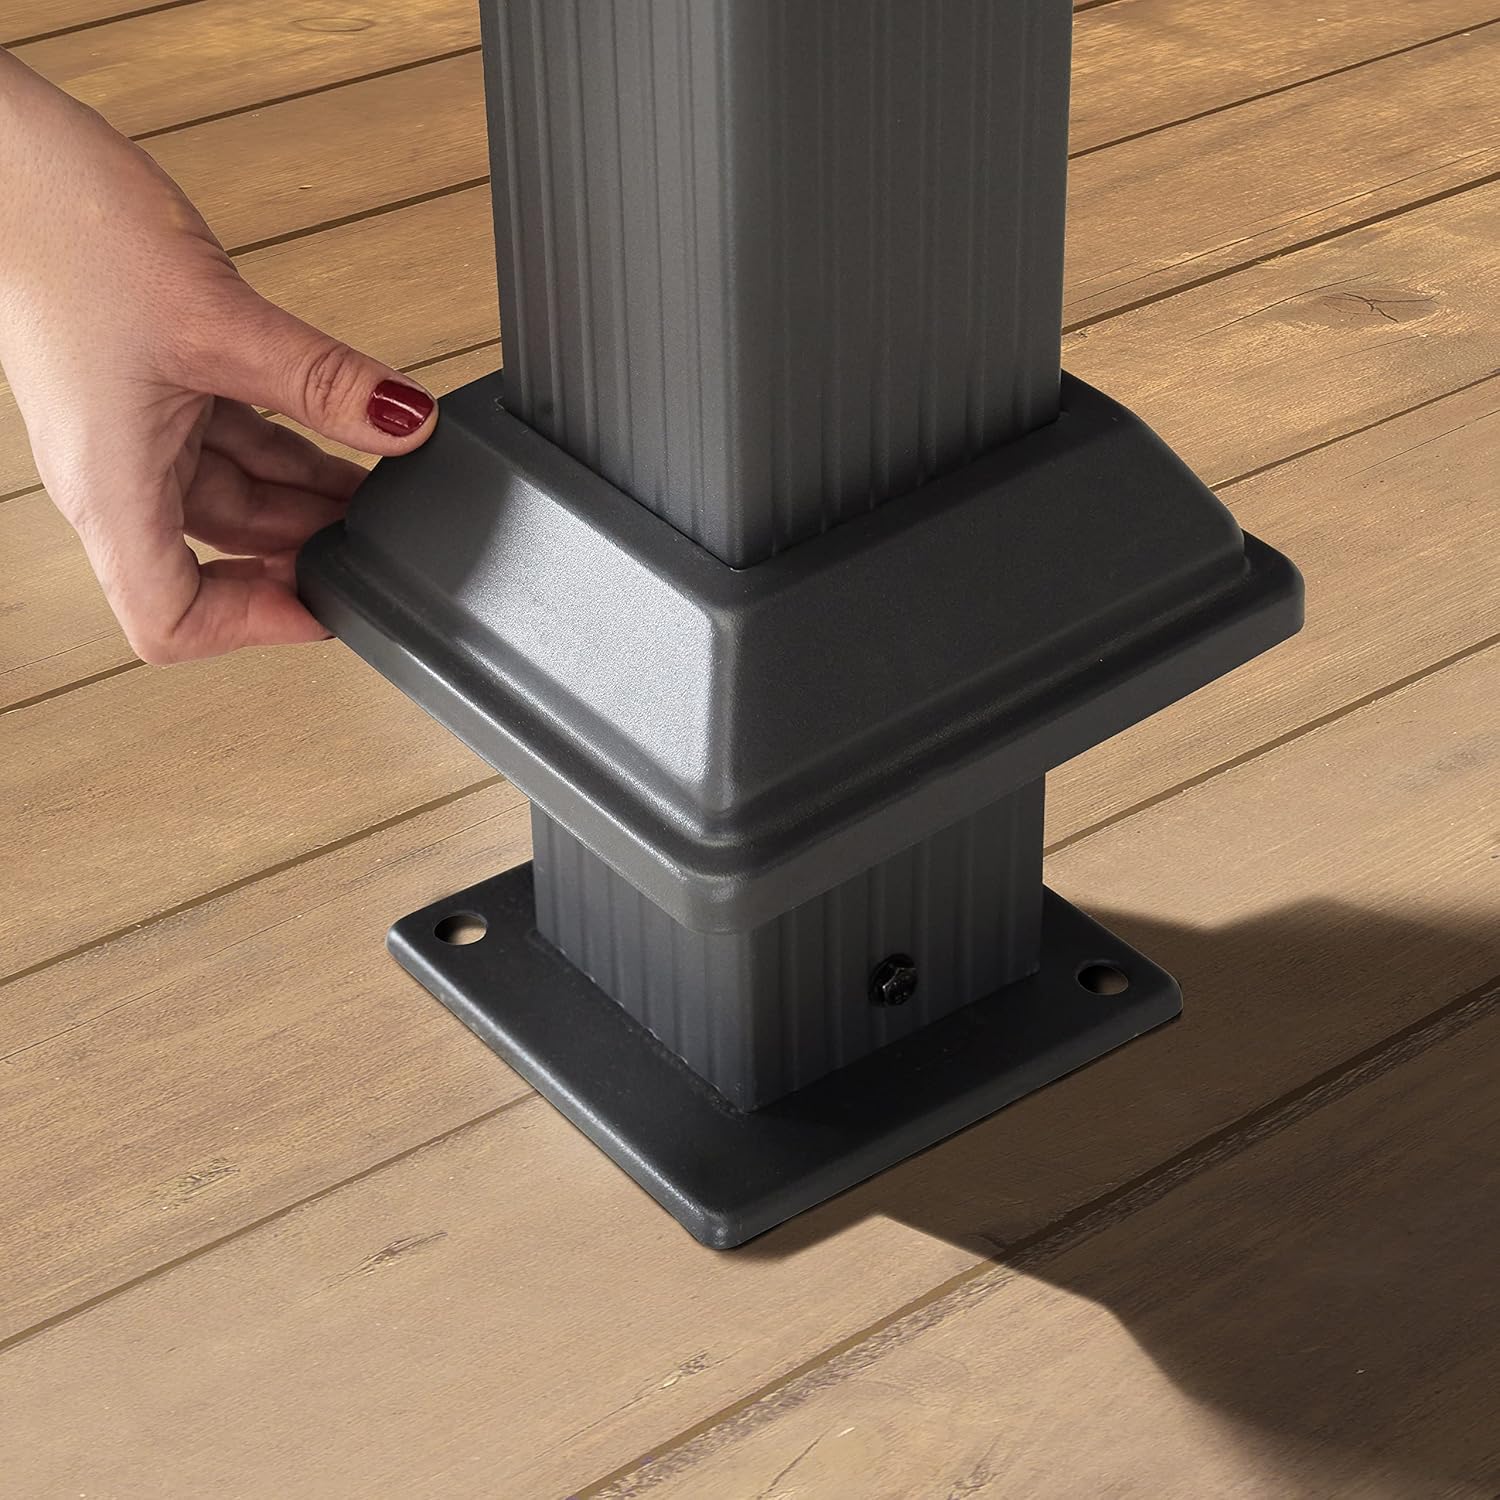
Image: Detail of the gazebo leg base plate, showing points for ground anchoring.
Usage Guidelines
The TOOLPORT Sunset Deluxe Gazebo is designed for outdoor use, providing shade and shelter. Follow these guidelines for optimal use:
- Weather Protection: The polycarbonate roof offers UV 50+ protection and is waterproof, providing shelter from sun and light rain.
- Side Walls: Use the included side walls for additional privacy or protection from wind and light rain. They can be zipped closed or tied back to the posts.
- Wind Conditions: In strong winds, it is recommended to remove the side walls to reduce wind resistance. Ensure the gazebo is always securely anchored.
- Snow Load: While the roof is robust, it is not designed for heavy snow loads. In areas with significant snowfall, it is advisable to clear snow from the roof regularly or disassemble the gazebo for the winter season.

Image: The gazebo set up with side curtains open, providing an outdoor living space.

Image: Demonstrating the zipper closure on the side curtains for privacy or weather protection.
Care and Maintenance
Proper care and maintenance will extend the life of your gazebo.
- Cleaning the Frame: Clean the aluminum frame with a soft cloth, mild soap, and water. Avoid abrasive cleaners or harsh chemicals that could damage the finish.
- Cleaning the Roof Panels: The polycarbonate panels can be cleaned with a soft cloth or sponge and mild soapy water. Rinse thoroughly with clean water. Do not use brushes or abrasive materials that could scratch the surface.
- Cleaning Side Walls: The fabric side walls can be spot cleaned with mild soap and water. For deeper cleaning, they may be hand washed or machine washed on a gentle cycle with cold water, then air-dried. Ensure they are completely dry before storing to prevent mildew.
- Seasonal Storage: For prolonged periods of non-use or during harsh winter conditions, it is recommended to disassemble the side walls and store them in a dry, protected area. Consider disassembling the entire gazebo if extreme weather is anticipated.
- Regular Inspection: Periodically check all bolts, screws, and connections to ensure they remain tight. Inspect the frame for any signs of corrosion or damage and the roof panels for cracks or leaks.
Troubleshooting
Here are solutions to common issues you might encounter:
| Problem | Possible Cause | Solution |
|---|---|---|
| Gazebo feels unstable or wobbly. | Loose connections; inadequate anchoring; uneven ground. | Tighten all bolts and screws. Ensure ground pegs are fully inserted. Relocate to a more level surface or use shims under legs. Consider additional anchoring methods. |
| Roof panels leak. | Panels not properly seated; damaged panels; sealant failure. | Check that all panels are correctly installed and secured. Inspect panels for cracks and replace if necessary. Apply a suitable waterproof sealant to seams if needed. |
| Side walls do not close smoothly. | Misaligned zippers; debris in zipper; fabric obstruction. | Ensure the gazebo frame is square. Clean zippers of any dirt or debris. Gently guide the zipper, ensuring fabric is not caught. |
Warranty and Support
TOOLPORT products are manufactured to high-quality standards. For specific warranty details, please refer to the documentation included with your purchase or visit the official TOOLPORT website. If you require assistance with assembly, missing parts, or have any questions regarding your gazebo, please contact TOOLPORT customer support directly.
Contact information can typically be found on the TOOLPORT brand store page or on your purchase receipt.


