
1. Introduction
This instruction manual provides essential information for the proper installation, use, and maintenance of the Georgia Pacific Drip Tray. This accessory is designed to be used with compatible Georgia Pacific EnMotion and Manual soap and hand sanitizer dispensers to prevent drips from reaching floors, thereby maintaining cleanliness and reducing slip hazards.
2. Product Overview
The Georgia Pacific Drip Tray is an authentic accessory designed to integrate seamlessly with specific Georgia Pacific soap and hand sanitizer dispensers. Its primary function is to catch excess liquid, protecting flooring and promoting a safer, cleaner environment.
Key Features:
- Authentic Georgia Pacific product.
- Designed to protect carpets and floors from soap and hand sanitizer drips.
- Sturdy construction ensures a snug fit to compatible dispensers.
Dimensions:
- Overall: Approximately 6 inches (Height) x 4.5 inches (Width) x 4 inches (Depth).
- Tray Surface: Approximately 4.5 inches (Length) x 4 inches (Width).
Compatibility:
This drip tray is compatible with the following Georgia Pacific EnMotion and Manual Soap dispensers:
- Model 52052
- Model 52053
- Model 52054
- Model 52087
- Model 53052
- Model 53053
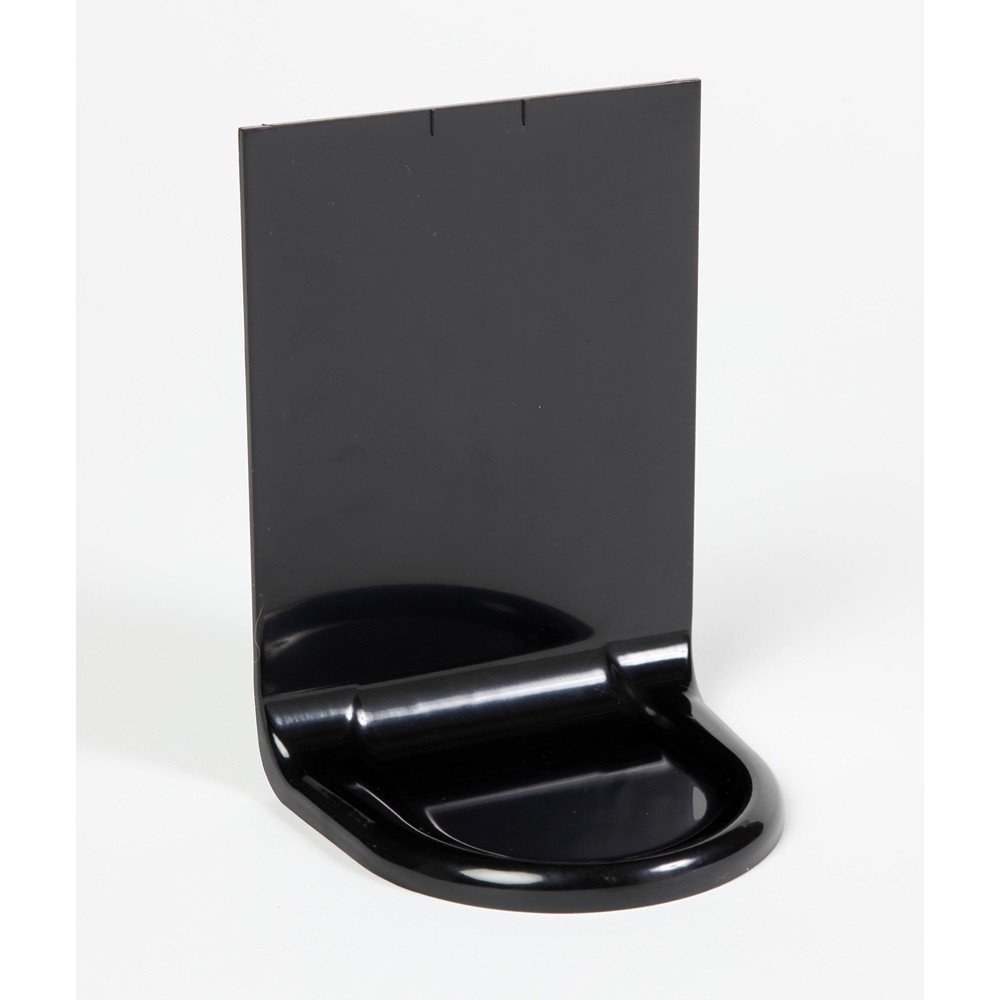
Figure 2.1: The Georgia Pacific Drip Tray, designed to catch drips from soap and hand sanitizer dispensers.
3. Setup and Installation
The Georgia Pacific Drip Tray is designed for straightforward installation. Ensure the dispenser is clean and dry before attaching the drip tray.
- Identify Mounting Area: Locate the designated attachment points or grooves on the underside of your compatible Georgia Pacific soap or hand sanitizer dispenser.
- Align Drip Tray: Position the drip tray directly beneath the dispenser, aligning its top edge or mounting tabs with the corresponding features on the dispenser.
- Secure in Place: Gently push the drip tray upwards until it clicks or slides securely into place. The tray should fit snugly against the dispenser, providing a stable platform to catch drips. No tools are typically required for installation.
- Verify Stability: Once installed, gently tug on the drip tray to ensure it is firmly attached and will not easily dislodge during use.
4. Operating Instructions
The drip tray operates passively by collecting any excess soap or hand sanitizer that may drip from the dispenser nozzle. No active operation is required from the user.
- Ensure the drip tray is correctly installed beneath the dispenser.
- Regularly inspect the tray for accumulated liquid.
- Empty and clean the tray as part of routine maintenance to prevent overflow and maintain hygiene.
5. Maintenance
Regular cleaning of the drip tray is essential to maintain hygiene and ensure its effectiveness.
- Removal: Carefully detach the drip tray from the dispenser. This usually involves a gentle pull or slide, reversing the installation steps.
- Empty Contents: Dispose of any collected liquid in an appropriate waste receptacle.
- Clean Tray: Wash the drip tray with warm, soapy water. For stubborn residue, a soft brush or cloth can be used. Avoid abrasive cleaners or scouring pads, which may scratch the surface.
- Rinse and Dry: Rinse the tray thoroughly with clean water to remove all soap residue. Dry completely with a clean cloth or allow to air dry before reattaching.
- Reinstallation: Reattach the clean and dry drip tray to the dispenser following the steps in the "Setup and Installation" section.
Frequency: The frequency of cleaning will depend on the usage volume of the dispenser. Inspect daily in high-traffic areas and clean as needed.
6. Troubleshooting
| Problem | Possible Cause | Solution |
|---|---|---|
| Drips are missing the tray or overflowing. |
|
|
| Drip tray feels loose or unstable. |
|
|
7. Specifications
| Attribute | Detail |
|---|---|
| Product Type | Drip Tray for Soap/Sanitizer Dispensers |
| Brand | Georgia Pacific |
| Color | Black |
| Product Dimensions (Overall) | Approximately 6 inches (Height) x 4.5 inches (Width) x 4 inches (Depth) |
| Tray Surface Dimensions | Approximately 4.5 inches (Length) x 4 inches (Width) |
| Weight | Approximately 1.6 ounces |
| Shape | Rectangular |
| Compatible Dispensers | Georgia Pacific EnMotion and Manual Soap dispensers (Models: 52052, 52053, 52054, 52087, 53052, 53053) |
8. Warranty and Support
Specific warranty information for this Georgia Pacific Drip Tray is typically provided at the point of purchase or can be obtained directly from Georgia Pacific. Please retain your proof of purchase for any warranty claims.
For technical support, product inquiries, or to report any issues, please contact Georgia Pacific customer service through their official website or the contact information provided with your original purchase documentation.