
1. Introduction
Thank you for purchasing the XK X252 2.4G 3D 6 Axis Gyro RC Quadcopter Drone. This manual provides essential information for the safe operation, setup, maintenance, and troubleshooting of your new drone. Please read this manual thoroughly before operating the aircraft to ensure proper function and to avoid damage or injury. Keep this manual for future reference.
Safety Warning: Always operate the drone in open areas, away from people, animals, and obstacles. Ensure all local regulations regarding drone operation are followed.
2. Product Overview
2.1 Package Contents
The XK X252 package typically includes the following components:
- XK X252 RC Quadcopter Drone
- Remote Controller
- 720P 140 Degree Camera (integrated or separate, depending on model variant)
- Propellers (main and spare set)
- Battery for Drone
- Battery Charger
- User Manual
- Tools (screwdriver, wrench, etc.)
2.2 Key Features
- 2.4G Remote Control: Provides stable and responsive control.
- 6-Axis Gyro: Ensures stable flight and easy control.
- 3D Flight Mode: Allows for advanced aerobatic maneuvers.
- 5.8G FPV (First Person View): Real-time video transmission to the remote controller's screen.
- 720P 140 Degree Camera: Captures high-definition video and photos with a wide field of view.
- High-Efficiency Brushless Motors: Provides powerful and durable performance.
- 6G Mode: Offers enhanced stability, suitable for beginners.
- "A Key to Shoot" Function: Simplifies photo and video capture.

Figure 2.2.1: Front view of the XK X252 RC Quadcopter Drone.

Figure 2.2.2: Dimensions of the XK X252 RC Quadcopter Drone (175mm x 175mm).

Figure 2.2.3: Various angles and views of the XK X252 RC Quadcopter Drone.
3. Setup
3.1 Charging the Drone Battery
- Connect the drone battery to the provided charger.
- Plug the charger into a suitable power outlet.
- The charging indicator light will show the charging status. Charge time is approximately 60-80 minutes.
- Once fully charged, disconnect the battery from the charger.
3.2 Installing Batteries in the Remote Controller
- Open the battery compartment on the back of the remote controller.
- Insert the required batteries (e.g., AA batteries, not included) according to the polarity markings.
- Close the battery compartment securely.
3.3 Attaching Propellers
- Identify the correct propellers (A and B) for each motor arm. Propellers are typically marked.
- Align the propeller with the motor shaft and press down firmly, or use the provided screws/caps to secure them.
- Ensure all propellers are securely attached and can rotate freely without obstruction.
3.4 Installing the Camera
- Locate the camera mounting slot on the underside of the drone.
- Slide the camera into the slot until it clicks into place.
- Connect the camera's power/data cable to the corresponding port on the drone.
3.5 Binding the Drone and Remote Controller
- Place the drone on a flat, level surface.
- Turn on the drone's power switch. The drone's indicator lights will flash.
- Turn on the remote controller.
- Push the throttle stick (left stick) all the way up, then all the way down. The drone's lights will become solid, indicating successful binding.

Figure 3.5.1: Overview of XK X252 specifications, including frequency and FPV details relevant for setup.
4. Operating Instructions
4.1 Pre-Flight Checklist
- Ensure drone and remote controller batteries are fully charged.
- Check that propellers are securely attached and undamaged.
- Verify the camera is properly installed and connected.
- Choose an open, clear area free from obstacles, people, and animals.
- Check weather conditions; avoid flying in strong winds or rain.
4.2 Basic Flight Controls
Familiarize yourself with the remote controller's layout and functions:
- Left Stick (Throttle/Yaw): Up/Down controls altitude; Left/Right controls rotation (yaw).
- Right Stick (Pitch/Roll): Up/Down controls forward/backward movement (pitch); Left/Right controls sideways movement (roll).
- Trim Buttons: Used to fine-tune the drone's stability if it drifts in any direction.
- One-Key Take-off/Landing: Press to automatically take off or land.
4.3 Take-off and Landing
- Take-off: After binding, press the One-Key Take-off button, or slowly push the left throttle stick up until the drone lifts off.
- Landing: Press the One-Key Landing button, or slowly pull the left throttle stick down until the drone lands gently.
4.4 Advanced Features
4.4.1 3D Flight Mode
The X252 supports 3D flight for aerobatic maneuvers. Consult the remote controller's specific button for activating 3D mode. Practice at a safe altitude.

Figure 4.4.1: The XK X252 features high-efficiency brushless motors for powerful 3D flight performance.
4.4.2 6G Mode
For beginners or stable flight, activate 6G mode. This mode uses the 6-axis gyro to provide enhanced stability and easier control.

Figure 4.4.2: The XK X252 in 6G mode, offering stable flight for beginners, and showcasing its no landing gear design.
4.4.3 FPV and Camera Operation
The 5.8G FPV system transmits real-time video to the remote controller's screen. To capture photos or videos, use the dedicated "A Key to Shoot" button on the remote controller. Ensure a compatible SD card (Media Type: SD) is inserted into the camera if required for recording.
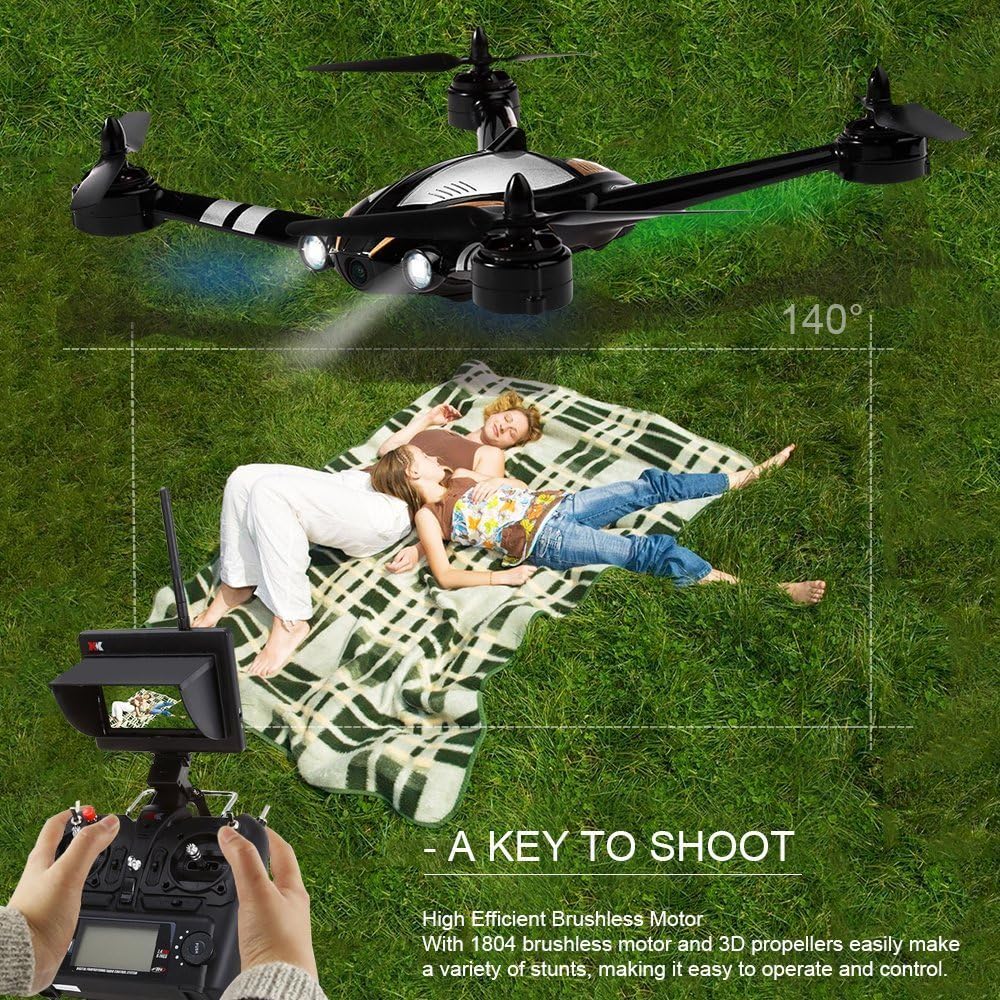
Figure 4.4.3: The FPV screen on the remote controller and the "A Key to Shoot" function for easy photo/video capture.
5. Maintenance
5.1 Cleaning
Regularly clean the drone with a soft, dry cloth. Avoid using water or solvents that could damage electronic components.
5.2 Propeller Replacement
Inspect propellers before each flight for cracks or damage. Replace any damaged propellers immediately to ensure safe and stable flight. Refer to section 3.3 for attachment instructions.
5.3 Battery Care
- Do not overcharge or over-discharge the battery.
- Store batteries in a cool, dry place away from direct sunlight and extreme temperatures.
- If storing for extended periods, charge the battery to approximately 50% capacity.
5.4 Storage
When not in use, store the drone and its components in a safe, dry place, preferably in its original packaging or a protective case.
6. Troubleshooting
| Problem | Possible Cause | Solution |
|---|---|---|
| Drone does not power on | Battery not charged; Battery not connected; Power switch off | Charge battery; Connect battery securely; Turn on power switch |
| Drone does not respond to remote | Not bound; Remote batteries low; Out of range | Re-bind drone; Replace remote batteries; Fly within control distance |
| Drone flies unstably | Propellers damaged/loose; Gyro not calibrated; Strong wind | Replace/tighten propellers; Calibrate gyro (refer to remote manual); Fly in calm conditions |
| FPV image is blurry or absent | Camera not connected; Interference; Camera lens dirty | Check camera connection; Avoid interference sources; Clean lens |
| Cannot record video/photo | No SD card; SD card full/corrupted; Camera not powered | Insert/replace SD card; Format SD card; Check camera connection |
7. Specifications
| Feature | Detail |
|---|---|
| Model Name | X252 |
| Brand | XK |
| Age Range (Description) | Adult |
| Color | Black |
| Video Capture Resolution | 720p (1280x720 Pixels) |
| Connectivity Technology | 5.8 GHz (FPV), 2.4 GHz (Remote Control) |
| Skill Level | Intermediate |
| Video Capture Format | MP4 |
| Remote Control Technology | Radio Frequency |
| Control Type | Remote Control |
| Media Type | SD |
| Material | Plastic |
| Battery Cell Composition | Lithium Polymer |
| Are Batteries Included | No (for remote, drone battery included) |
| Supported Image Format | JPEG |
| Optical Sensor Technology | CMOS |
| Flying Time | About 12 minutes |
| Charging Time | 60 - 80 minutes |
| Control Distance | About 250 - 300m |
| Motor Type | 1804 Brushless Motor |
| UPC | 712994211200 |
| ASIN | B01LAYZ8YW |
8. Warranty and Support
For warranty information, please refer to the specific warranty card included with your product or contact the seller/manufacturer directly. Keep your proof of purchase for any warranty claims.
If you encounter any issues not covered in this manual, or require further assistance, please contact the customer support of your retailer or the manufacturer.