Chief KRA221SXRH

Chief KRA221SXRH Expansion Arm Kit Instruction Manual

Model: KRA221SXRH

1. Introduction

This manual provides detailed instructions for the installation and use of the Chief KRA221SXRH Expansion Arm Kit. This kit is designed to expand existing Chief K1C series monitor arm installations, allowing for additional monitor configurations.

The KRA221SXRH facilitates upgrading a single-arm K1C120SXRH to a dual-arm K1C220SXRH setup or adding a third and/or fourth arm to a multi-workstation configuration when used with the KRA226 grommet plate accessory.

2. Safety Information

3. Package Contents

Verify that all components are present and undamaged before proceeding with installation. If any parts are missing or damaged, contact Chief customer support.

Chief KRA221SXRH Expansion Arm Kit components

Image: Components of the Chief KRA221SXRH Expansion Arm Kit. This image displays the primary arm component and associated mounting hardware.

4. Setup and Installation

This section outlines the steps to install the KRA221SXRH Expansion Arm Kit. Ensure you have all necessary tools and an existing Chief K1C series mount in place.

4.1. Expanding a Single-Arm K1C120SXRH to a Dual-Arm K1C220SXRH

  1. Prepare the Existing Mount: Ensure your existing K1C120SXRH single-arm mount is securely installed.
  2. Attach the Expansion Arm: Locate the designated attachment point on the existing K1C mount's pole or central hub. Align the KRA221SXRH expansion arm with this point.
  3. Secure the Arm: Use the provided mounting hardware (screws, washers, etc.) to firmly attach the expansion arm. Refer to the specific diagrams in your K1C base mount manual for precise screw locations and torque specifications.
  4. Mount the Second Monitor: Attach your second monitor to the newly installed expansion arm using the VESA mounting plate.
  5. Cable Management: Route monitor cables through the integrated cable management channels of both arms for a clean setup.

4.2. Adding a Third or Fourth Arm (Requires KRA226 Grommet Plate)

For configurations requiring three or four arms, the Chief KRA226 Grommet Plate Accessory is necessary. This accessory provides additional mounting points for expansion arms in a center-of-table setup.

  1. Install KRA226 Grommet Plate: If not already installed, follow the instructions provided with the KRA226 grommet plate to securely mount it to your workstation.
  2. Attach Expansion Arms: Identify the available mounting points on the KRA226 grommet plate. Attach the KRA221SXRH expansion arms to these points using the provided hardware.
  3. Mount Monitors: Secure your monitors to the expansion arms.
  4. Adjust and Secure: Make any necessary adjustments to monitor height, tilt, and swivel. Ensure all connections are tight and secure.

5. Adjustments

Once installed, the KRA221SXRH expansion arm allows for various adjustments to optimize your viewing experience.

Always ensure that adjustments are made smoothly and that all locking mechanisms are securely fastened after positioning to prevent accidental movement.

6. Maintenance

Regular maintenance ensures the longevity and safe operation of your Chief KRA221SXRH Expansion Arm Kit.

7. Troubleshooting

ProblemPossible CauseSolution
Arm feels loose or wobbly.Mounting screws are not tight enough.Check and retighten all mounting screws on the expansion arm and the main K1C mount.
Monitor sags or does not hold position.Weight capacity exceeded or tension adjustment needed.Ensure monitor weight is within limits. Adjust the tension mechanism on the monitor head if available (refer to your K1C base mount manual).
Difficulty attaching expansion arm.Incorrect alignment or missing hardware.Review installation steps. Ensure correct orientation and that all necessary hardware is used. Confirm compatibility with your existing K1C mount.

If you encounter issues not listed here, please contact Chief customer support for assistance.

8. Specifications

9. Warranty and Support

For information regarding warranty coverage, please refer to the official Chief website or the warranty documentation included with your original K1C series monitor arm. Chief provides customer support for product inquiries, technical assistance, and troubleshooting.

Contact Information:

Related Documents - KRA221SXRH

Preview Chief TS318SU/TS318TU/TS325TU Medium Swing Arm Mounts Installation Guide
Detailed installation instructions for Chief Medium Swing Arm Mounts, models TS318SU, TS318TU, and TS325TU. Includes parts lists, tools required, and step-by-step assembly and mounting procedures for various wall types.
Preview 
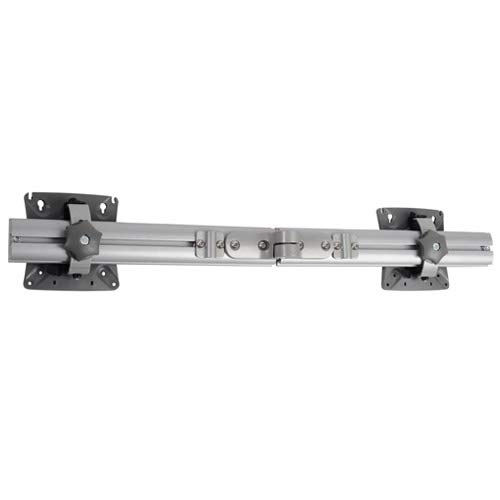
Chief PDR Series Large Flat Panel Dual Arm Wall Mount Installation Instructions
Detailed installation instructions for the Chief PDR Series Dual Arm Wall Mount, designed for large flat panel displays. Covers mounting to the wall, attaching the display, cable management, tension adjustments, and swing arm configurations. Includes safety warnings, product specifications, and contact information.
Preview Chief PNR Series Large Flat Panel Dual Arm Wall Mount Installation Instructions
Detailed installation guide for the Chief PNR Series Large Flat Panel Dual Arm Wall Mount, covering safety precautions, parts, tools, mounting procedures, adjustments, and display removal.
Preview Chief MSBV VESA Interface Bracket Installation Instructions
Detailed installation guide for the Chief MSBV VESA Interface Bracket, a mounting solution for displays. Covers safety, dimensions, parts, VESA compatibility (100x100 to 400x200), and mounting procedures. Includes contact information for Legrand | AV.
Preview Chief RMF3/RMT3/RLF3/RLT3 Installation Instructions
Comprehensive installation guide for Chief's RMF3, RMT3, RLF3, and RLT3 flat panel mounts, detailing hardware requirements, assembly steps, and safety precautions for various wall types.
Preview Chief Thinstall Large Tilt Universal Mount Installation Guide
Comprehensive installation instructions for the Chief Thinstall™ Large Tilt Universal Mount (LTTU). This guide provides detailed steps for wall plate mounting, display attachment, tilt adjustment, and cable management, ensuring safe and proper setup of your display.