1. Introduction
Thank you for purchasing the Girmi FM02 20L Microwave Oven. This appliance is designed for efficient and convenient cooking, reheating, and defrosting. Please read this manual carefully before operating the appliance to ensure safe and optimal use. Keep this manual for future reference.
The Girmi FM02 microwave oven combines a refined aesthetic with excellent functionality and ease of operation. It allows you to select preferred power levels and cooking types, including quick defrosting. It offers three primary cooking functions: Microwave, Grill, and Combined cooking. The integrated timer helps manage cooking durations effectively.
2. Important Safety Instructions
WARNING: To reduce the risk of fire, electric shock, injury to persons, or exposure to excessive microwave energy, observe the following basic precautions:
- Read all instructions before using the appliance.
- Do not attempt to operate this oven with the door open as this can result in harmful exposure to microwave energy.
- Do not place any object between the oven front face and the door or allow soil or cleaner residue to accumulate on sealing surfaces.
- Do not operate the oven if it is damaged. It is particularly important that the oven door closes properly and that there is no damage to the: (1) door (bent), (2) hinges and latches (broken or loosened), (3) door seals and sealing surfaces.
- The oven should not be adjusted or repaired by anyone except properly qualified service personnel.
- Ensure the appliance is properly grounded.
- Do not heat liquids or other foods in sealed containers since they are liable to explode.
- Only use utensils suitable for microwave ovens.
- Do not use corrosive chemicals or vapors in this appliance.
- This appliance is intended for household use only.
3. Product Overview
The Girmi FM02 microwave oven features a compact design with a 20-liter capacity, suitable for various kitchen tasks. It includes a grill function for versatile cooking options.

Figure 1: Front view of the Girmi FM02 Microwave Oven, showing the control panel on the right and the oven door on the left.
Components:
- Oven Door
- Door Handle
- Viewing Window
- Control Panel (Power Dial, Timer Dial)
- Turntable Ring
- Glass Turntable
- Grill Rack (for grill function)
- Oven Cavity
4. Setup and Installation
Unpacking:
- Remove all packaging materials from inside the oven cavity and from the oven door.
- Check the oven for any damage, such as dents or a misaligned door. Do not operate the oven if it is damaged.
- Place the glass turntable and turntable ring inside the oven cavity.
Placement:
- Place the oven on a flat, stable surface that can support its weight (approximately 11.5 kg).
- Ensure adequate ventilation. Leave a minimum of 10 cm (4 inches) clearance at the rear, 20 cm (8 inches) at the top, and 5 cm (2 inches) on the sides.
- Do not block any ventilation openings.
- Keep the oven away from heat sources and strong magnetic fields.
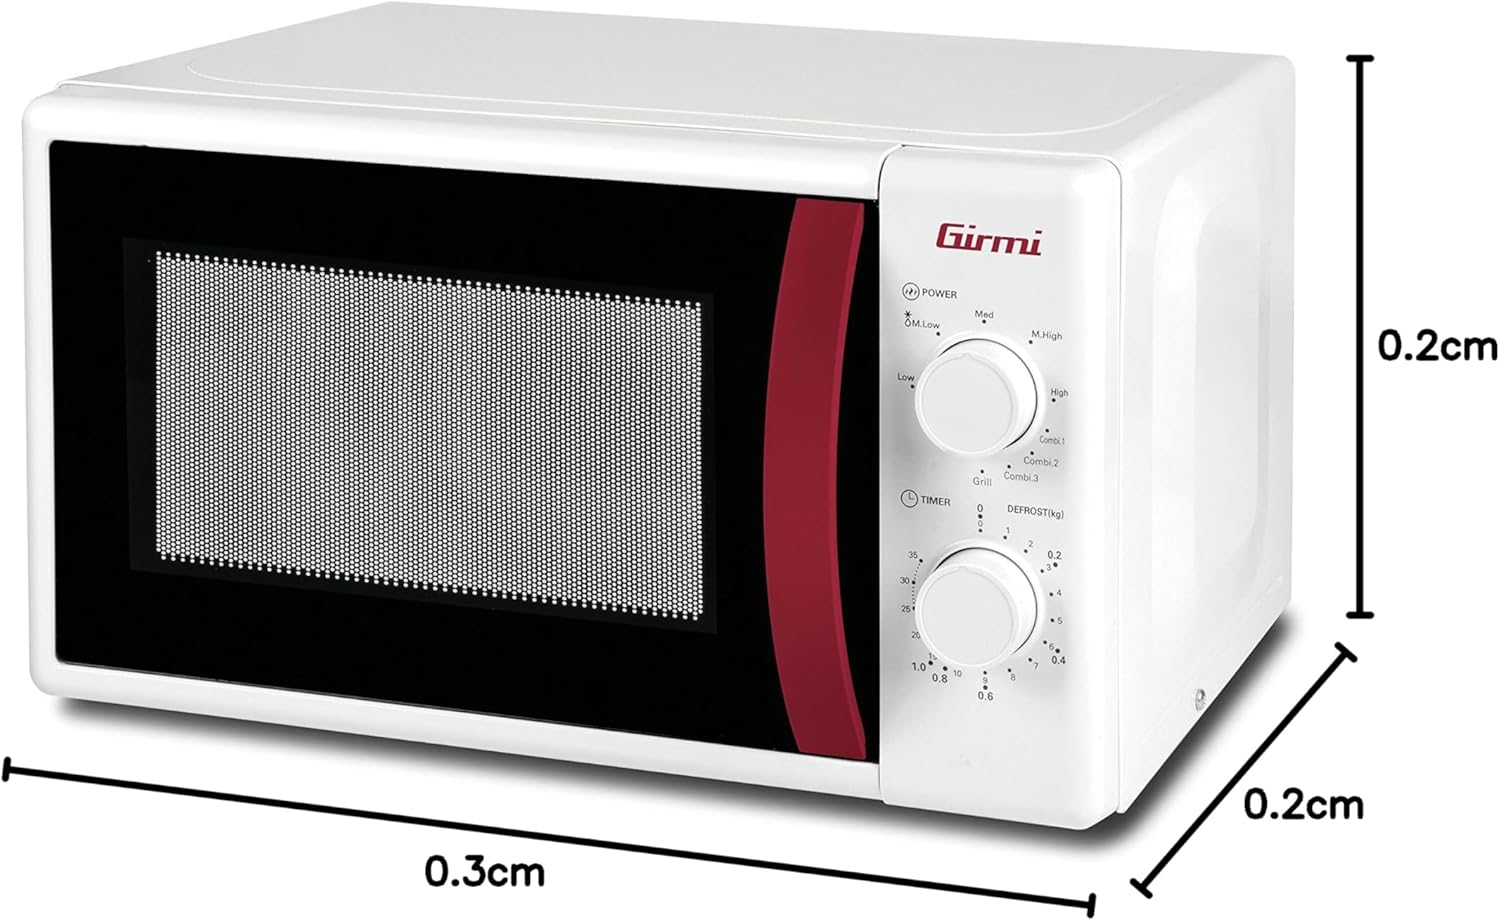
Figure 2: Dimensions of the Girmi FM02 Microwave Oven, showing approximate measurements for length, width, and height to assist with placement.
Electrical Connection:
- Plug the power cord into a standard 230V, 50Hz grounded electrical outlet.
- Do not use extension cords or adapters.
5. Operating Instructions
The Girmi FM02 microwave oven is controlled by two rotary dials: the Power/Function Dial and the Timer/Defrost Dial.
Control Panel Overview:
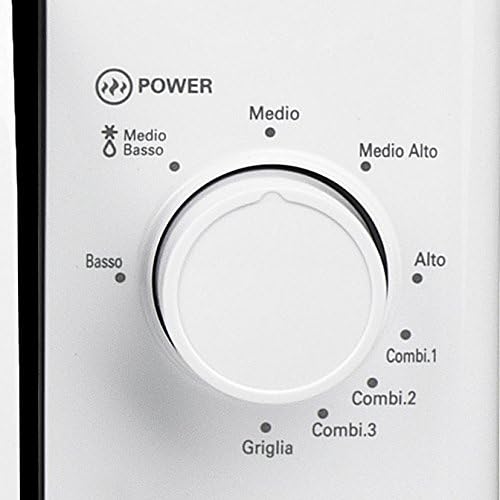
Figure 3: Close-up of the Power/Function Dial, indicating settings for Low, Medium, Medium-High, High, Grill, and Combination modes.
- Power/Function Dial: Used to select the desired cooking power level or function (Microwave, Grill, Combi).
- Timer/Defrost Dial: Used to set the cooking time or defrost weight.
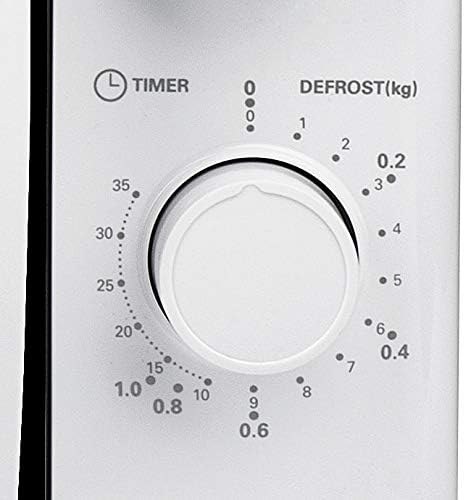
Figure 4: Close-up of the Timer/Defrost Dial, showing time settings up to 35 minutes and defrost weight settings in kilograms.
General Operation:
- Place food in a microwave-safe container on the glass turntable.
- Close the oven door securely.
- Turn the Power/Function Dial to select the desired cooking mode (e.g., High for full microwave power, Grill, Combi 1, 2, or 3).
- Turn the Timer/Defrost Dial to set the desired cooking time. The oven will start automatically once the timer is set.
- The oven will stop and a bell will sound when the set time has elapsed.
- To stop cooking before the timer finishes, simply open the oven door. Close the door to resume cooking, or turn the timer dial back to "0" to cancel.
Cooking Functions:
- Microwave Cooking:
Use this function for general heating, cooking, and reheating. Select a power level from Low (Basso) to High (Alto) using the Power/Function Dial. Higher power levels cook faster.
Microwave Power Levels Setting Approximate Power Output Recommended Use Basso (Low) ~17% Softening ice cream, simmering Medio Basso (Medium-Low) ~33% Defrosting, stewing Medio (Medium) ~55% Reheating, cooking delicate foods Medio Alto (Medium-High) ~77% Cooking fish, chicken, casseroles Alto (High) 100% (1050W) Boiling water, fast cooking - Grill Cooking:
Ideal for grilling thin slices of meat, steaks, chops, sausages, or chicken pieces. Place food on the grill rack provided. Select "Griglia" on the Power/Function Dial and set the desired time on the Timer Dial.
- Combination Cooking:
Combines microwave and grill functions for faster cooking and browning. There are three combination settings:
- Combi 1: 30% Microwave, 70% Grill. Suitable for fish, gratin, or thin casseroles.
- Combi 2: 55% Microwave, 45% Grill. Suitable for poultry, meat, or thick casseroles.
- Combi 3: 70% Microwave, 30% Grill. Suitable for quick cooking and browning.
Select the desired Combi setting on the Power/Function Dial and set the cooking time.
- Defrosting:
Use the Timer/Defrost Dial to select the weight of the food to be defrosted (in kg). The oven will automatically set the appropriate defrost time and power level. Turn the Power/Function Dial to "Medio Basso" (Medium-Low) for optimal defrosting results.
6. Maintenance and Cleaning
Regular cleaning of your microwave oven will help maintain its performance and extend its lifespan.
Cleaning the Oven Interior:
- Always unplug the oven before cleaning.
- Wipe the interior cavity after each use with a damp cloth and mild detergent.
- For stubborn stains, place a bowl of water with lemon juice inside and microwave on high for 5-10 minutes. The steam will loosen the grime, making it easier to wipe away.
- Clean the door seals, hinges, and latches regularly to ensure proper door closure.
- The glass turntable and turntable ring can be washed in warm soapy water or in a dishwasher.
Cleaning the Exterior:
- Wipe the exterior surface with a soft, damp cloth.
- Do not use abrasive cleaners or harsh chemicals.
7. Troubleshooting
If you encounter issues with your microwave oven, refer to the following table for common problems and solutions.
| Problem | Possible Cause | Solution |
|---|---|---|
| Oven does not start | Power cord not plugged in; Door not closed properly; Timer not set. | Ensure plug is securely in outlet; Close door firmly; Set timer to desired cooking duration. |
| Food not heating | Incorrect power level selected; Cooking time too short; Utensils not microwave-safe. | Adjust power level; Increase cooking time; Use only microwave-safe dishes. |
| Sparking inside oven | Metal objects in oven; Food packaging with metal trim. | Remove all metal objects; Ensure food packaging is microwave-safe. |
| Turntable not rotating | Turntable not correctly placed; Debris under turntable ring. | Reposition turntable and ring; Clean under the turntable ring. |
If the problem persists after checking these solutions, please contact qualified service personnel. Do not attempt to repair the oven yourself.
8. Specifications
| Feature | Specification |
|---|---|
| Brand | Girmi |
| Model Number | FM02 |
| Capacity | 20 Liters |
| Power Output | 1050 Watts |
| Voltage | 230 Volts |
| Dimensions (L x W x H) | 43.5 x 35.5 x 25 cm |
| Weight | 11.5 Kilograms |
| Material (Turntable) | Glass |
| Control Type | Rotary Knobs |
| Special Features | Microwave, Grill, Combination functions, Automatic stop |
| Included Components | Microwave oven, grill rack, glass turntable |
9. Warranty and Support
Specific warranty information for the Girmi FM02 microwave oven is not provided within this manual. For details regarding warranty coverage, service, or technical support, please refer to the warranty card included with your product or contact Girmi customer service directly.
Please retain your proof of purchase for any warranty claims.


